Articles by Nadine Crozier

A Red Tractor Picnic Style Party

Red Tractor Header

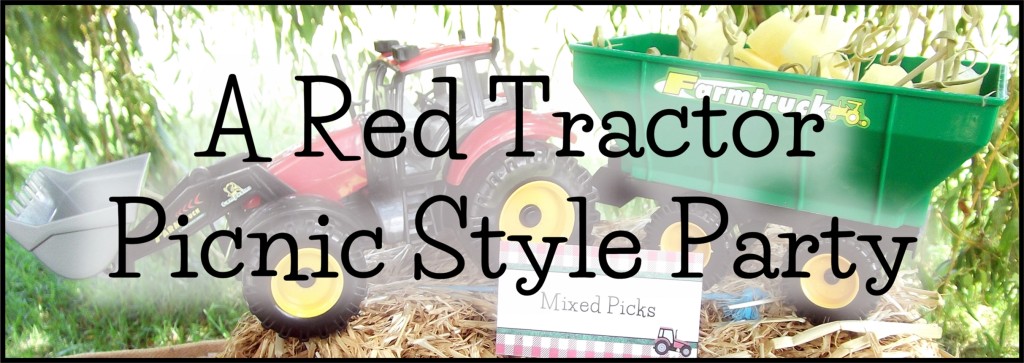
Earlier this month we had the pleasure of planning a Red Tractor themed birthday party for a young fellow who was turning 4 years old.  Because his family were still on their camping holiday we arranged for the party to take place at the camp ground they were staying at.  Because of this and the uncertainty around the number of guests attending we opted for more of a picnic style set up.  So very early on the Saturday morning we loaded up the van and ventured north for a fun outdoor party.

Party Highlights:
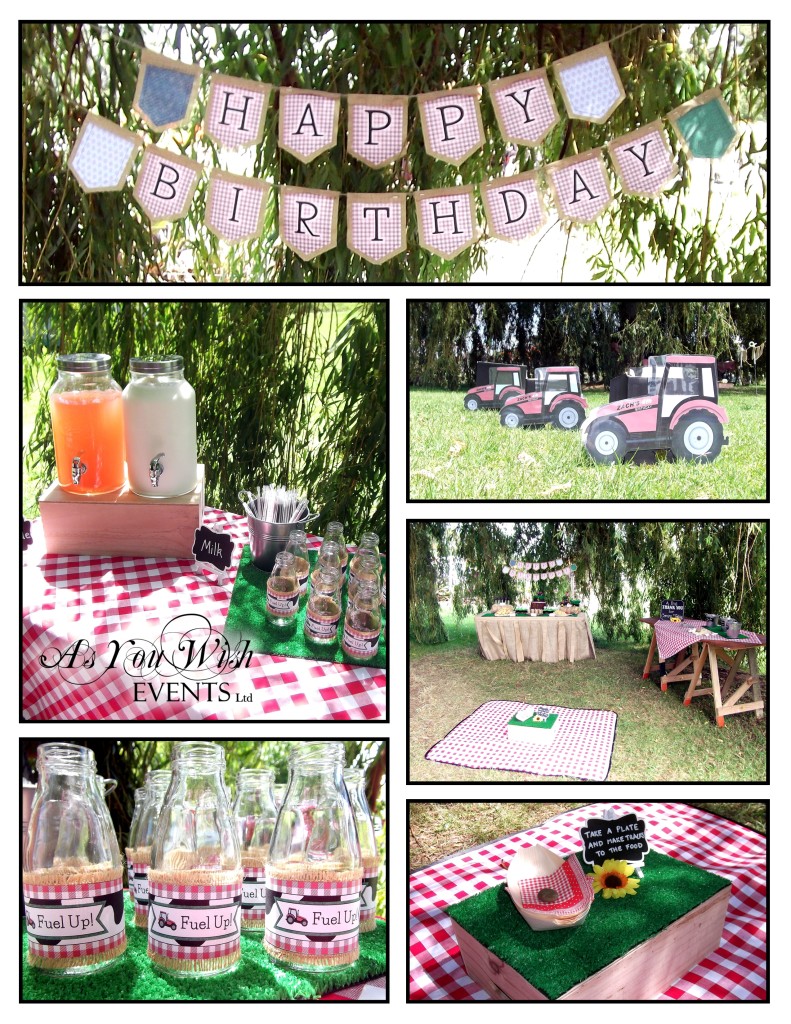
  • The location was amazing.  When we arrived at the camping ground we found this amazing Willow tree growing right next to the family’s camp site.  The way it draped down created the perfect space for the party.
  • The red gingham picnic blankets and tablecloths contrasted perfectly with the greenery.
  • Our pocket shaped bunting was another of our décor favourites.
  • In keeping with the theme, milk seemed like a good choice of beverage along with flavour changing straws – very popular.
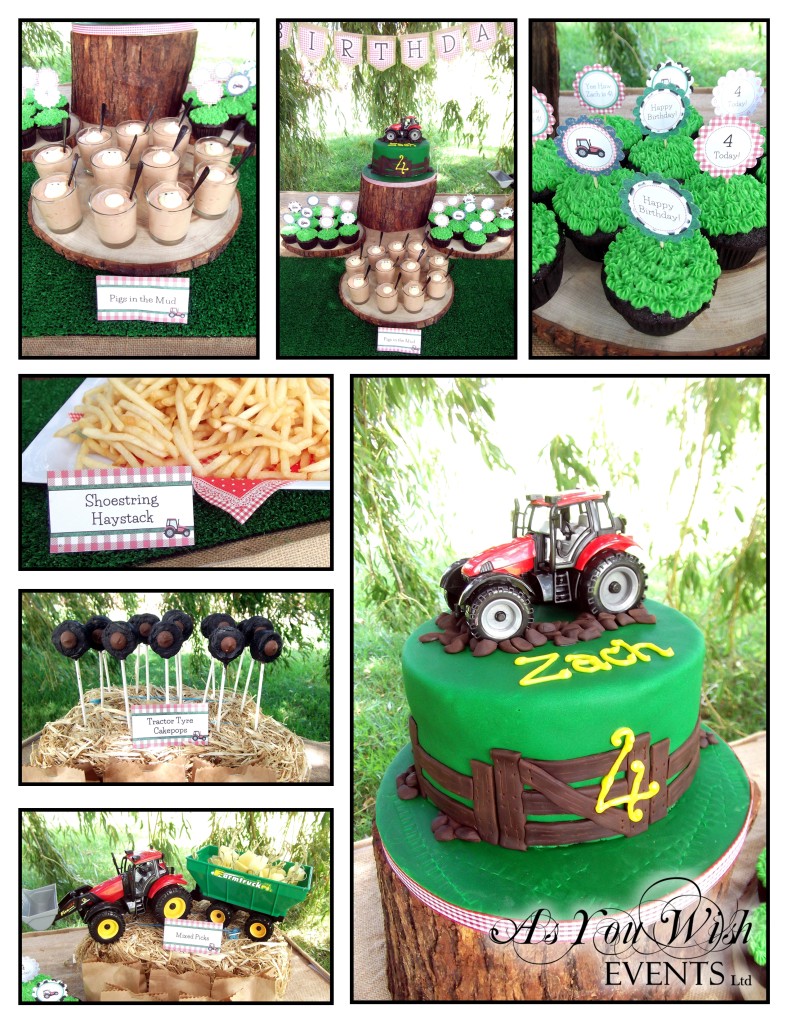
  • And our ‘Pigs in the Mud’ dessert cups had to be a favourite of ours among the food – so cute.

Red Tractor Party - Image 1

Party Décor:

Using some electric fence standards and the bunting, we created a walkway/entrance to the party space under the tree.  We laid out the red gingham picnic blankets that we had made and set up the various tables.  To complement the red gingham we added hessian and artificial grass as table covers, placemats and accents on the bunting, as well as chalkboard signs.  Lastly to complete the look we designed a Red Tractor printable range to use as cupcake toppers; bottle wraps; swing tags; buffet labels; bunting; and the ‘Happy Birthday’ banner.

Party Entertainment:

For the party fun and games we started off with some tractor racing.  We made some little tractors out of cardboard.  The children could step inside of these and hold onto them while having running races against each other.  Later we had a treasure hunt of sorts, which we called ‘The Farmyard Round-Up’.  We hid a whole lot of small toy farm animals in a nearby area, which the children had to hunt out.  The child who found the most toys won the game.  Lastly we finished the party with Story time – when we read the book ‘Pigs Might Fly’ by Brett Avison.

Red Tractor Party - Image 2

Party Favours:

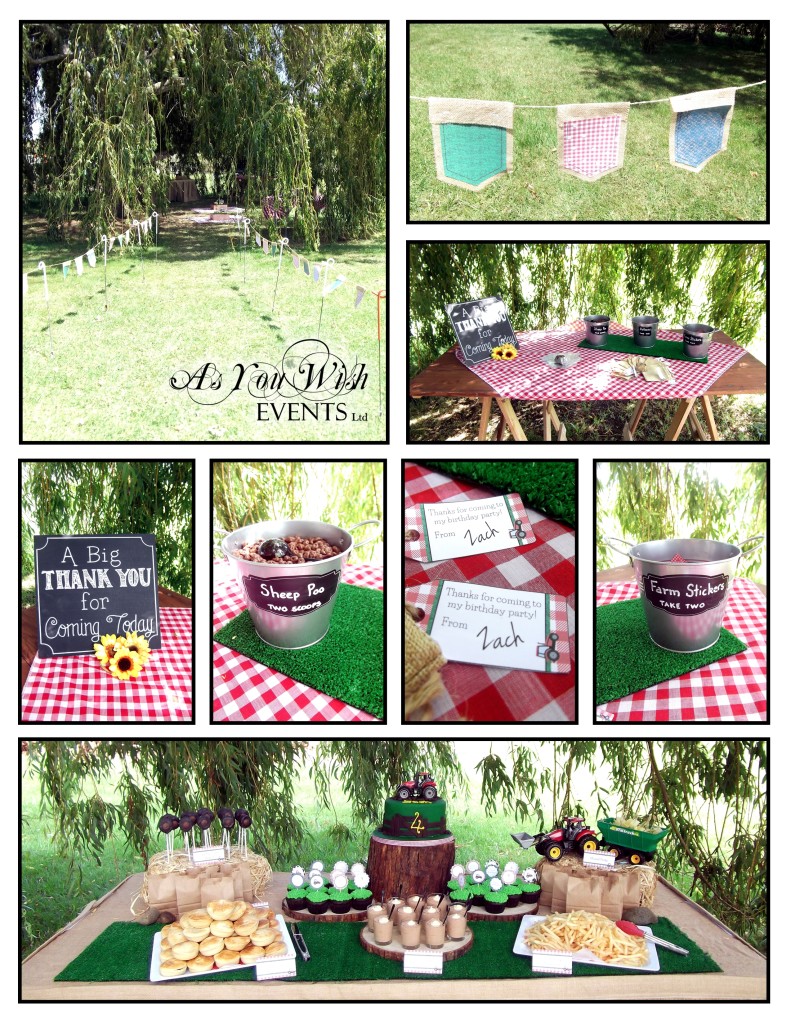
For the party favours we went for a more build your own option.  Each child could pick up a little hessian draw string bag, and fill it with two scoops of ‘Sheep Poo’ (also known as chocolate coated raisins), a balloon and two farm themed stickers.  Each hessian bag had a thank you swing tag attached to it.

The Party Food:

As always, we do our best to have the food match the theme.  This time our menu consisted of the following:

  • Mini Mince Pies
  • Shoestring Haystack (fries)
  • Mixed Picks (Picks with cheese & pineapple)
  • Kettle corn
  • Tractor Tyre Cake pops
  • Pigs in the Mud (chocolate mousse with little piggy sugar decorations)
  • Cupcakes
  • Milk with flavour changing straws plus Pink Lemonade.  Usually we only provide one flavoured beverage, but due to the hot weather and outdoor venue arrangements were made to add a second one.

We set the buffet table using mini straw bales, purchased from the Warehouse, an artificial grass table runner and wood slices.  The buffet labels from our Red Tractor party printables collection then tied everything together nicely.  Last but not least was the delightful birthday cake made by the birthday boy’s aunty.

Red Tractor Party - Image 3

Summing Up:

All in all, it was another successful party.  This picnic style set up worked perfectly for both the outdoor setting and the uncertain number of guests.  The décor looking stunning in the outdoor environment and all the guests enjoyed themselves.

If you have any questions or comments regarding how we put this theme together or if you would like us to create a party for you then please contact us either via email or through the comments section below.


Sign off


Vendor Credits:
  • ‘Red Tractor’ Party Printables: As You Wish Events Ltd
  • Décor & Styling: As You Wish Events Ltd
  • Catering: As You Wish Events Ltd
  • Photography: As You Wish Events Ltd
  • Mini Straw Bales: The Warehouse
  • Flavour Changing Straws: Pak’n’Save

NZ Bridal Fashion Trends for Summer 2014-2015

Our last article was on what is hot in décor for weddings this summer, but we felt it needed expanding to include what’s hot in bridal fashion.  So here is our update.

I’ve always been of the opinion that when it comes to the colours and styles worn by the bride and her maids that she should simply choose what she likes and what works for her and her attendants.  Having said that, there always seems to be few colours that jump out as the popular choices each season.  This summer the favourites are Lavender, Cadbury Purple, Spearmint Green, and Navy.

Summer Colour Swatch

Styles for bridesmaids continue to vary – short, long, matching or mixed.  It all depends on your personal taste.

Lavender-Bridesmaid-Dresses-Collection-2014-15-14

As seen on: Hello1fashion


Fabulous-Purple-Bridesmaid-Dresses-Elegance

As seen on: Tulle and Chantilly


greygreenwedding4

As seen on: Bridesmaid.com


Navy-Bridesmaids-Dresses-600x489

As seen on: Elizabeth Anne Design


For the bridal gown all-over lace is the number one popular choice.  Brides are also favouring dresses with little cap sleeves and detailed backs.  Here are a couple of our favourite dress from the range at Ballgowns, Bridal and Beyond in Henderson, Auckland.

Bridal Gowns

That brings us to the end of our Bridal fashion update for Summer 2014-2015.  Just remember, whether you follow the trends or not, the most important thing is that you choose something that makes you look and feel fabulous.

Sign off

NZ Wedding Decor Trends for Summer 2014-15

With inspiration being seemingly endless for weddings around the globe, I got to wondering what trends are Kiwi brides really buying into.  So off I went to see some friends of mine in the wedding industry and together we discovered some common trends emerging for this summer.  Here are our observations of what is popular when it comes to overall style and design.

A couple of years ago we began to see the Vintage look rise in popularity with the use of fine china, cut glass, lace, pearls and pastel colours. Since then we have seen this style merge with Rustic elements typical of rural living.

decorations-for-a-rustic-wedding-590x439

As seen on: Rustic Wedding Chic

The Rustic theme with pastel colours continues to be a popular choice, yet for this summer we are starting to see another transition take place as elements of Boho Chic are taking the stage.  The Boho Chic style draws on a number of bohemian and hippie influences which translates into bolder colour choices, no tablecloths and a vibe that is more free and earthy.

chicweddingfavours

As seen on: Chic Wedding Favours

Naturally the rustic/boho chic look isn’t going to work for everyone, and there will always be other themes to provide an alternative.  One of the alternatives that we are seeing a lot of is the Black & White monochrome look.  The black and white is often paired with diamantes and chandeliers creating an overall look of classic elegance.  And for the flowers, white with vibrant greens seem to be the popular choice.

black-and-white-wedding-centerpieces-ideas

As seen on: Karentran.com

Whatever your preferred style is for you wedding décor, remember to keep it cohesive.  Making sure that every element ties in with each other will truly make your wedding stand out for all the right reasons.

Many thanks to Cover Decorations Hire & Bethany Gardens Flowers for their insights.

Sign off


© 2014 As You Wish Events Ltd.  Want to use this article in your E-newsletter, blog, or website? You can as long as you include this complete statement: Auckland, New Zealand – Event Planner & Designer Nadine Crozier publishes the ‘As You Wish Events’ blog filled with secrets, tips and how-tos for planning your fabulous event. Get your exclusive inspiration, tips and tricks at http://www.asyouwish.co.nz.  As You Wish Events is an event planning and design company based in Auckland, serving the Auckland region and certain areas of Northland.

An Outdoor Christmas Table Setting

12 Days of Christmas Ideas 2014 – Day 12

Yes, this is our 12th day of Christmas ideas – and I feel we’ve saved the best until last.  Last Christmas I got talking to a lovely lady who was struggling with how to set her outdoor table, with an umbrella, for Christmas dinner.  While we came up with a few ideas at the time, I continued to think about it throughout the year – which has lead me to today’s idea.

Many times I have gone to set a table that has an umbrella and ended up getting frustrated because the pole just got in the way.  So the whole point with this table setting was to create a purpose built centrepiece that would embrace the umbrella pole.

Table Setting - Page 003
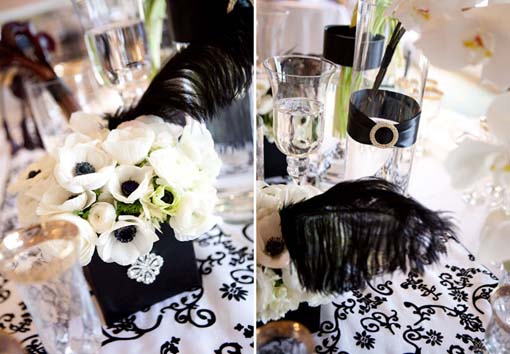
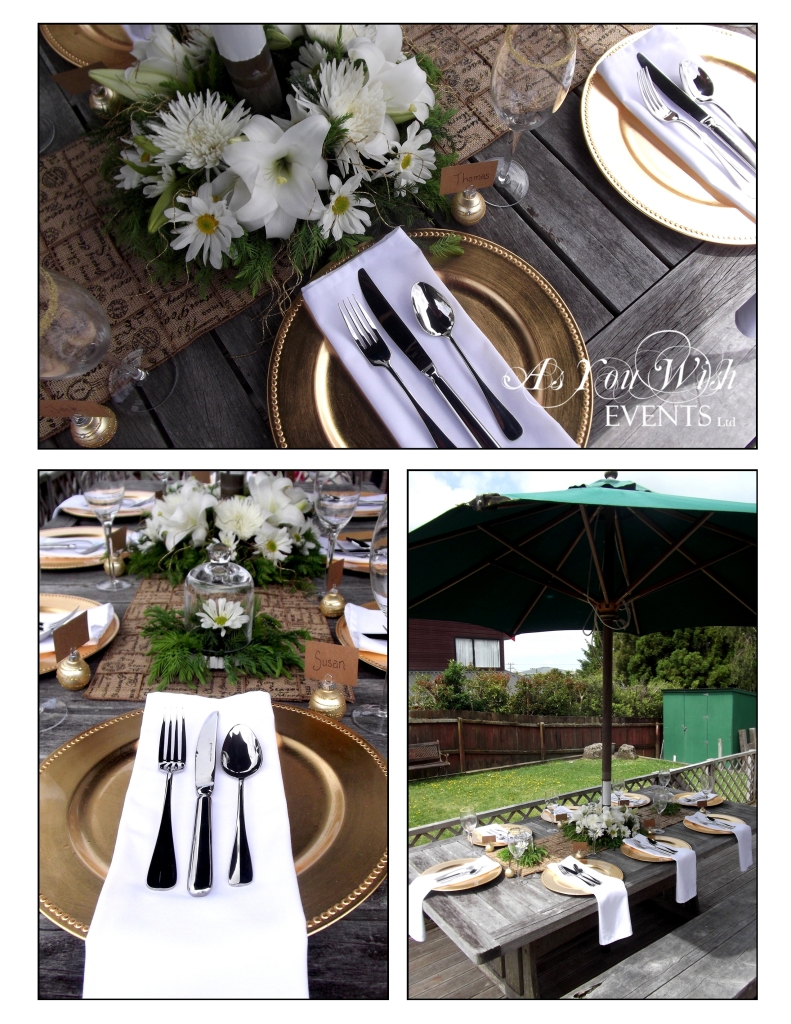
I had seen in my local Spotlight store that they had floral foam rings that were in a plastic ring container – I believe they made for wreaths but I figured why not just arrange the flowers to look more like a centrepiece.   I went to see the lovely ladies at Bethany Gardens Florists and together we put together this beautiful White & Gold arrangement.  The next key element to this table design was the table runner.  I came across this beautiful Christmas ribbon and instantly fell in love with it.  I wanted it to be a feature on the table, so I set about weaving it together to make the runner.  When making a table runner like this the key is to make sure that you have an odd number of ribbon lengths running in each direction – this means you have a perfect centre square that you can cut and fold back to make a very tidy umbrella hole.  Once all the weaving had been done I stitched around the edge in a gold metallic thread to hold it all together.

Table Setting - Page 002

With those two key elements in place I set about adding the final details.  The gold charger plates and white linen napkins tied in nicely which the centrepiece and table runner.  These were hired from Covers Decoration Hire.

Table Setting - Page 001
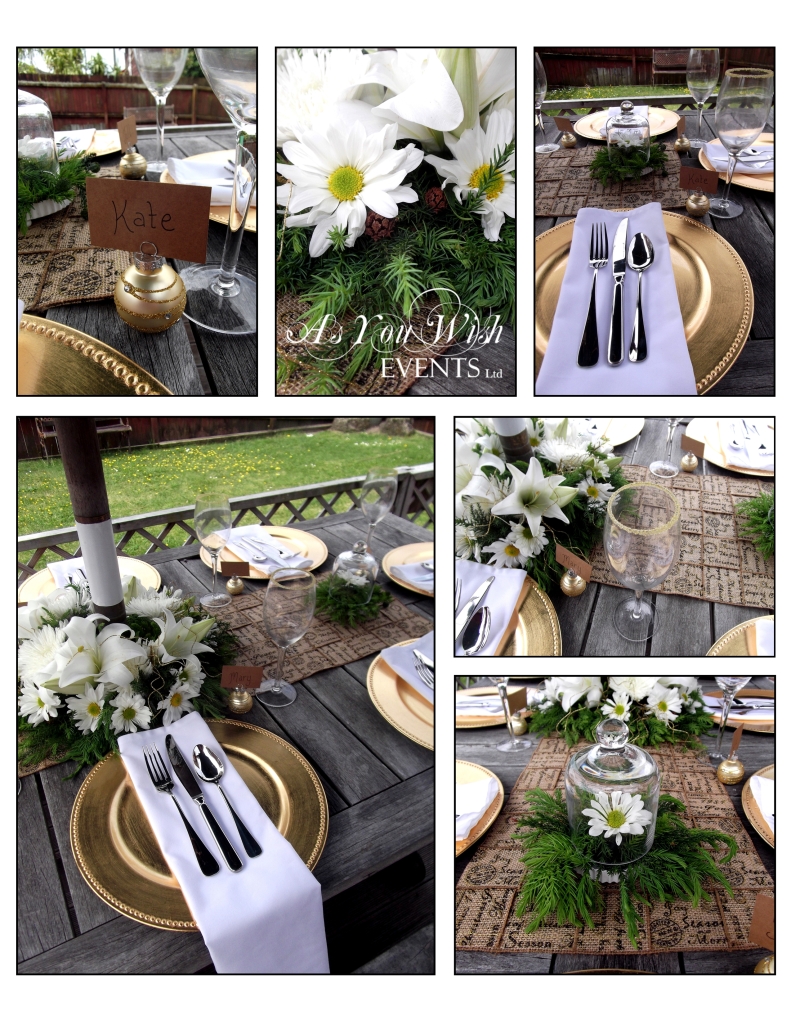
Lastly I added the place cards holders which I found at The Warehouse and the gold sugar rimmed wine glasses.  Overall I think all the elements came together nicely creating a rustic, yet elegant Christmas Table setting.  I hope this inspires you for your Christmas table.

Sign off

The Planning Diary

12 Days of Christmas 2014 – Day 11

02 – Sarita L3
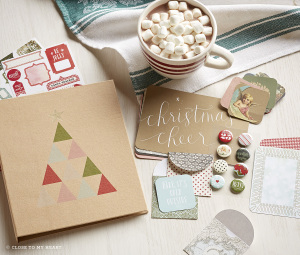
When it comes to reducing stress around a busy event filled time of year, pre-planning is the number one key. Another key is to write everything down – that way you are reducing the strain on your brain that comes from trying to remember all the things you are supposed to do.  This year I thought I should take my own advice and write all my Christmas planning down, and to do this I found this beautiful Christmas diary from Close to My Heart.

Their Christmas Crush Album has 15 beautifully designed pages, including a few little plastic sleeves to slide in notes, photos or whatever else takes your fancy.  My plan is to write into it all our advent activities; other appointments; Christmas décor plans; shopping lists; to-do-lists; travel plans; menus; recipes and photos.  Then at the end of the season I’ll also have a lovely keepsake.

However you decide to plan for this Christmas I hope it frees you up to enjoy the season even more and if you’re interested in purchasing your own folder like this one then click through to Close to My Heart and order online.  If you want to see how I get on with putting mine together, connect with us on Facebook as I’ll be adding the occasional update.

Sign off


The Cupcake Dome

12 Days of Christmas Ideas 2014 – Day 10


Cupcake dome
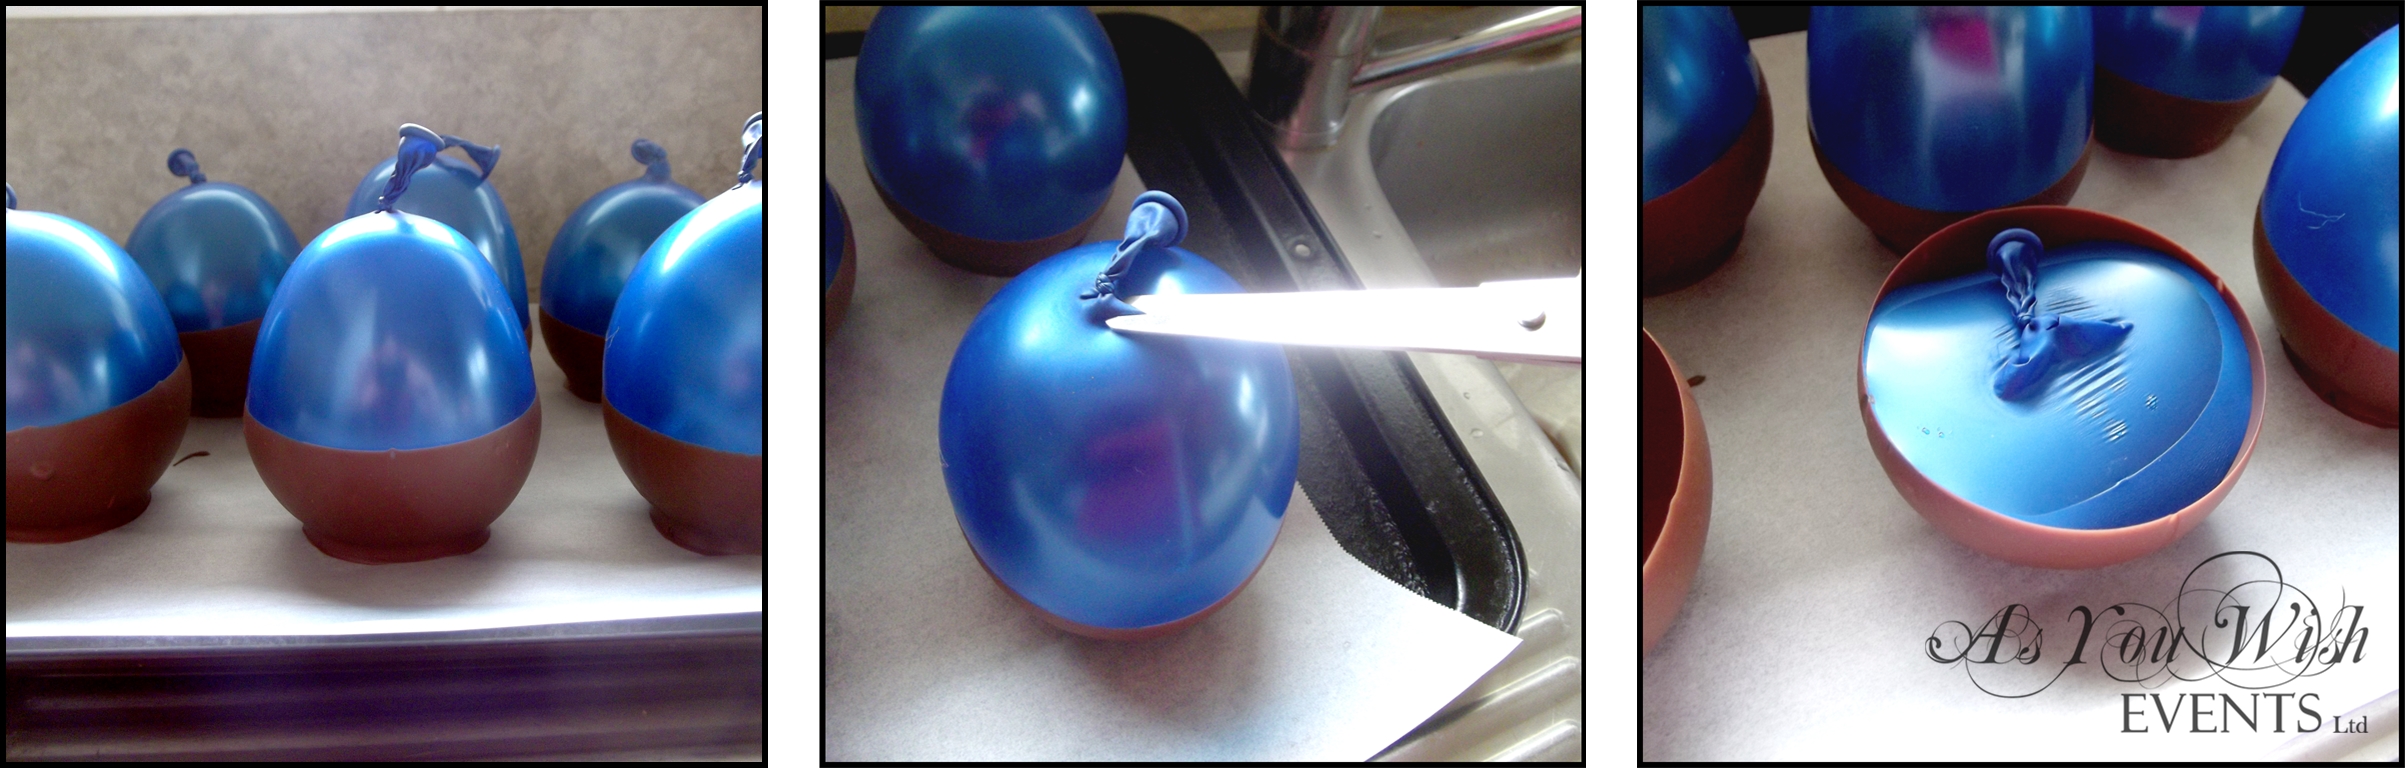
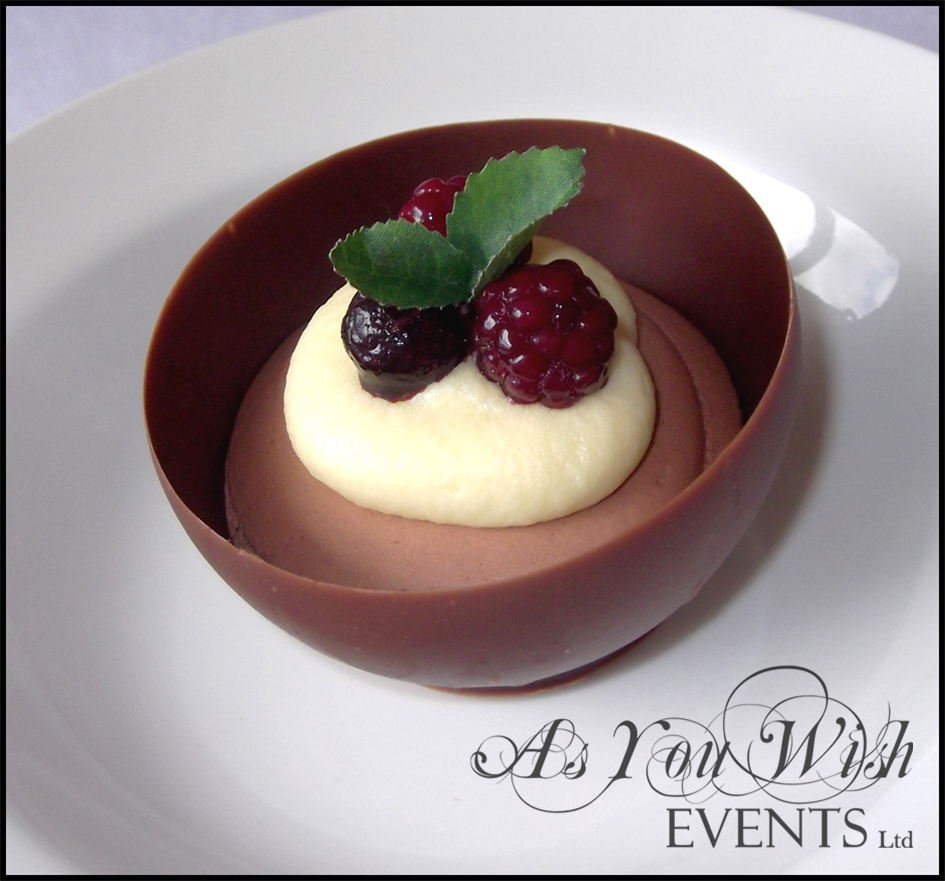
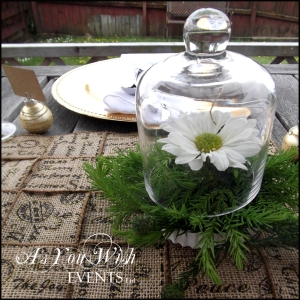
Here is a little gift idea to add to this season’s collection.  These cute Cupcake Domes are perfect for party favours and those small thank you gifts we like to give at Christmas time.  Despite what the name suggests they are surprisingly versatile – they can be used for much more than just cupcakes.

Pictured here, we have used them as a container for a small flower arrangement.  Some other things I’ve seen them used for are as follows:

  • Stacks of homemade sweets, such as fudge, rum balls & truffles.
  • You could even do chocolate coated strawberries.
  •  Or creating scenes like in a snow globe, using small figurines or other ornaments.


If you are interested in adding some of these to your Christmas shopping list, you can pop in and see Beryl at Covers Decoration Hire in New Lynn (they have these in their retail section) or contact us and we can help you find some.

Sign off


Paper Craft Christmas Decor

12 Days of Christmas 2014 – Day 9

Recently I went to Spotlight and purchased one of those jumbo pads of 12 x12 Christmas Scrapbook paper.  My plan was to see how many Christmas decorations I could make using just that pad.  After try all sorts of paper craft ideas I settled on three favourites that I would like to share with you as our 9th Christmas idea for 2014.


1.  The Paper Chain

Paper Chain
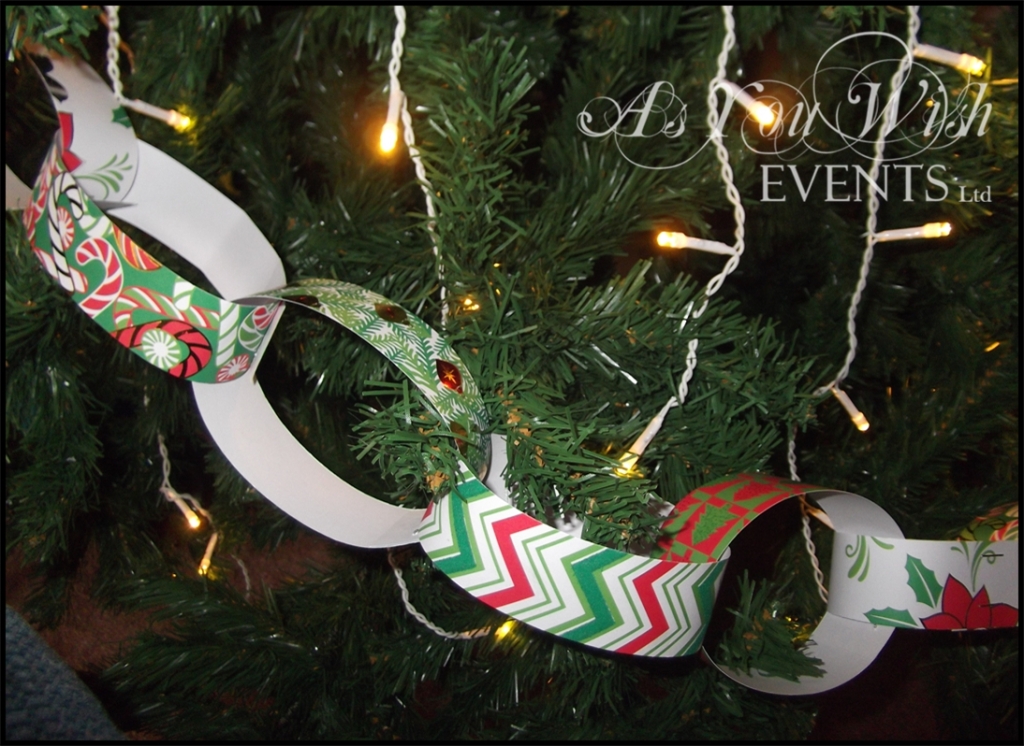
It’s an oldie but a goodie.  In fact I have vague memories of making these in primary school.  Super simple to make and a great craft to do with the kids.  For those who never had the opportunity of making them as a child, all you need to do is cut a bunch of strips of paper all the same size, take one strip and make it into a ring shape then secure it with a couple of staples. Then thread a second strip though the first as you make that one into a ring and then secure it with a couple of staples.  Keep repeating the process until you are happy with the length of your chain.  If your children are a little older and can handle a stapler on their own you could even make it into a competition to see who can make the longest chain.


2. Stitched Paper Garland

Stitched Garland

These days the sewing machine can be used for more than just fabric.  I love these stitched paper garlands.  They can be used in a variety of ways too.  You can hang them from the ceiling or on your Christmas tree, use it in your gift wrapping, they can even be used as an embellishment on your scrapbook pages.  While I wouldn’t recommend this as one for the kids to make on their own, it is still rather simple.  You’ll need a sewing machine, thread, paper and a shape punch (as you can see, I chose to use a circle punch).  First punch out heaps of shapes from your paper.  If your paper is white on one side and patterned on the other and you want to make your garland double sided you’ll need twice as many shapes. Thread up the sewing machine and begin sewing straight through each shape.  If you are going for the double sided option you’ll need to put two shapes back to back before sewing them.  I counted about 5-6 stitches before putting the next shape into the machine to create the gap.


3.  The Paper Rosette

Paper Rosette

These are my absolute favourite.  They are the most difficult to make but they look amazing when arranged together on a wall or around a doorway.  If you are going to attempt these I highly recommend buying a Scoring Board as they making the folding process so much quicker.  You can buy these through a Close to My Heart Consultant or at most Spotlight stores.  What I thought looked extra awesome was layering a couple of different sizes together and inserting a paper or plastic doily in between to make a more complex rosette.  I found this excellent tutorial on You Tube that taught me all I needed to know about making these fabulous rosette decorations.

I hope this inspires you for your Christmas décor.

Sign off


Pretty Punch for Summer

12 Days of Christmas Ideas 2014 – Day 8


Pretty drinks, with fancy garnishes and swizzle sticks are a perfect picture of summer.  Whether it’s served by the glass or set up as a help-yourself drink station, you can guarantee your guests will appreciate it on a hot summers day.

For today’s idea I want to share a couple of pretty easy punch recipes.  The first was introduced to me by a friend a few years back and it couldn’t be more Kiwi, as the main ingredient is the iconic NZ soft drink, L&P.

Pineapple Punch

Pineapple Punch

Pineapple Punch
Ingredients: 
  • 1L Pineapple Juice
  • 1.5L Bottle of L&P
  • 2-3 Tbsp Canned Crushed Pineapple
  • Mint leaves to garnish.

Mix all of the ingredients together, garnish with a few mint leave.  Serve chilled (Makes approx. 2.5 Litres).


For the second punch recipe I wanted it to be pink in colour and without any fizz – just to be different I guess.  After a lot of trial and error I think I have a winner in this Pink Lemonade recipe.

Pink Lemonade

Pink Lemonade

Pink Lemonade
Ingredients:
  • 2 cups of Sugar
  • 2 cups of Boiling Water
  • 3 cups of Lemon Juice
  • 2 cups of Cranberry Juice
  • 12 cups of cold water

Place the sugar and boiling water into a large saucepan or heat proof bowl.  Stir until the sugar has fully dissolved.  Then stir in the lemon juice, cranberry juice and cold water.  If it is still too sweet for your liking, just add more water.  Serve chilled or over ice (Makes approx. 4.5 Litres).

I hope this inspires to you enjoy a refreshing glass of pretty punch this summer.  And if you have a favourite punch recipe that you’d like to share with us, we’d love to hear from you – either send us an email or type it into the comments box below.

Sign off


A Bowl of Chocolate

12 Days of Christmas 2014 – Day 7

CB4

Here is another simple, yet stunning dessert option for you to impress your friends with over the Christmas season and beyond.

CB3

To get started you’ll need a packet of Chocolate melts or buttons, some water balloons, non stick baking paper and a tray.

Begin by inflating the water balloons.  Make sure each balloon is clean by rinsing them under warm water.  Be sure to dry them thoroughly as water and chocolate do not like each other.  Line the tray with the non-stick baking paper – and then you’re ready for the next stage.

Melt the packet of Chocolate melts in the microwave, cook for short periods of time (1 minute or less) and always at 50% power.  Stir well between each cooking time and be patient.  If you rush this process you are likely to ruin the chocolate.  When the chocolate is of a smooth consistency take a balloon and press it into the chocolate until it reaches about half way – high enough to create a bowl. Then lift the balloon out of the chocolate and place onto the tray and leave to set.  Repeat the process until you have your desired number of bowls.

Once the chocolate has set hard you will need to carefully deflate the balloons.  I did this by snipping a hole near the balloon’s knot and then carefully peeling the balloon out to reveal the bowl.

CB 1

You can then fill your chocolate bowl with whatever filling you like.  I opted for a chocolate mousse with a cream and berry garnish.  Other ideas could be Ambrosia or for a healthier option, a fresh fruit salad.  I hope you enjoy this idea and have some fun making your own.

Sign off


Brown Paper Packages …

12 Days of Christmas 2014 – Day 6

Gift Wrap 1

‘Brown paper packages tied up with string, these are a few of my favourite things’.  This song has been playing over and over in my head all day, while putting this article together.  There is truth in these lyrics – brown paper packages do happen to be one of my favourite things.  It is also true that there is nothing new about wrapping gifts in brown paper, but in recent years it has again regained popularity.

There are a few reasons I like using brown paper to wrap my gifts.  Firstly, it is stronger that your regular wrapping paper, so it is less likely to rip.  Secondly, because of its neutrality it works well for any occasion. Thirdly, it creates a blank canvas on which a variety of creative trimmings can be unleashed.

Gift Wrap 2

We have tried three different ideas on these gifts.  The first is a combination of twine and a narrow ribbon (5mm wide) woven together.  It is probably the most time consuming of the ideas, but isn’t overly complicated.  For the second idea we wrapped the gift with a printed hessian ribbon and tied it in place with twine.  Simple, yet effective.  For the last idea we used two paper doilies and some more of the narrow ribbon.  We positioned the doilies and fastened them in place with a couple of pieces of double sided tape.  We then tied two separate pieces of ribbon around the gift to create the criss-cross look.  Perhaps a little more involved than the second idea, but it is still reasonably easy and very elegant looking.

I hope this inspires you to be creative this year when wrapping your own Christmas gifts.

Sign off