Paper Craft Christmas Decor

12 Days of Christmas 2014 – Day 9

Recently I went to Spotlight and purchased one of those jumbo pads of 12 x12 Christmas Scrapbook paper.  My plan was to see how many Christmas decorations I could make using just that pad.  After try all sorts of paper craft ideas I settled on three favourites that I would like to share with you as our 9th Christmas idea for 2014.


1.  The Paper Chain
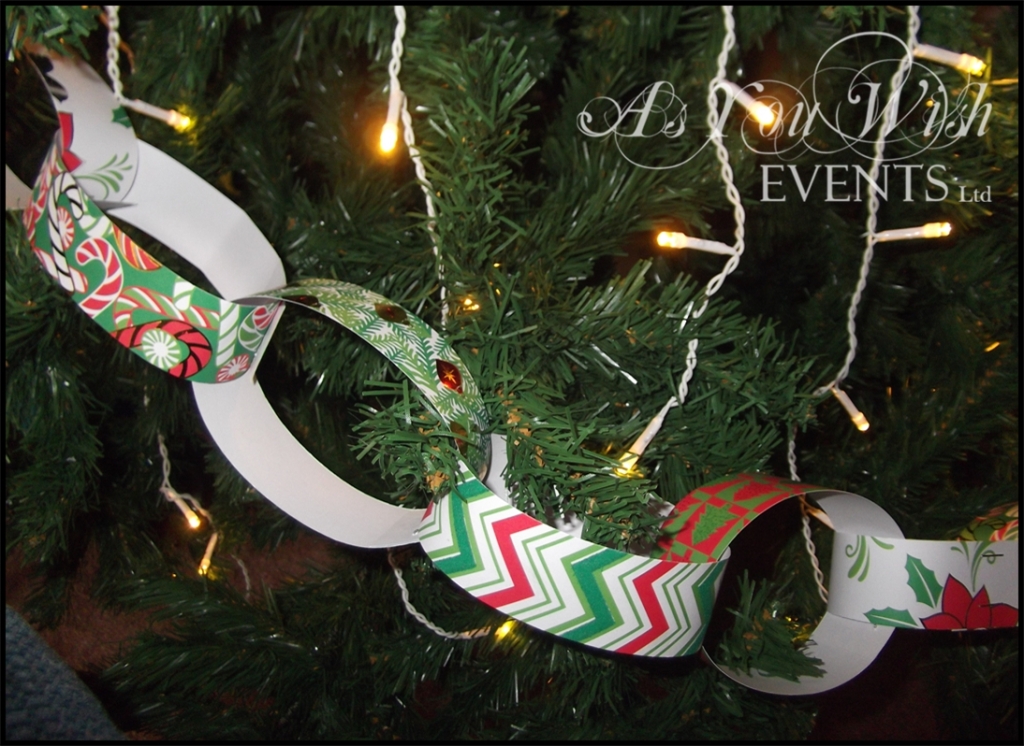
Paper ChainIt’s an oldie but a goodie.  In fact I have vague memories of making these in primary school.  Super simple to make and a great craft to do with the kids.  For those who never had the opportunity of making them as a child, all you need to do is cut a bunch of strips of paper all the same size, take one strip and make it into a ring shape then secure it with a couple of staples. Then thread a second strip though the first as you make that one into a ring and then secure it with a couple of staples.  Keep repeating the process until you are happy with the length of your chain.  If your children are a little older and can handle a stapler on their own you could even make it into a competition to see who can make the longest chain.


2. Stitched Paper Garland

Stitched Garland

These days the sewing machine can be used for more than just fabric.  I love these stitched paper garlands.  They can be used in a variety of ways too.  You can hang them from the ceiling or on your Christmas tree, use it in your gift wrapping, they can even be used as an embellishment on your scrapbook pages.  While I wouldn’t recommend this as one for the kids to make on their own, it is still rather simple.  You’ll need a sewing machine, thread, paper and a shape punch (as you can see, I chose to use a circle punch).  First punch out heaps of shapes from your paper.  If your paper is white on one side and patterned on the other and you want to make your garland double sided you’ll need twice as many shapes. Thread up the sewing machine and begin sewing straight through each shape.  If you are going for the double sided option you’ll need to put two shapes back to back before sewing them.  I counted about 5-6 stitches before putting the next shape into the machine to create the gap.


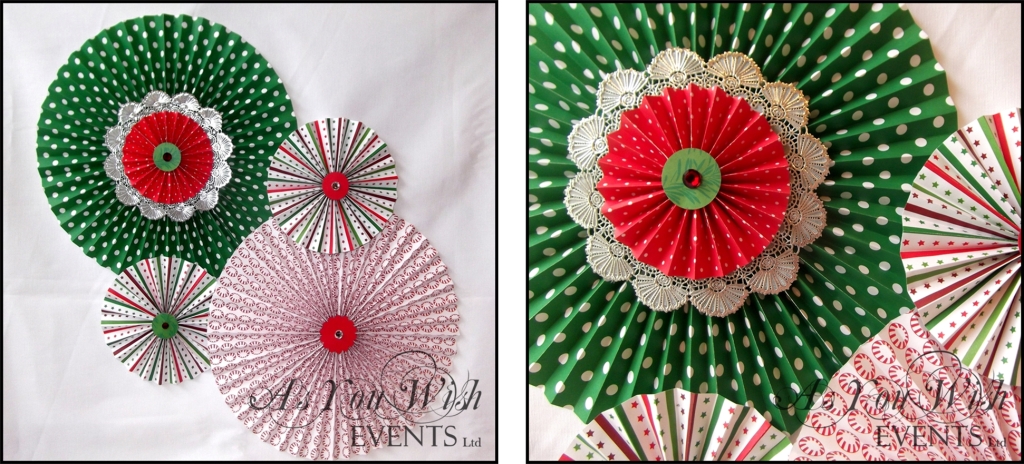
3.  The Paper Rosette

Paper Rosette

These are my absolute favourite.  They are the most difficult to make but they look amazing when arranged together on a wall or around a doorway.  If you are going to attempt these I highly recommend buying a Scoring Board as they making the folding process so much quicker.  You can buy these through a Close to My Heart Consultant or at most Spotlight stores.  What I thought looked extra awesome was layering a couple of different sizes together and inserting a paper or plastic doily in between to make a more complex rosette.  I found this excellent tutorial on You Tube that taught me all I needed to know about making these fabulous rosette decorations.

I hope this inspires you for your Christmas décor.

Sign off


Brown Paper Packages …

12 Days of Christmas 2014 – Day 6

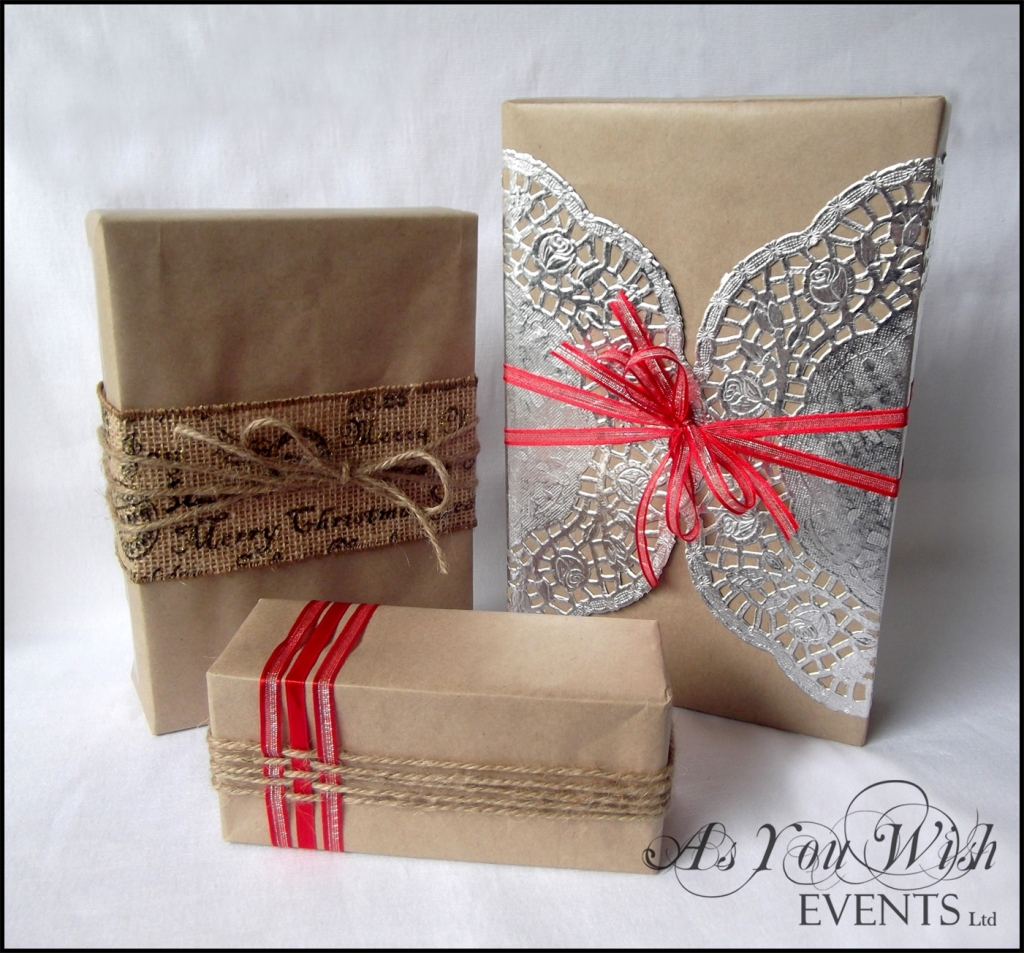
Gift Wrap 1

‘Brown paper packages tied up with string, these are a few of my favourite things’.  This song has been playing over and over in my head all day, while putting this article together.  There is truth in these lyrics – brown paper packages do happen to be one of my favourite things.  It is also true that there is nothing new about wrapping gifts in brown paper, but in recent years it has again regained popularity.

There are a few reasons I like using brown paper to wrap my gifts.  Firstly, it is stronger that your regular wrapping paper, so it is less likely to rip.  Secondly, because of its neutrality it works well for any occasion. Thirdly, it creates a blank canvas on which a variety of creative trimmings can be unleashed.

Gift Wrap 2

We have tried three different ideas on these gifts.  The first is a combination of twine and a narrow ribbon (5mm wide) woven together.  It is probably the most time consuming of the ideas, but isn’t overly complicated.  For the second idea we wrapped the gift with a printed hessian ribbon and tied it in place with twine.  Simple, yet effective.  For the last idea we used two paper doilies and some more of the narrow ribbon.  We positioned the doilies and fastened them in place with a couple of pieces of double sided tape.  We then tied two separate pieces of ribbon around the gift to create the criss-cross look.  Perhaps a little more involved than the second idea, but it is still reasonably easy and very elegant looking.

I hope this inspires you to be creative this year when wrapping your own Christmas gifts.

Sign off

Christmas Bling

12 Days of Christmas Ideas 2014 – Day 4

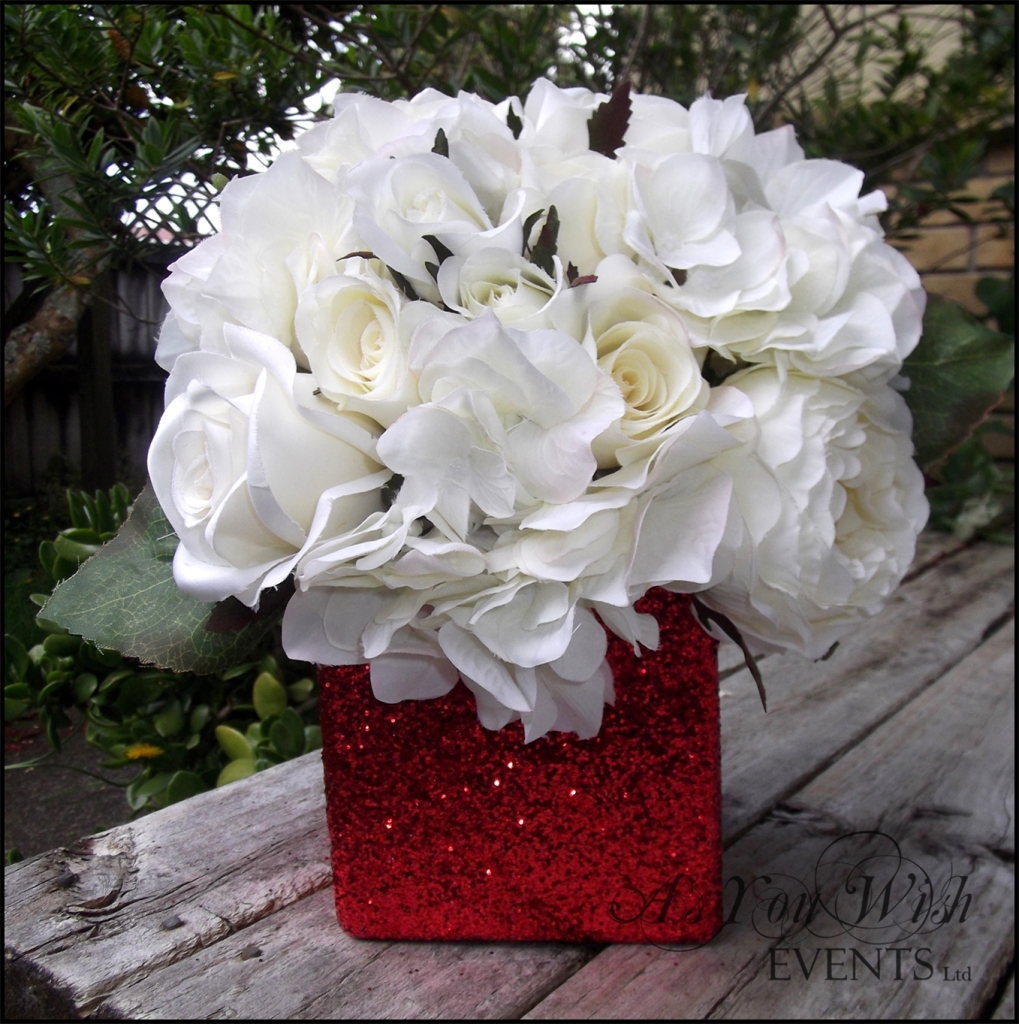
Glitter Vase 1

This year I am loving the glitter and bling for my Christmas Décor.  So I guess that is why I have fallen in love with these DIY glitter vases.  They are so simple yet beautifully bring the sparkle and shine to any room or table setting.

Here is what you need to make one of your own:

  • A glass vase
  • PVA glue
  • Paint brush
  • Glitter
  • Polyurethane varnish spray


Glitter Vase 2

Begin by painting the sides of the vase with PVA.  Make sure you have good even coverage, particularly on any corners, but not so much that it will run or drip. Sprinkle the glitter all over and then shake off the excess. Set aside to dry overnight.  Once it’s dry, dust off any loose glitter before repeating this process a second time.  When the second coat has dried, again dust off any loose glitter then spray with the polyurethane varnish to seal it. If you find that the vase is still shedding glitter after it has dried you may need to apply a second coat of varnish.

Glitter Vase

Now you are ready to enjoy this stunning glitter vase whether it’s as part of your Christmas décor or as a gift for a friend.


Homemade Play-dough Gifts

12 Days of Christmas Ideas 2014 – Day 2


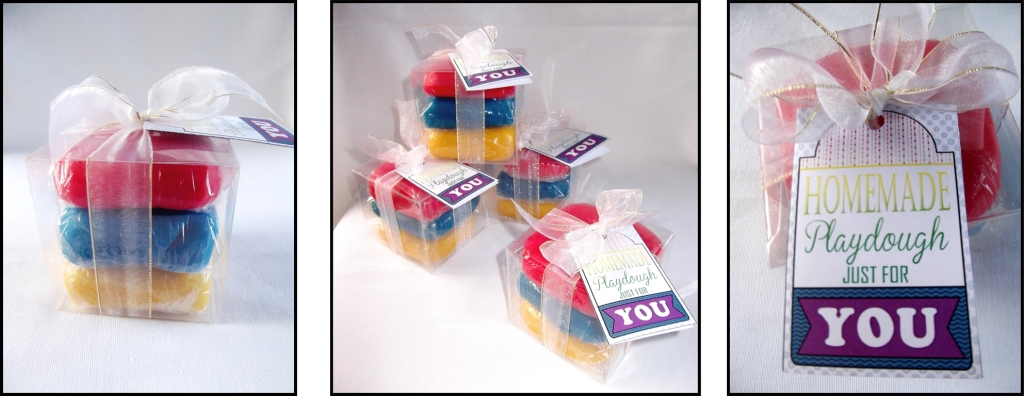
The Playdough Packaged

I love homemade gifts.  To me they say “I thought of you and I took the time to make something that you would like”.  I recently planned a party that had play-dough as one of the activities.  I was reminded how novel it can be and how people of all ages will always take the opportunity to mould and shape all kinds of creations.  The other thing I was reminded of was how as parents we will often shy away from letting our little children play with it for fear that they will eat it and that the ingredients may not be safe for them to consume.

This is why I thought these homemade play-dough gifts are ideal.  The children can have all the joy of playing with the play-dough, and the parents can have piece of mind that the ingredients are safe should it end up in their children’s mouths.

Homemade play-dough is very easy to make, and so you can create your own play-dough gifts, I thought I would share with you my favourite play-dough recipe.  All the ingredients are available from your local supermarket, and are commonly used in baking, which is how we know it’s safe to eat.   However, because of the high salt content I would still discourage it.

Play-dough Recipe
  • 1 cup Salt
  • 2 cups Flour
  • 4 tsp. Cream of Tartar
  • 2 Tbsp cooking Oil
  • 2 cups of water
  • Food colouring

Place all of the ingredients into a large saucepan.  When it comes to adding the food colouring the more you add the more intense the colour will be.  I quite like the strong colours, so I usually add up to 2 teaspoons.  Just bear in mind that as you cook the dough the colour will deepen.  Mix all the ingredients together until it becomes a smooth paste and then place over a medium heat to cook it.  It is important to stir the mixture constantly – this helps to distribute the heat throughout the mixture and will also stop the dough from burning (Note: it is normal for some to stick to the bottom of the saucepan).  As it cooks the mixture will start to stiffen and the colour will deepen.  You will know it’s is ready when it clumps into one big ball, and doesn’t stick to you when you touch it – this usually takes 3-5 minutes. I then turn the play-dough out onto a hard surface and knead it for a bit to insure an even consistency.  It will be quite warm but it is not likely to burn you.  This play-dough will last for months & months, as long as you keep it in an air-tight container.

The Playdough Process

To make the gifts I chose to make 3 batches of play-dough in primary colours.  I figured the play-dough could then be mixed together to make other colours.  I then cut a piece from each colour, wrapped it in plastic-wrap (to keep it air-tight) and layered them into a 8cm x8cm clear cupcake box.  I then finished it off by tying it with a white organza ribbon and adding a rainbow coloured gift card that I designed.  This amount of dough easily makes 6 gifts of this size.  And if you decide to make your own and would like to use our gift cards you can download them here for free.

 Playdough Gift Card Download Here


I hope you enjoy making your own play-dough, whether its for Christmas gifts, party favours or even just as a holiday activity.  If you have any questions or comments we’d love to hear from you.  You can either leave a message in the comments box below, email us or join us on our Facebook page.


VeggieTales Pirate Party Invitations

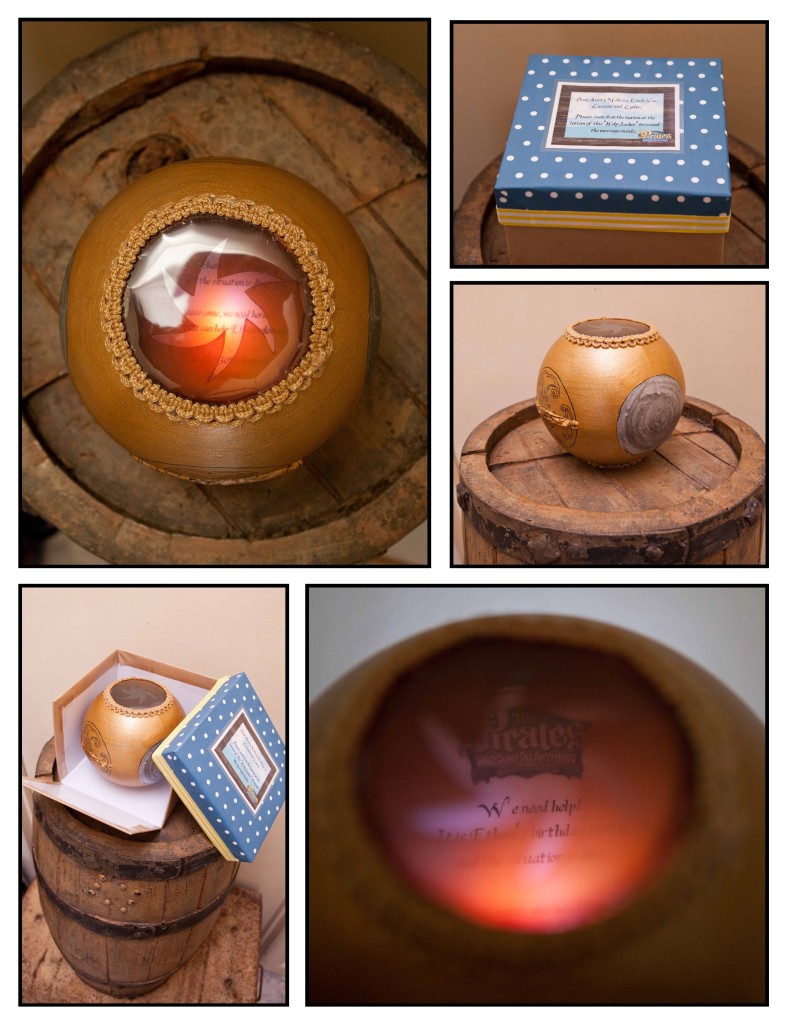
At the end of August it was my son’s 3rd Birthday – I can’t believe it has been 3 years already, they grow up so fast.  Being super fans of the VeggieTales cartoons and anything nautical we decided to use the VeggieTales movie ‘The Pirates Who Don’t Do Anything’ as his birthday party theme.  The first thing to do was send out the invitations.  I was discussing ideas of how to do this with my husband, when he mentioned how cool it would be to replicate the Help-Seeker from the movie.  If you haven’t seen the movie, at the beginning the princess sends out this golden mechanical ball in order to find heroes and bring them back, to help her rescue her brother who had been taken captive.

So off I went in search of the materials I needed.  At the local $ value store I found some plastic world globes and paper jack-o-lanterns that had an LED light in them.  I striped down the globes and cut a whole in each end (one end for looking into and the other end to fit the LED light from jack-o-lantern into).  I then cut a slit in the top and bottom to slide a piece of transparent plastic through which held the actual wording for the invitation.  I then painted them to look like Help-Seekers, and finished them off with some braid.  We then packaged them up in boxes for delivery.

Veggie Pirate Party Invitation

Photos by Adam Ferris Photography

Everyone enjoyed receiving their invitations and it created an expectation and a sense of excitement for the party.  Check back next week or subscribe to my posts for more about the party – what we did for décor, food and games.

Some Super Ideas for Celebrating Easter

Easter is sneaking up fast on us again.  This is another of my most favourite holidays, so I’ve been out looking for some exciting ideas for our family’s celebrations.

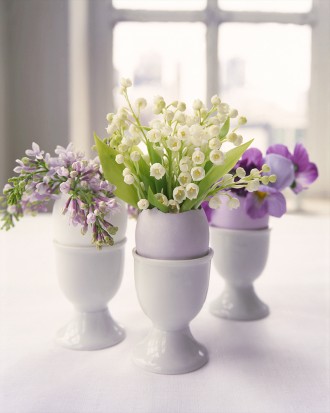
Flower Arrangments in Eggshells

Such a simple yet sweet idea to bring a touch of Easter into your home.

As Seen On: Martha Stewart.com


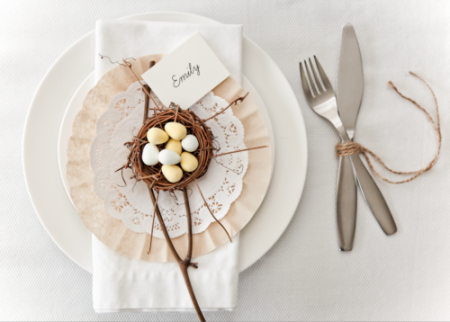
Easter Table Setting

I love this table setting by Boxwood Clippings. It has a rustic elegance about it with the little nest, paper doily and coffee filters. Brilliant!

As Seen On: Boxwood Clippings


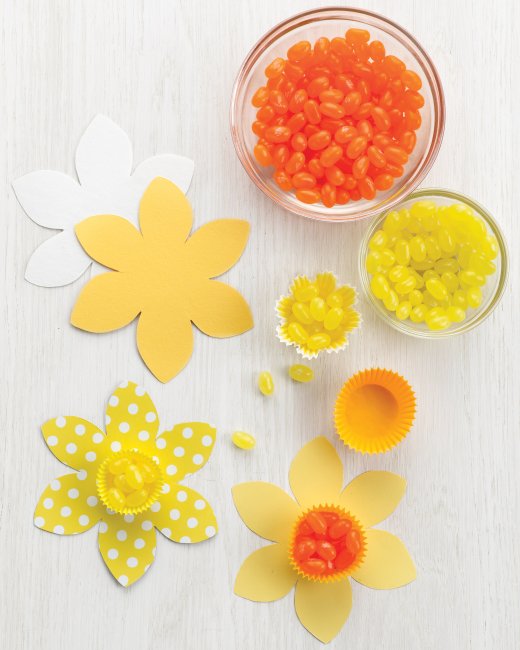
Daffodil Candy Cups

Not only is this a great craft idea to do with the family, its also a great option for those who have allergies that stop them from eating chocolate.

As Seen On:  Martha Stewart.com

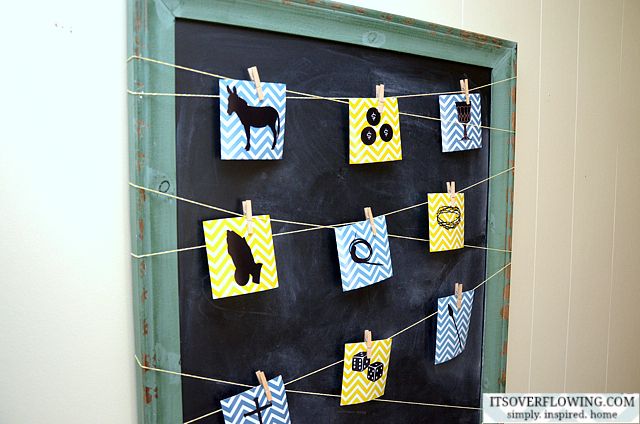
The Easter Story

What a beautiful way to keep the true story of Easter central to the holiday. Aimee from ‘It’s Overflowing’, offers the template for this as a free printable on her website. I absolutely love it!

As Seen On: It’s Overflowing


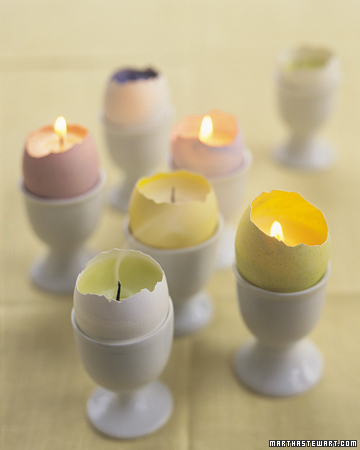
Egg Votive

Another fantastic idea from Martha Stewart.com

As Seen On: Martha Stewart.com

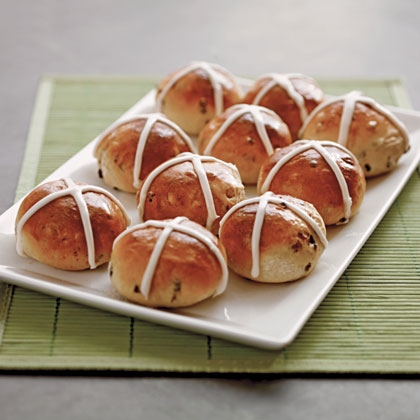
Hot Cross Buns

I just can’t imagine having Easter without Hot Cross Buns. Why not try making your own, maybe hunt out the old family recipe or give this one a try.

As Seen On: Spoonful

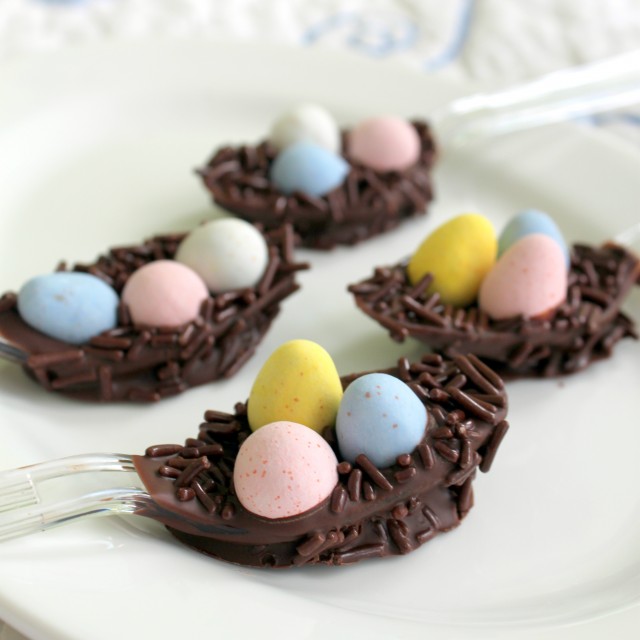
Chocolate Easter Egg Nests

A fun gift idea or maybe an activity for the family.
Mmmm, I would like to try stirring one into a nice mug of hot chocolate.

As Seen On: Life and Kitchen

If you have any Easter craft ideas, favourite Easter recipes or Easter decorations that you’d like to share, we’d love to hear from you.  Just share your ideas in the comments below or send us an email.  Happy Easter everyone!

Creative Cutlery

12 Days of Christmas Ideas – Day 11

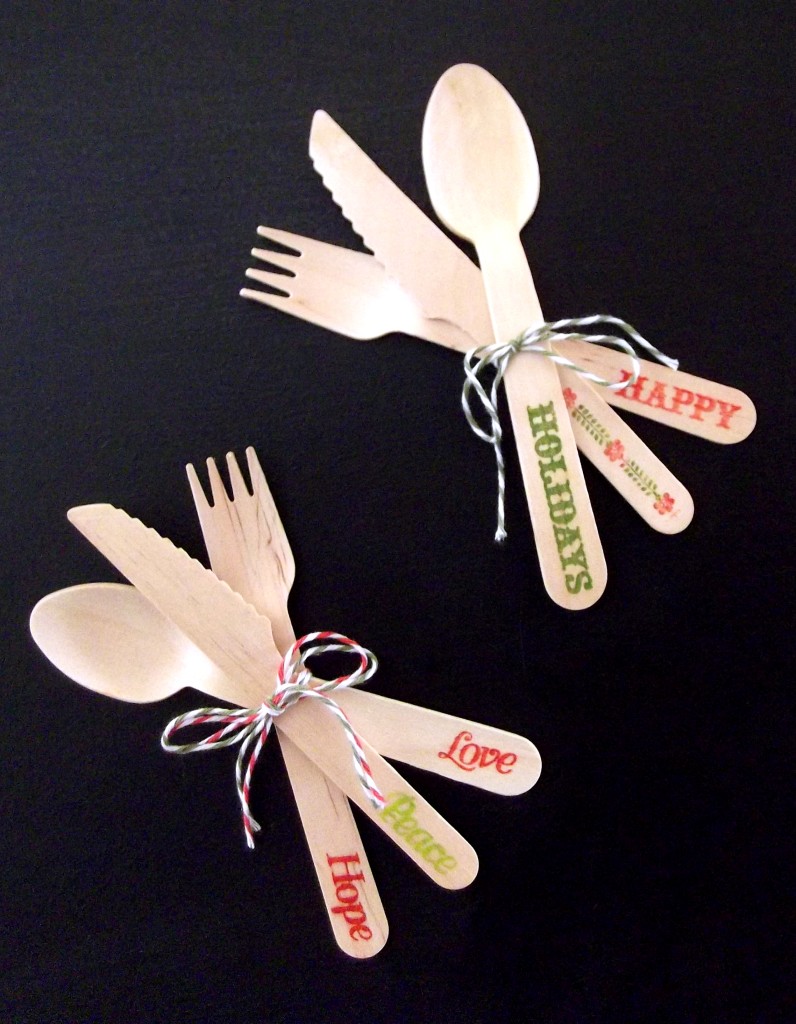
Creative Cutlery


Sometimes it can be the smallest detail that gives a party that ‘Wow’ factor.  Even something as simple as presenting the disposable cutlery in a creative fashion.  I recently came across an everyday version of this idea and thought why not do this for Christmas.

I got the funky wooden cutlery from a New Zealand company called Disposable Tableware  – I’ll write more about their stylish disposable range in a couple of weeks time.  The stamps, pigment inks and bakers twine I got from Close To My Heart.

All I had to do was stamp the handle of each cutlery piece.  I found that the pigment inks worked best as they didn’t bleed as much as the water based inks.  Once the ink dried I simply tied each set together with Christmas coloured Bakers Twine.

I can just picture these on the table at a pre-Christmas BBQ or a Christmas Day dinner at the Bach – so simple, yet so festive.

The Cookie Swap Party

12 Days of Christmas Ideas – Day 10

Home baking is a lovely treat to offer family and friends when they pop in for a visit over the Christmas period.  It is also a great and inexpensive gift idea.  Having a variety available for both instances can be a lot of work which is why (as promised on Day 2 – Planning Tips for Christmas) I would like to share with you the second of the two party ideas that will help you prepare for Christmas. It’s the Cookie Swap Party.

The Cookie Swap Party is somewhat of a new concept to us here in New Zealand, but I think it is a fantastic idea for getting friends together to achieve a common goal.  Here’s how it works.

1. The Planning

Invite a few of your friends to participate.  I think 5 – 8 people is a nice number.  Each person bakes one dozen of cookies per person attending, plus 1 extra dozen for tasting during the party.  So if you have 5 people coming, each person would need to bake 6 dozen cookies.  That may seem a little scary at first but if you choose a recipe that yields a large quantity to start with and has a short baking time then all you need to do is double the recipe once and within an hour or so you should have all the cookies you need.  Another planning tip is when your guests confirm their participation, ask them what type of cookie they plan to bring.  This way you can be sure to have a good variety on the day.

2. The Cookies

A couple of points to consider when choosing your cookie recipe:

  • Make sure that they are a cookie that will handle being transported – you don’t want the cookies crumbling to pieces before they reach their intended recipients.
  • If the recipe calls for the cookie to be kept in the fridge then it is not a good recipe to choose – you don’t want them to spoil before they reach their intended recipients.
  • You might also like to find out if any of your friends would like a gluten and dairy free option in which case I found the most amazing recipe for Coconut Flour Snickerdoodles. Yum, Yum!

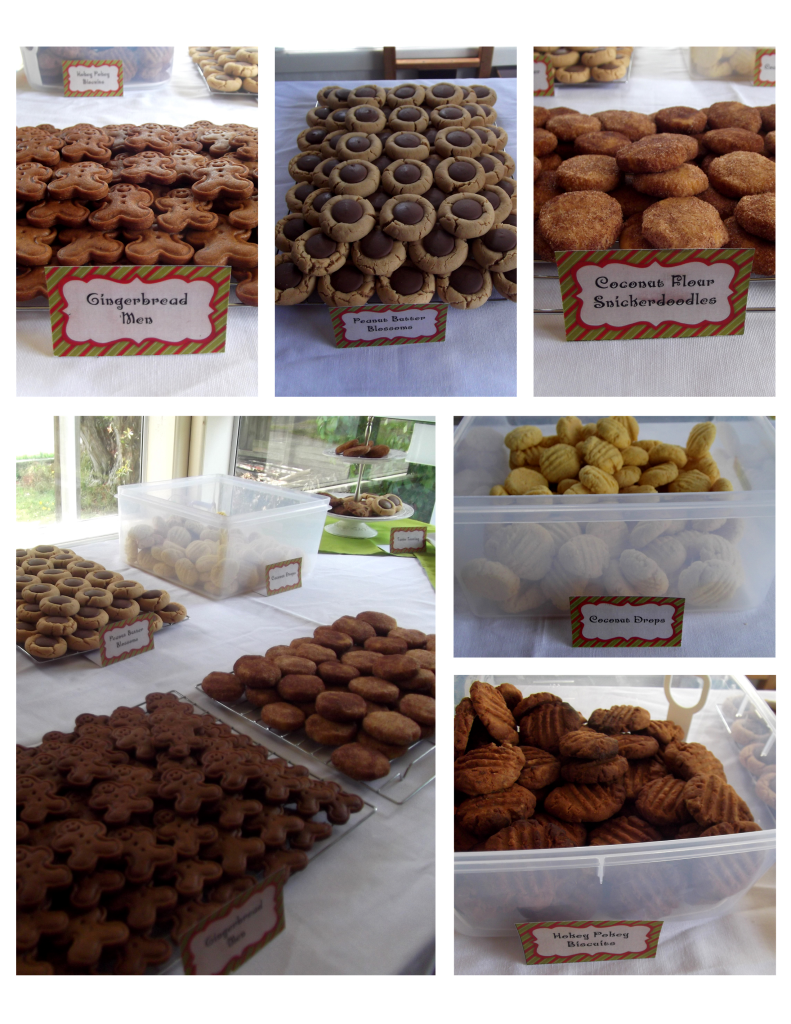
The Cookies - gingerbread

When everyone arrives for the party layout the cookies for swapping on the table.  Label the cookies so everyone knows what they are getting.  If there are gluten and dairy free options make sure everyone knows which ones these are.  Before the swapping begins remind everyone that they can take one dozen of each type of cookie, including one dozen of their own.  If people are gift wrapping their cookies then they probably won’t want to take all their cookies at once, so offer paper and pens for people to keep track of what they take.


3. The Tasting

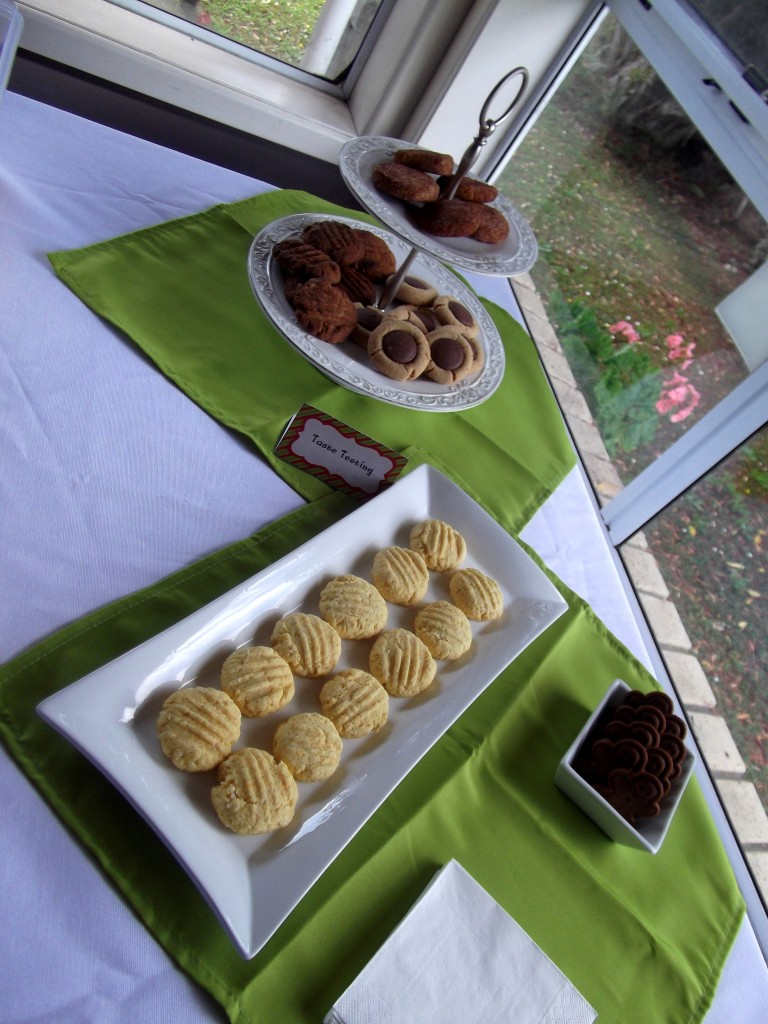
Set up the cookies for tasting in a space separate from the swapping cookies.  Be the polite hostess and offer your guests a beverage when the arrive, but also set up a little refill station so they can help themselves later if they would like another one – this way you can concentrate on wrapping your cookies and enjoying their company.

The Tasting

Tasting the cookies is my favourite part.  It’s great that the refreshments for the party are provided without any extra effort, but I think it is even better that everyone then knows exactly what it is they are wrapping as gifts or taking home.  It’s also a great opportunity to swap recipes if something really takes your fancy.


4. The Wrapping

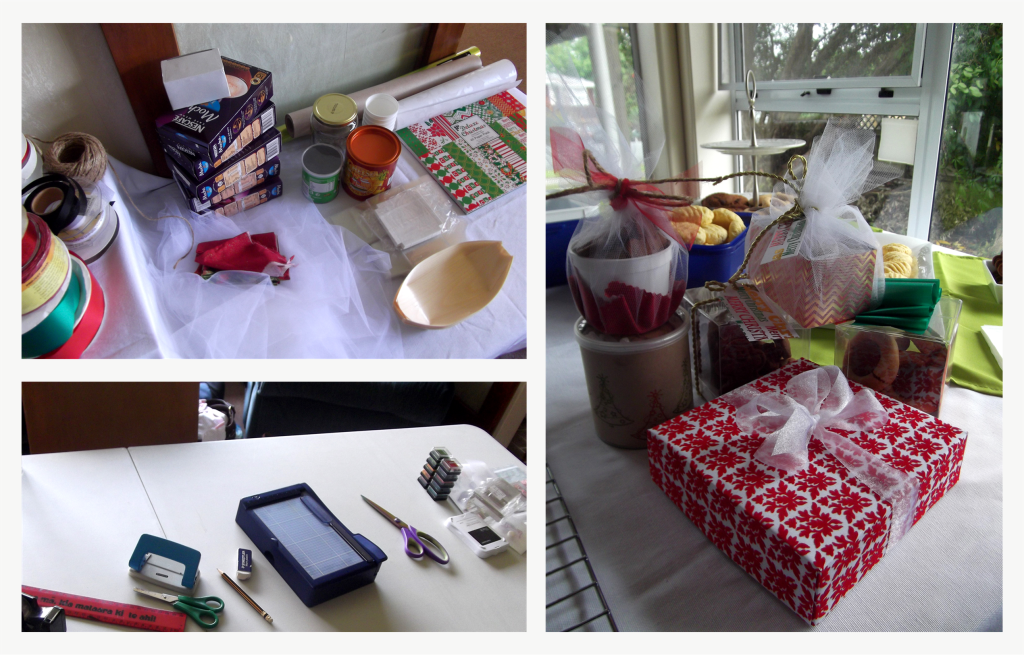
The last thing you’ll need to set up is a wrapping station.  Gather together a range of wrapping supplies.  You can choose whether you supply these yourself or if you ask your friends to contribute.  Things you could include are ribbons; favour boxes; disposable plates; recycled cans, boxes and jars that could be decorated and Christmas paper for making boxes or gifts bags.  Cellophane and lunch wrap paper are also handy to have. One idea a friend of mine suggested was to buy little glass dishes from the second hand shop and wrap the cookies up in these.  You’ll also need things like scissors, glue stick, rulers, sticky tape etc. along with anything else you might want in order to achieve your desired results.The Wrapping

Once everything is set all that is left to do is start swapping, wrapping, eating and chatting.

The photos in this post were taken at a Cookie Swap Party I had with my friends over the weekend.  It was a lot of fun, catching up, eating cookies and being creative.  I wish you just as much fun, should you try this idea with your friends.

Magnetic Frame Gift Idea

12 Days of Christmas Ideas – Day 8

dscf1789

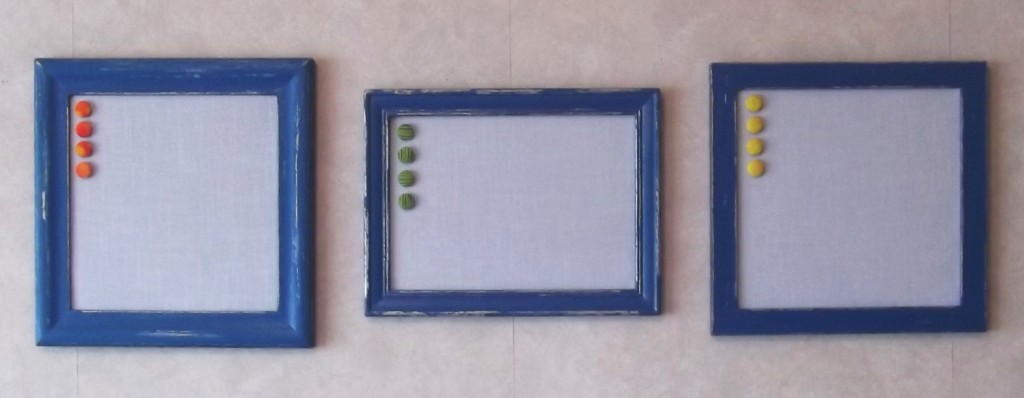
Magnetic Picture Frames are a favourite of mine.  I have seen a number of styles displayed in various people’s homes, and each time they capture my attention.  What I like most about these is that they allow you the freedom to easily update the display in a way that fits your personal style and level of creativity.  I have often looked at buying them for myself or as a gift but the price would always deter me – so recently I decided to have a go at making some myself.

Surprisingly they weren’t too hard.  I found some old frames at the second hand shop.  I liked the distressed paint effect so searched the internet for some ‘How to Guides’ and got painting. The base colour I chose was a silver and the top coat a blue.  I finished it off with a glaze that I made by watering down the sliver paint.  This gave the finished paint job a shimmery look.  Next we put the sheet metal into the frames.  We had an old filing cabinet lying around so my husband kindly cut it into pieces to fit the frames.  Because I wanted the metal to have a fabric finish to it, using a paint brush, I covered the metal pieces with PVA glue and stuck to it some white linen look fabric that I had got from the Dargaville Sewing and Curtain Centre.  Then using some little nails I fitted the metal into place along with a cardboard backing.  Lastly I covered the nails over with masking tape.  The little magnets I made out of covered buttons and a magnetic strip from Spotlight.

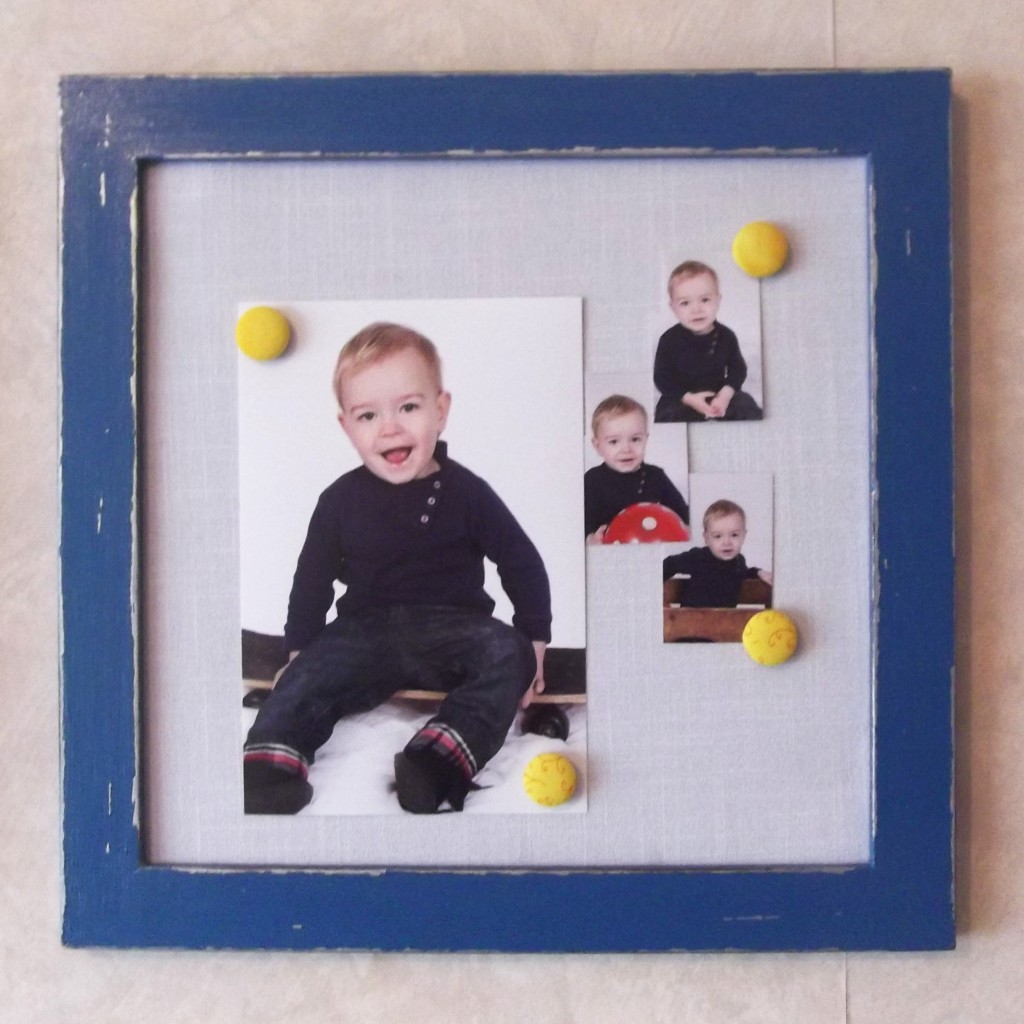
You could leave it there and give it as a gift or you could add a display of photos to give it that more personal touch.  A display could be anything from just adding a few photos like this …

Sample Display 1

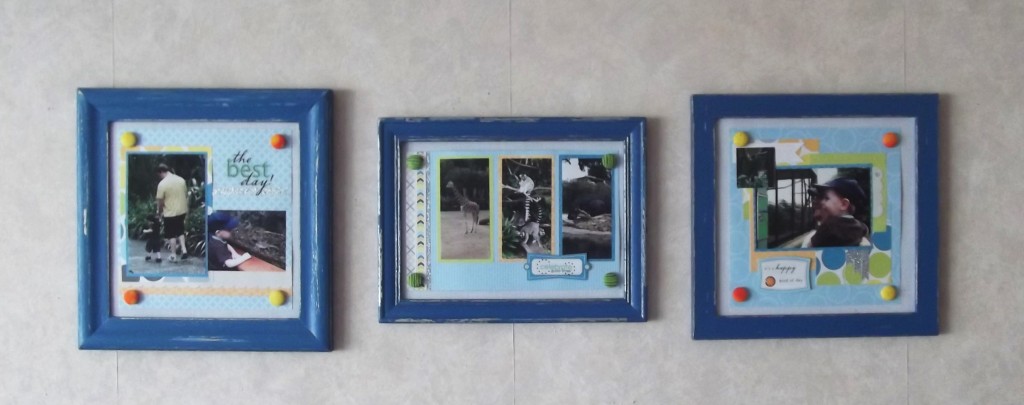
 … or you if you enjoy scrapbooking it could look more like this …

Sample Display 2

… either way it looks fabulous.

If you have a go at making your own we are always excited to see the creativity of others so feel free to share in the comments section below.

Chocolate Christmas Tree Centrepiece

12 Days of Christmas Ideas – Day 7

I like table centrepieces.  They look pretty and are a simple way to decorate for a special occasion.  In fact whenever I am styling an event, one of the first things we consider are the table centrepieces.  They draw in the guest’s attention and help to set the atmosphere for the occasion, and I believe this true whether you have 20 tables at a wedding or just the one for Christmas day dinner.

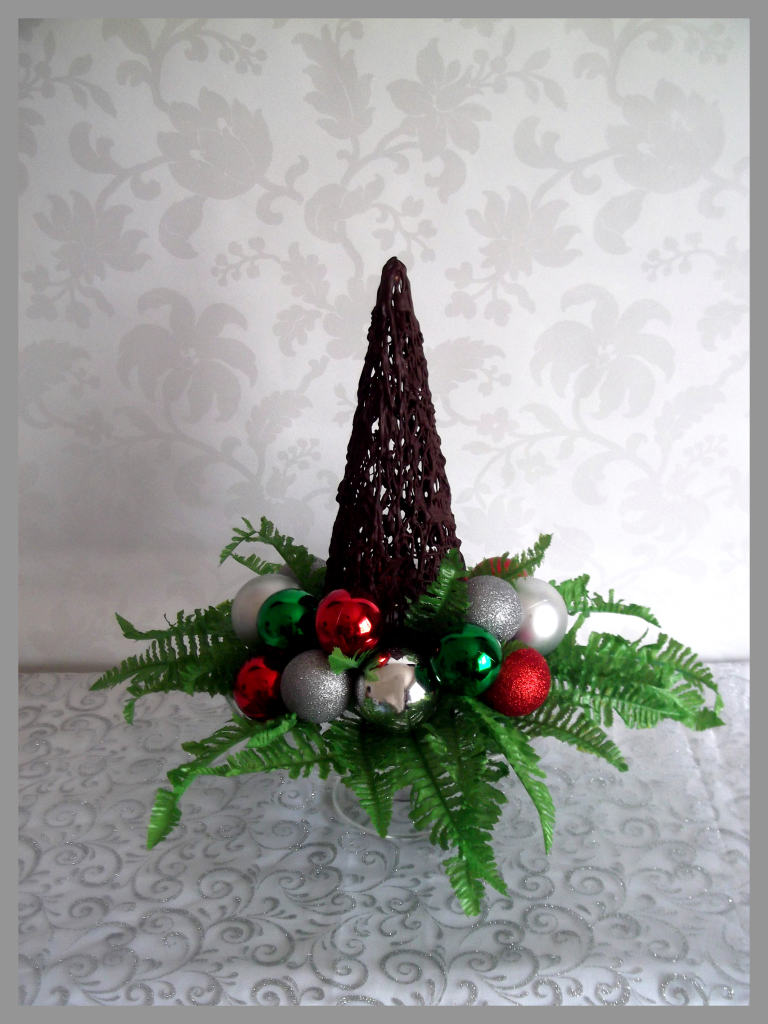
A friend mentioned today’s Christmas idea to me a few years back, but it has only been in the last few months that I decided to give it a try.  And here it is, ’The Chocolate Christmas Tree Centrepiece’.   It took me couple of tries to get this to work, but once I had the right materials it came together very quickly.

Chocolate Tree 1

The Chocolate Christmas Tree Centrepiece

How I did this was to start with a cone.  You could make one out of card or stiff paper but I just bought a polystyrene one from the craft section at The Warehouse.  I then covered the cone with baking paper, using two flat head sewing pins to hold it in place.  Then I sat it on a small ramekin so that it wouldn’t get stuck to the plate when I put the chocolate on it.  I melted the dark chocolate buttons in the microwave and allowed it to cool just enough so that I could handle it once it was in the piping bag.  Using a small round tip icing nozzle, I drizzled the chocolate all over the cone.  Once it set hard I removed the cone and gently peeled away the baking paper.  The easiest way I found to do this was by pushing a bamboo skewer into the polystyrene, then as I pulled it out I gave it a slight twist and it brought the cone out with it.

From there all that was left to do was to display the chocolate tree.  I chose to use a cake stand with some artificial greenery and Christmas tree baubles – but you could use anything you like.

If you decide to give this idea a go, I would love to see your finished product.  Either email me or leave a comment below.


My tips for working with Chocolate:

  • Your tree is less likely to collapse when you remove the cone if the chocolate has set hard.  Some chocolates seem to set harder like dark chocolate or cooking chocolate, but it is also important to consider the temperature of the room – the cooler the better.
  • When melting chocolate in the microwave, cook for short periods of time only and always at 50% power.  Stir well between each cooking time and be patient.  If you rush the process you’re likely to ruin the chocolate.