Handy Hints for Hosting a Gingerbread House Decorating Party

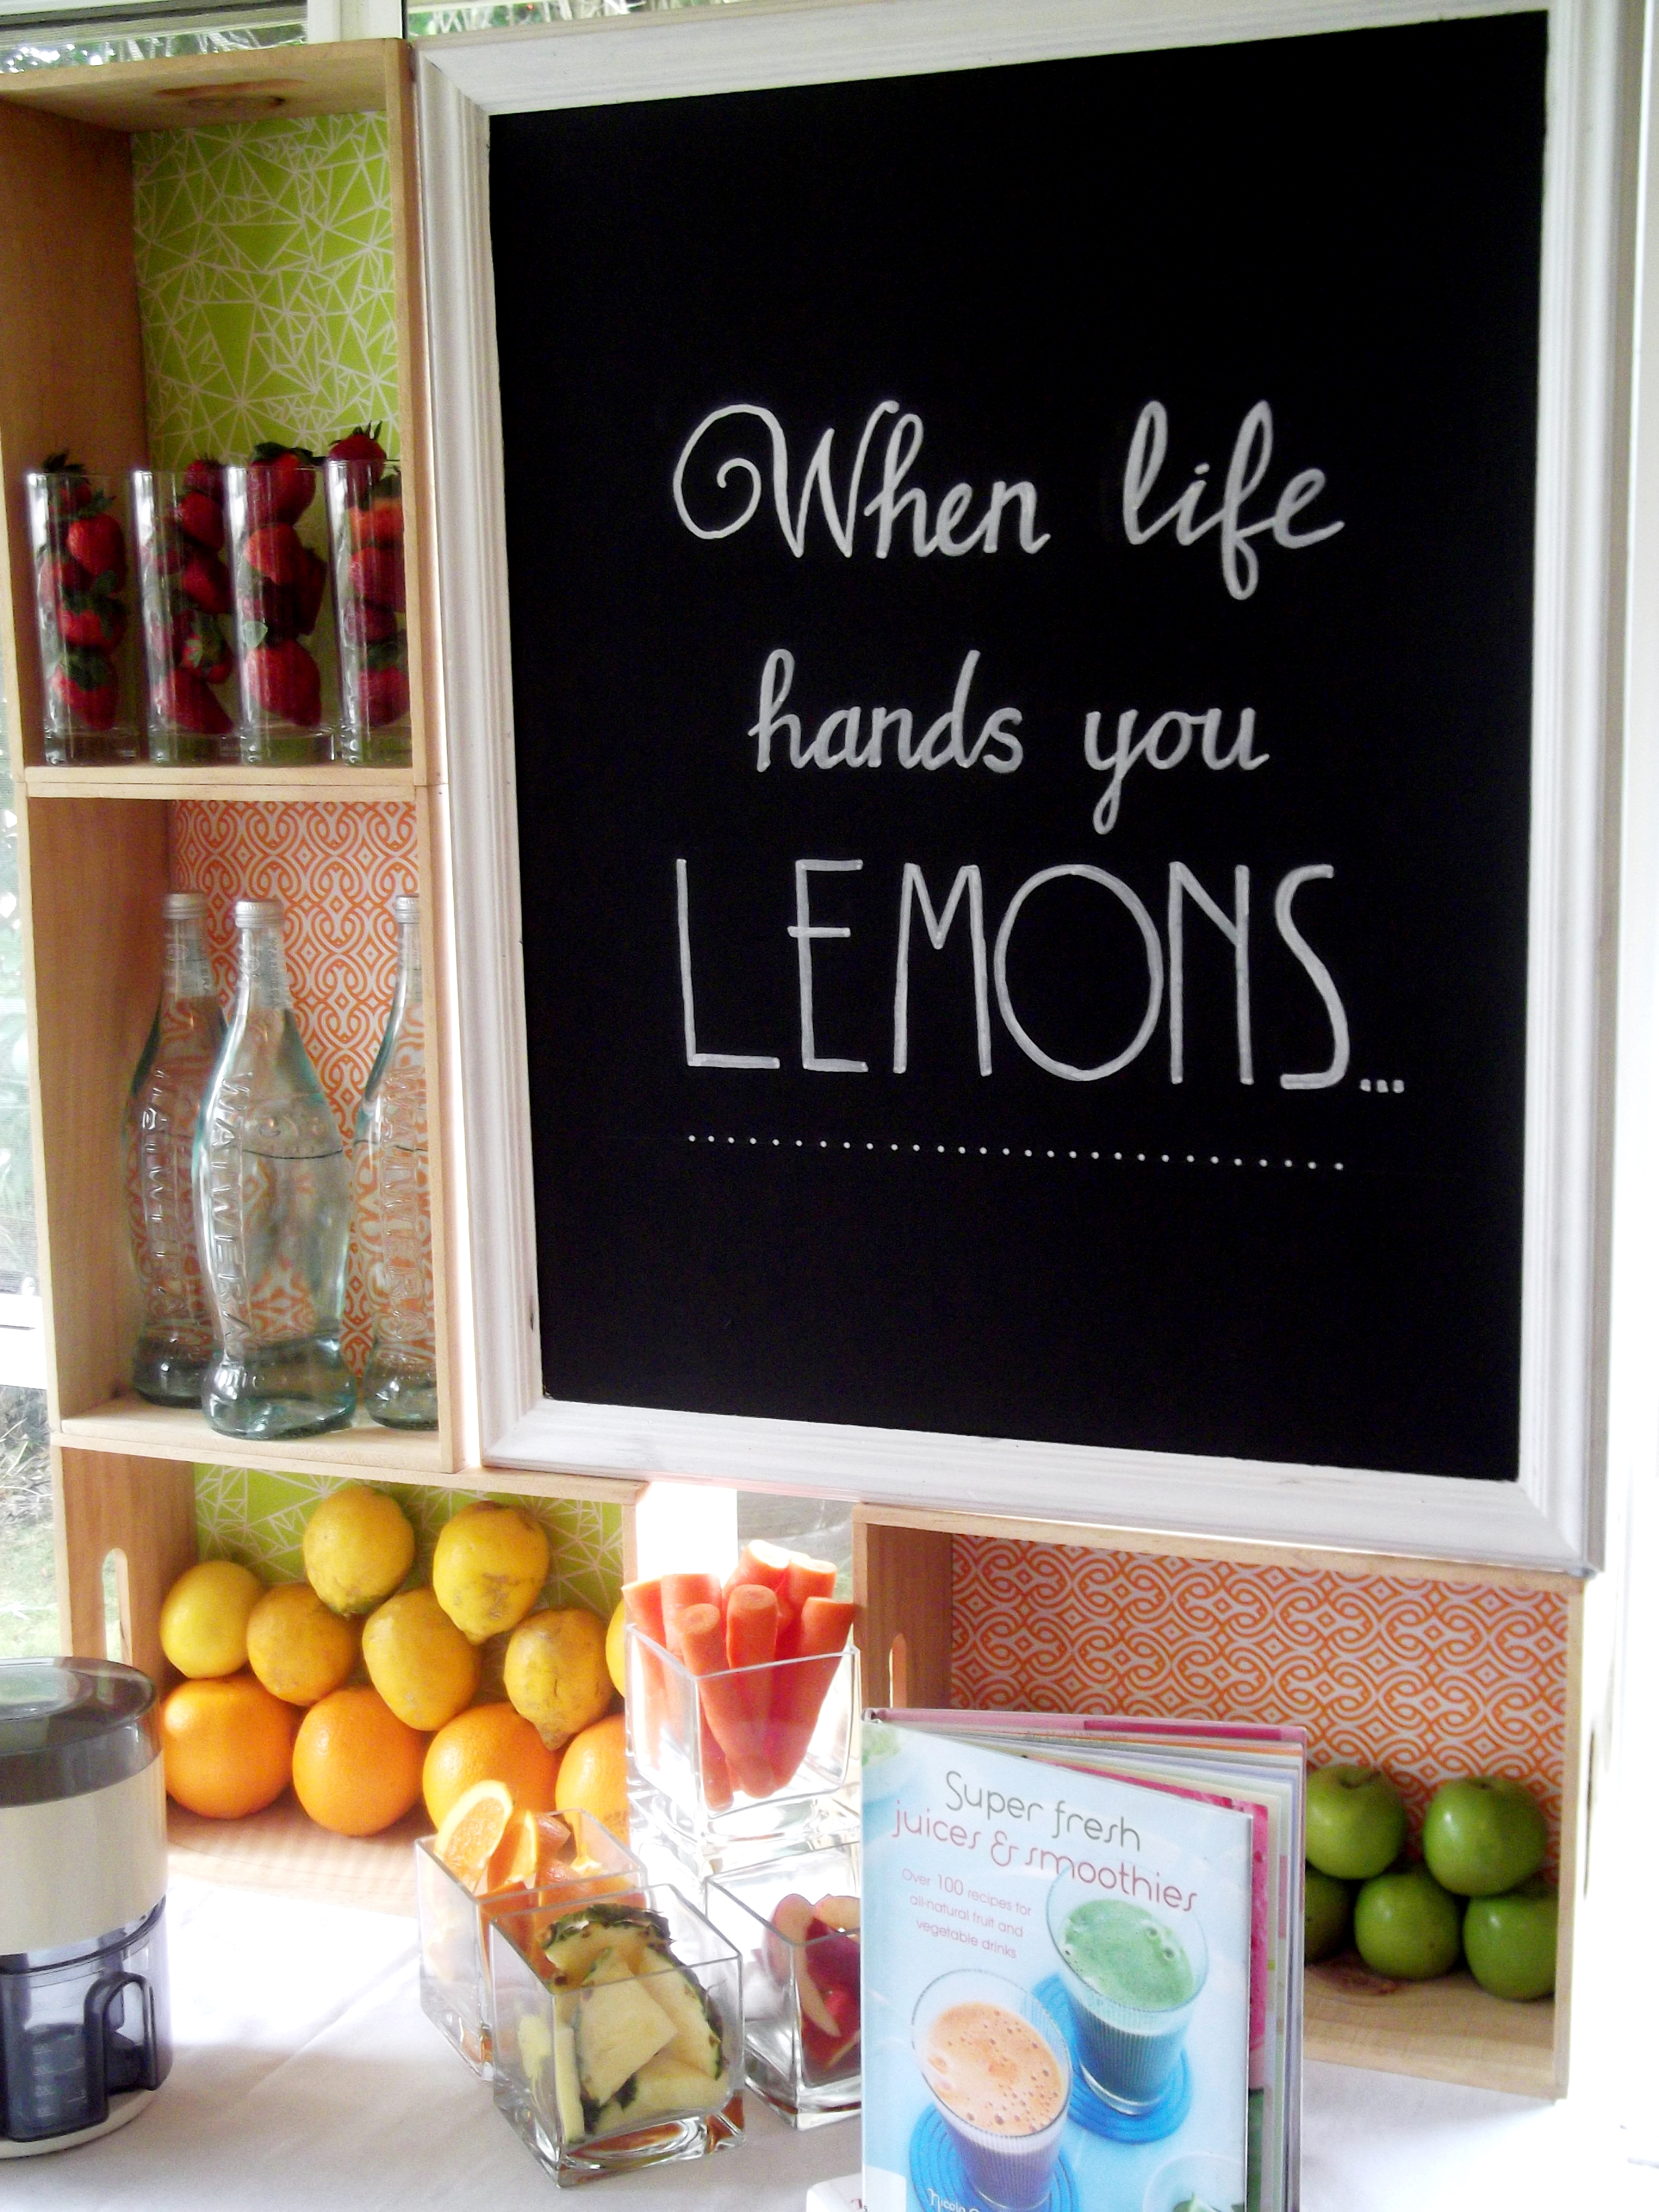
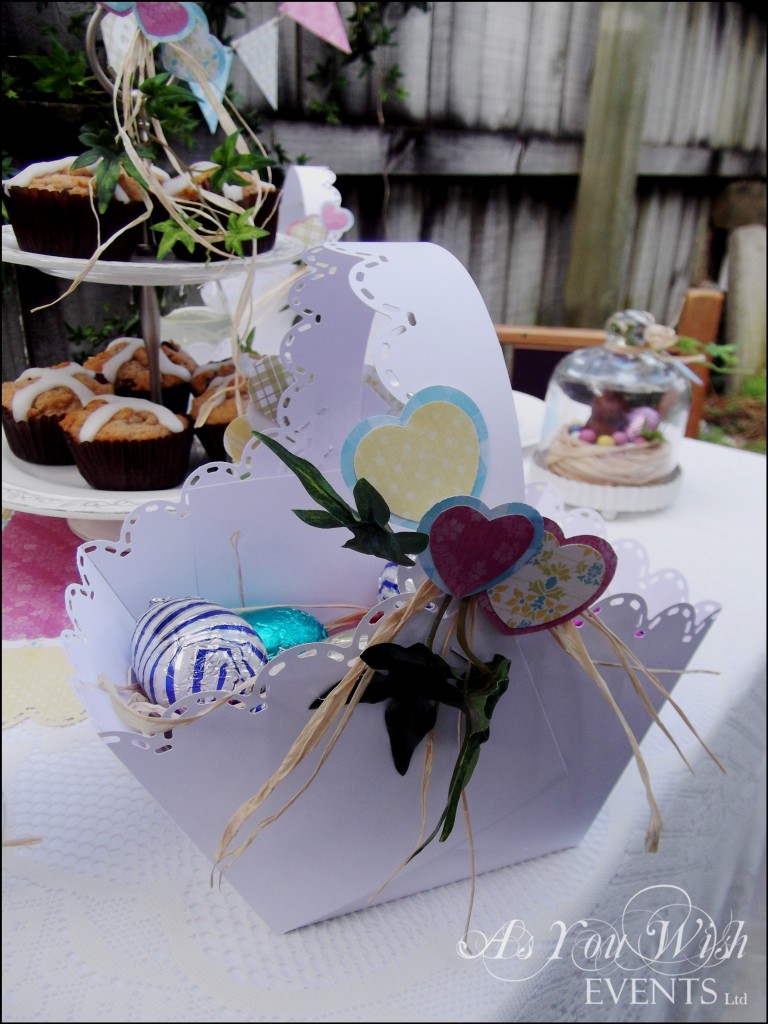
12 Days of Christmas Ideas – Day 9
Gingerbread House Decorating Party Title Image

I really do enjoy the build up to Christmas, and for the last few years as part of the build up we have included the decorating of gingerbread houses. It really is a fun activity for the whole family. Over the last few years we have kept it all rather low-key, but this year the plan is to go all out. However you decide to approach it, here’s a few hints we have learned along the way that will hopefully help you with yours.

While you can actually buy complete kits for making a Gingerbread house these days, if you’d rather approach it from scratch here’s a list of things you’ll need:

  • Gingerbread house pieces
  • Icing to glue the house together and stick on the decorations
  • Decorations i.e lollies etc.
  • A plate to decorate the house on
  • A knife or scissors or both


The Gingerbread House Pieces

Most recipes for gingerbread men will work for making gingerbread houses.

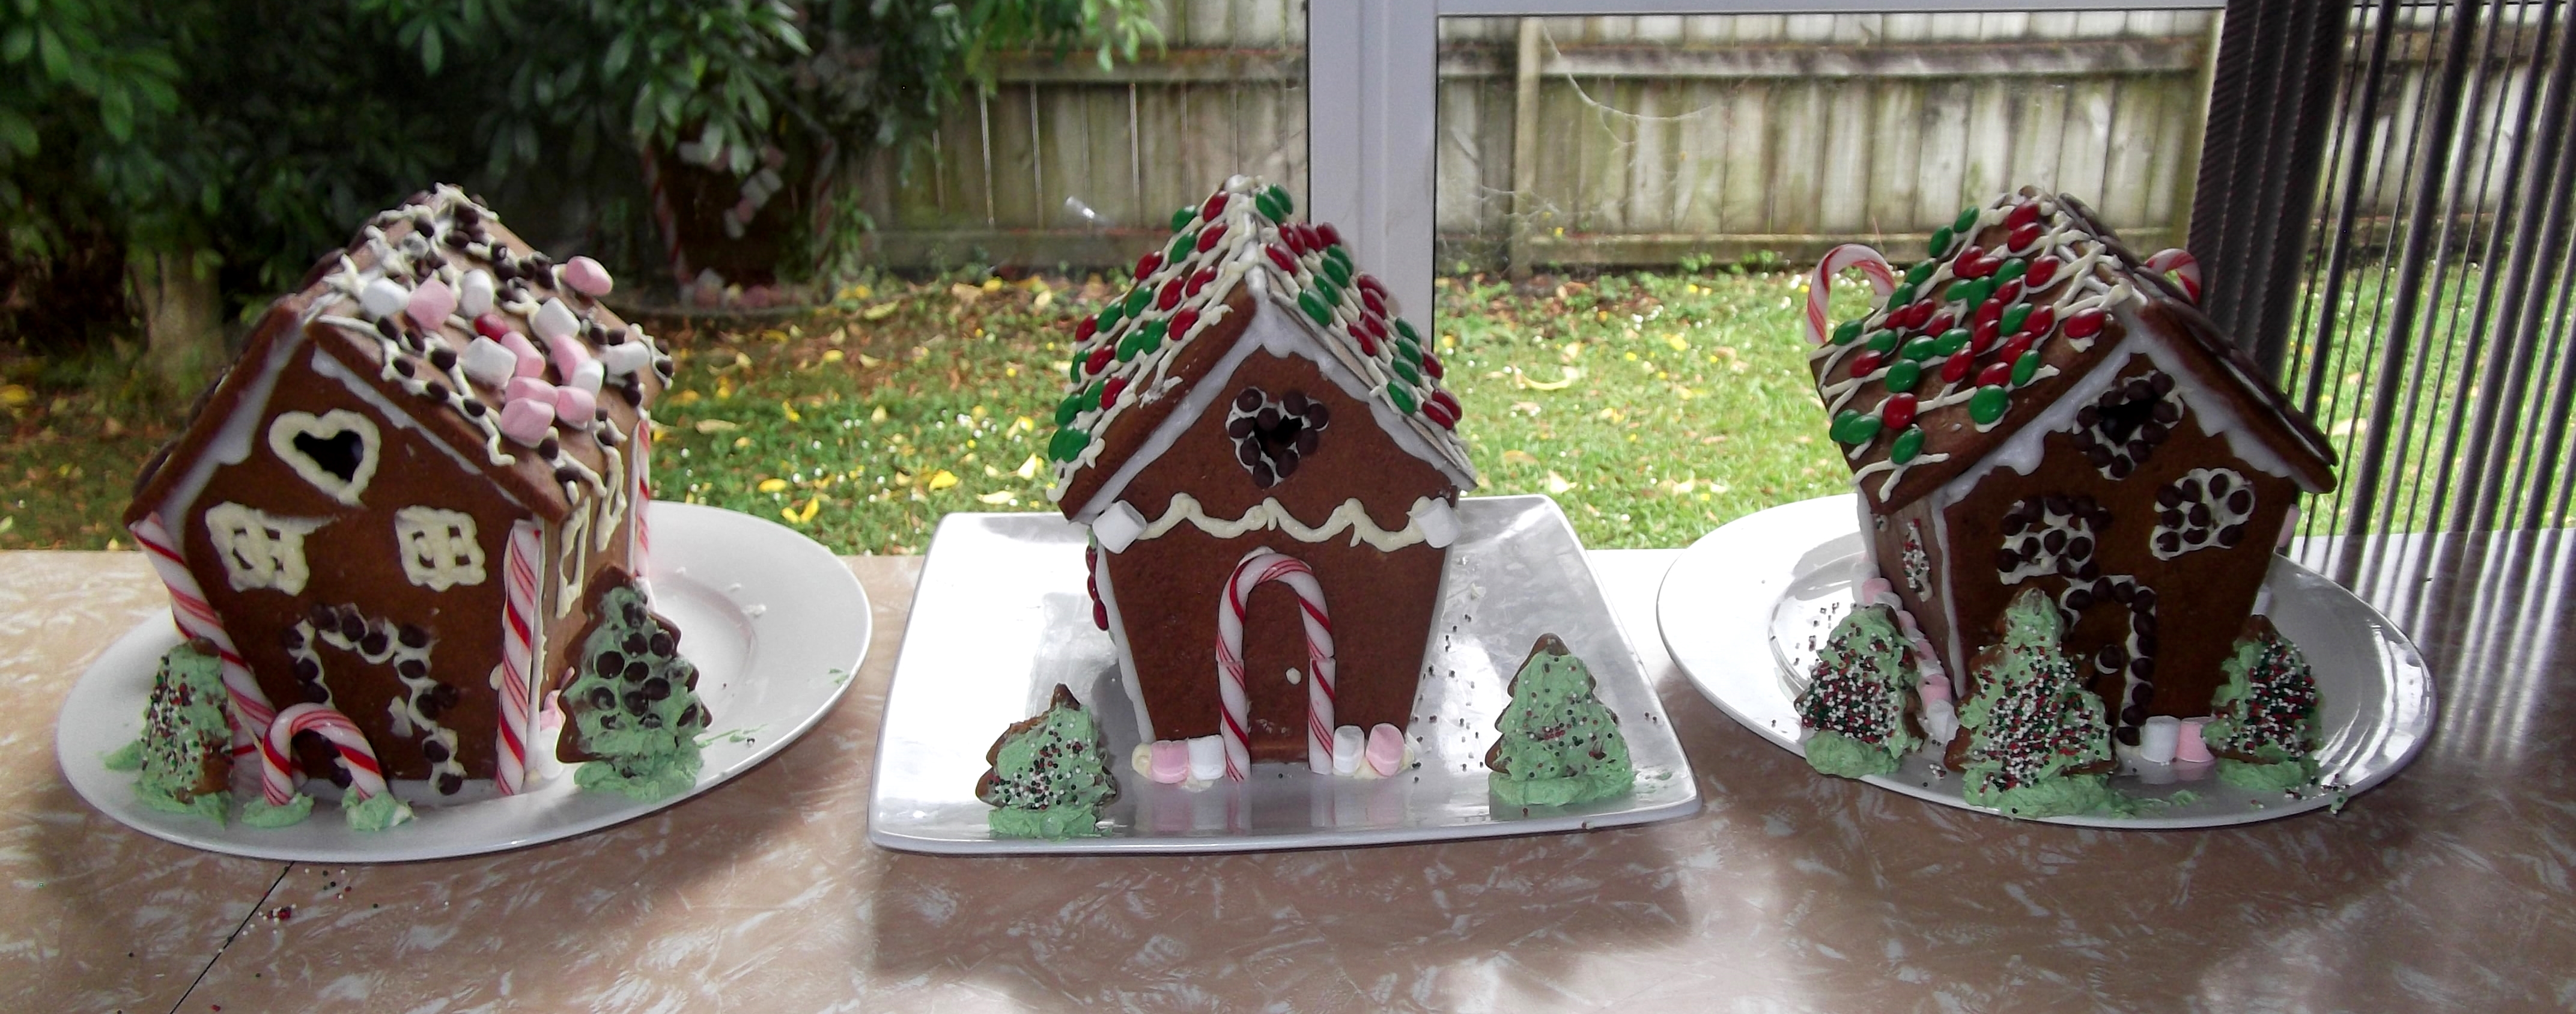
You’ll either need to create your on pattern or you can buy actual cutters from most supermarkets. I find that the cutters you can buy make rather large houses. This is fine if 3-4 people are all working on one house, but if you opt to have one house each like we do, well let’s just say, that’s a lot of gingerbread! I decided to design my own pattern and so far it seems that each year the design has got a little smaller. When you are doing one house each, you want to find the right balance between enough space to decorate creatively without having too much space that the kids loose interest before they are done.

Another thing you need to do when baking the house walls, is double check you have all the pieces – one year I came to the assembling of the houses only to find I was one piece short – arrgh!

Gingerbread Houses

Can you spot the roof piece that is made of cardboard?

The Icing

This is something that I have struggled with a little. They say that royal icing is best. This is made with egg whites or an egg white powder that can be purchased at cake decorating stores. It is quite a fast drying icing that sets real hard – two things you are after when you are trying to get the walls to hold together. I have also had some success with just mixing icing sugar and water, but you do have to get the consistency just right – usually quite thick.

I have also taken to using sewing pins (having sterilised them in boiling water first) to hold the pieces in place while they dry.

Gingerbread house disaster

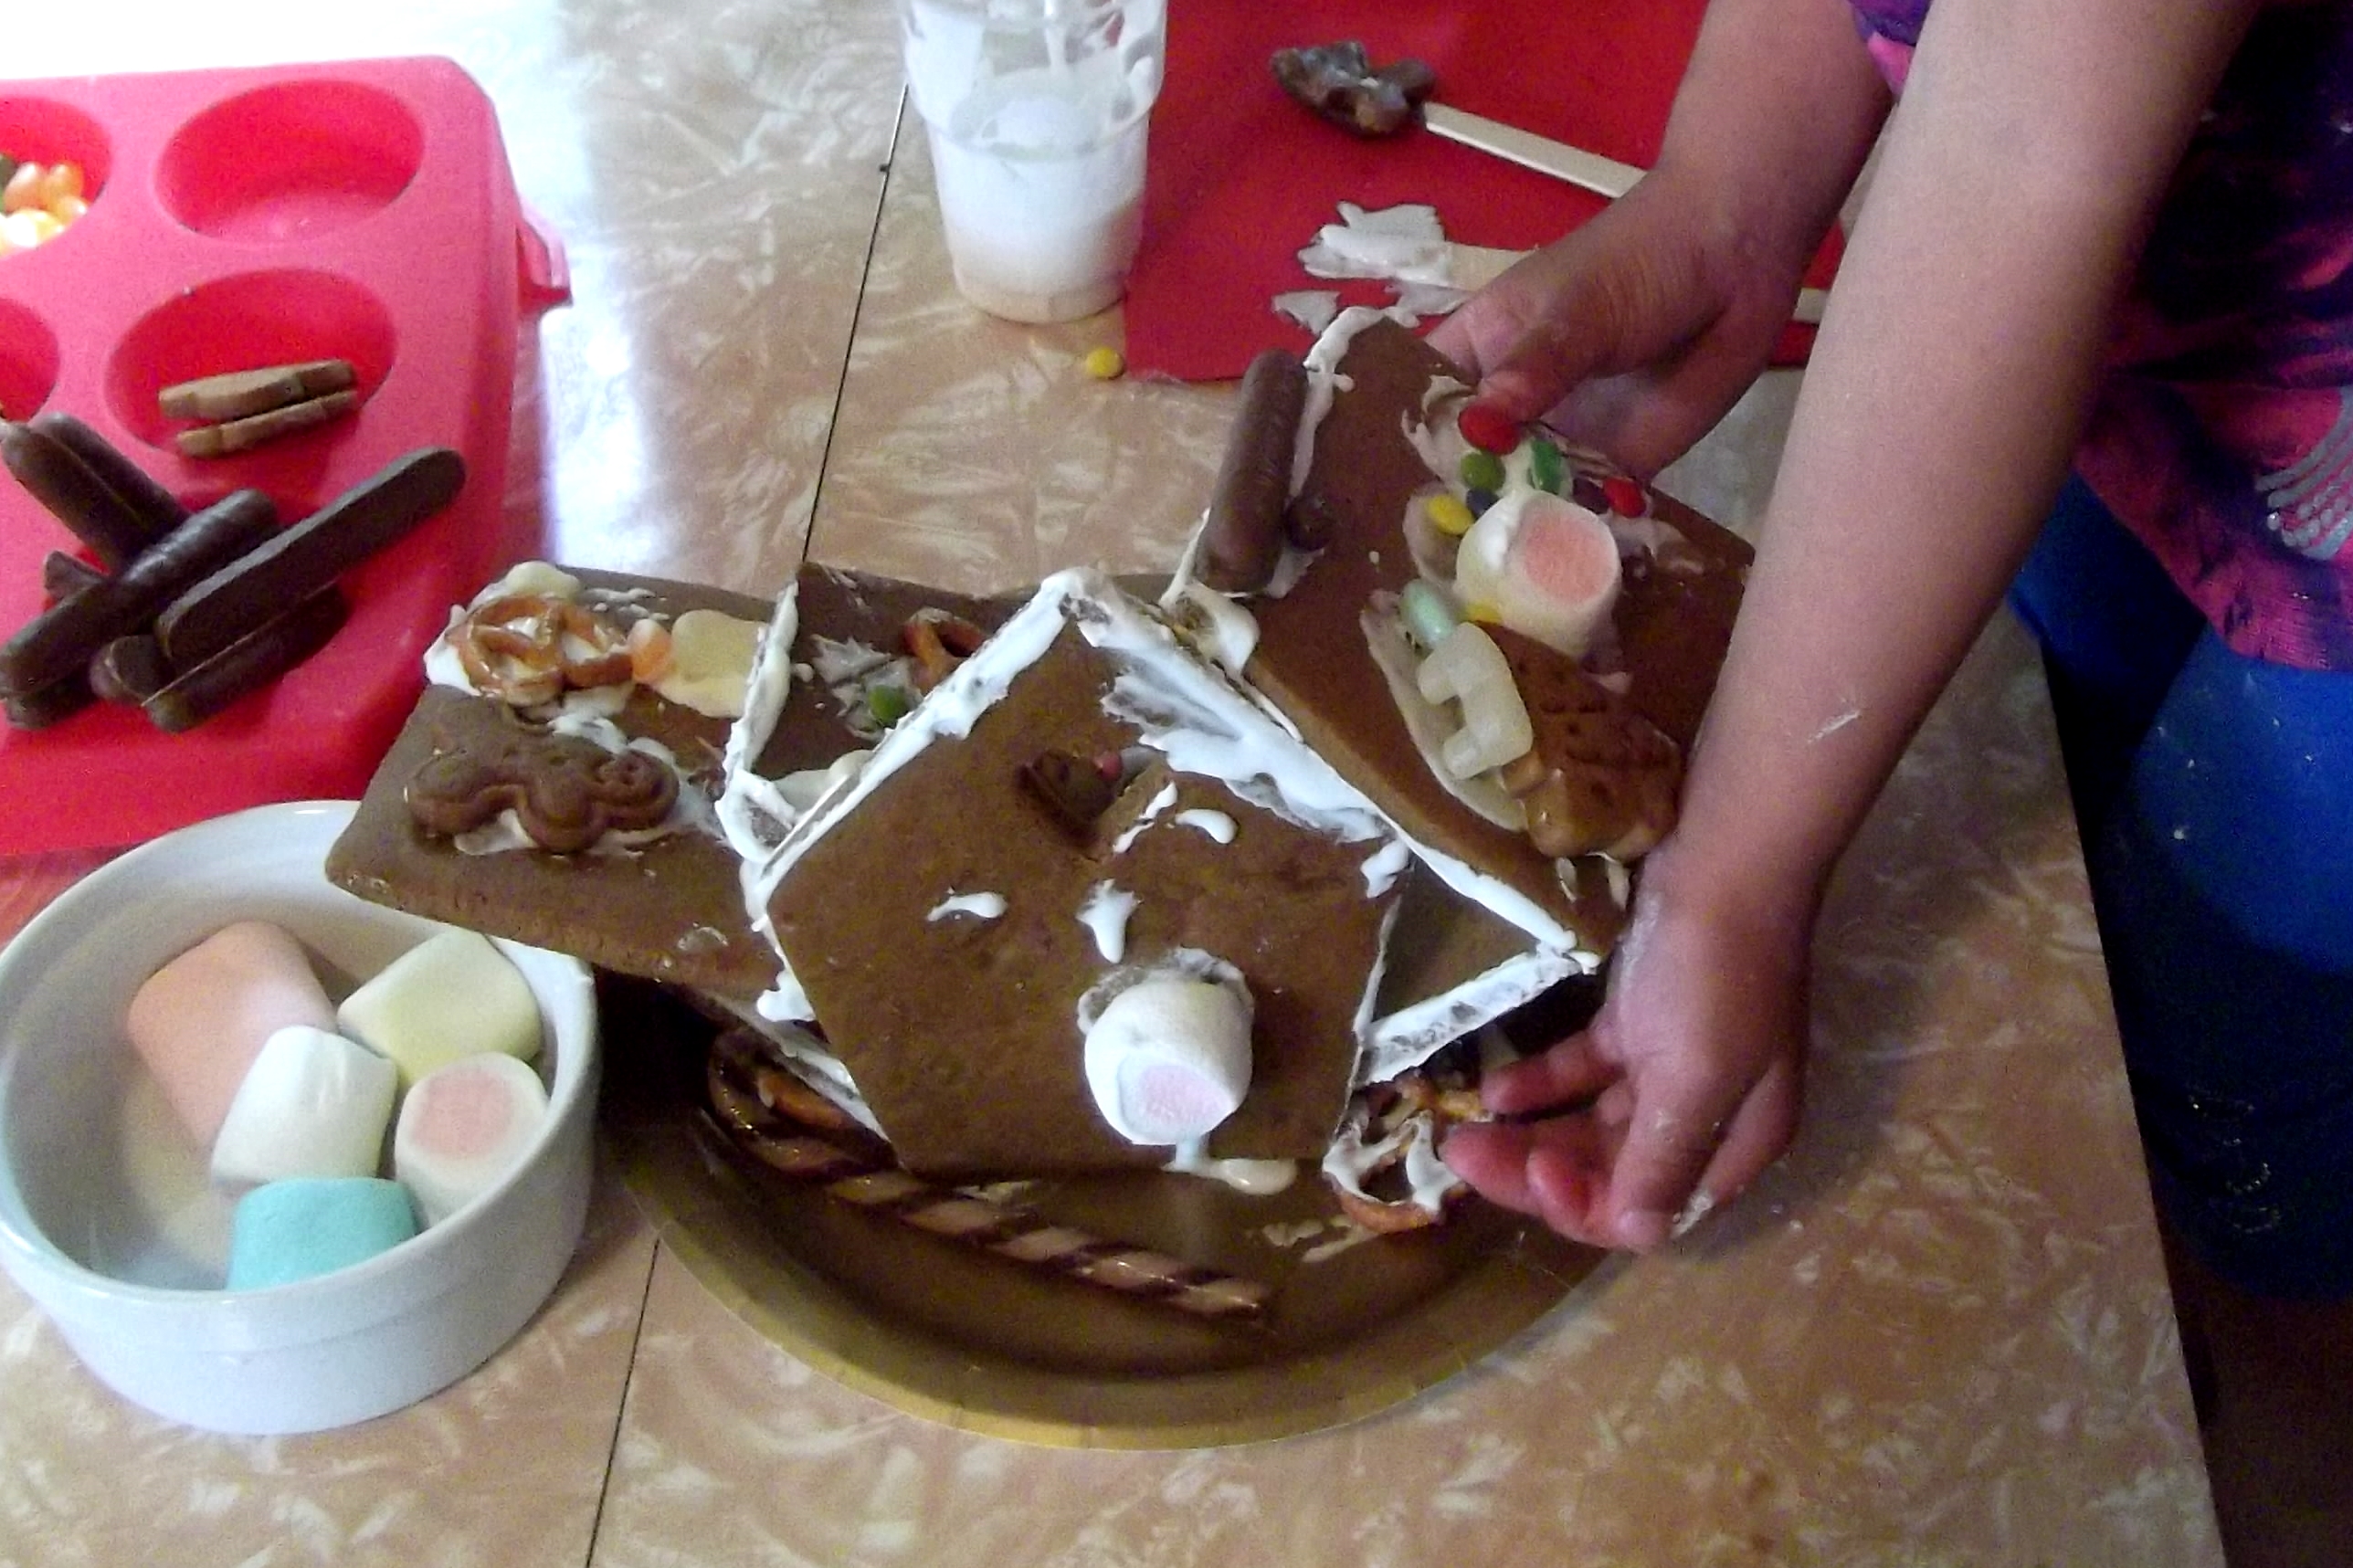
As you can see this was one of our failed attempts – but it still tasted great!


The Decorations

The most obvious thing here is the need for lollies. Smaller lollies are best but you can also cut larger lollies down to the size you want. A pair of sterilised scissors works best for cutting jellies and marshmallows, but you’ll need a knife and chopping board for harder lollies like candy canes. Our favourite lollies for decorating are M&Ms, mini jellybeans, marshmallows, candy canes and chocolate drops/buttons.

While lollies seem like the most obvious choice you can use lots of other things too. For example you can use cake sprinkles like 100s & 1000s, pretzels, small chocolate biscuits, dried fruit, nuts and even some breakfast cereals work well too.

Finished gingerbread house

Love the pretzel fence.

The Plate

Don’t forget about the plate you’re building it on. It does need to be fairly sturdy as the houses do have a bit of weight to them. We tried paper plates one year – not the best idea. Another option are cake boards – you can find these at most dollar stores these days. Size-wise, it’s a good idea for them to have a reasonable space available around the house so you can create gardens etc. too.

A Few Last Notes

I find when decorating gingerbread houses with kids it’s a good idea to have aprons of some description for them to wear. Also do whatever you can to limit their need to get out of their chairs and walk around – this definitely contains the mess. Lastly I make sure they each have either a drink of water or milk – my theory it that it helps to dilute the amount of sugar they eat during the process.

If you have any further questions about creating your own gingerbread house, I’m happy to try and answer them. Just use the comments section below. Happy creating,

Sign off


© 2015 As You Wish Events Ltd.  Want to use this article in your E-newsletter, blog, or website? You can as long as you include this complete statement: Auckland, New Zealand – Event Planner & Designer Nadine Crozier publishes the ‘As You Wish Events’ blog filled with secrets, tips and how-tos for planning your fabulous event. Get your exclusive inspiration, tips and tricks at http://www.asyouwish.co.nz.  As You Wish Events is an event planning and design company based in Auckland, serving the Auckland region and certain areas of Northland.


A Very Poppy Christmas

12 Days of Christmas Ideas – Day 8

Cake-pops, cookie-pops, sweet-pops and savoury-pops. There are just so many pop options out there. You can include them in your party menu or give them as a gift. Tasty and versatile – that’s my kind of thing! So today’s Christmas idea is a collection of our five favourite pops.

Cake pops

You may recognise this photo from one of our recent articles. While looking at this photo I thought how easy would it be to make these simple cake-pops into Christmas themed ones. All you’d have to do is swap the straws/sticks and the little bows for Christmas coloured ones.

Marshmallow pops

Marshmallow Pops

As seen on: The Pioneer Woman

oreo-pops

Oreo cookie pops

As seen on: Makoodle

Candy cane heart pops

Candy Cane Heart pops

As seen on: One Little Project

Mini Cheese Ball Bites

And for those who prefer a savoury option – Mini Cheese Ball Bites

As seen on: Five Heart Home


Sign off


© 2015 As You Wish Events Ltd.  Want to use this article in your E-newsletter, blog, or website? You can as long as you include this complete statement: Auckland, New Zealand – Event Planner & Designer Nadine Crozier publishes the ‘As You Wish Events’ blog filled with secrets, tips and how-tos for planning your fabulous event. Get your exclusive inspiration, tips and tricks at http://www.asyouwish.co.nz.  As You Wish Events is an event planning and design company based in Auckland, serving the Auckland region and certain areas of Northland.


One Super Juicy Idea

12 Days of Christmas Ideas 2015 – Day 3

I recently spoke to a lovely group of ladies in which I used the example of creating a Hot Chocolate station. I love Hot Chocolate stations, they look great, the drinks taste amazing and they help to create a warm and cozy atmosphere. Sadly, for those of us living in the southern hemisphere Hot Chocolate stations at Christmas time are not such a practical idea. So this got me thinking – what could a summer alternative be?

Since I have a number of family members who love smoothies and fresh juices I thought how about creating a make your own Juice station.

Juice BarFresh Juices and Smoothies

Fresh fruit and vegetables

Strawberries and tall glasses

Homemade Juice Station

Armed with a few books from the local library (prior to this idea I knew very little about juicing) I went shopping for a variety of fresh fruits and veggies. The key here, so I learned, is to buy what is in season. If you grow your own even better. Also try and avoid using over-ripe produce. I decided to keep it very simple, but if you want to, you can get quite fancy. The little bit of fancy that I added were some bottles of sparkling water. I figured some people like to water down their juice a little and others like bubbles in their juice – so sparkling water seemed like a fun and healthy way to provide this option.

Waiwera Sparkling WaterJuices and Smoothie recipe books

Juice bar set up

Juicer and glasses

Gathering the equipment was the next thing to do. Glasses, knife, chopping board and a rubbish bin were some of the basics. And of course there was the juicer itself. I was fortunate enough to have been given a juicer a few years back. There are a few different types of juicers on the market. They all have their pros and cons, but at the end of the day they all make juice. So whatever you choose is fine. I’ve also seen these on Trade Me and in the second hand stores – so don’t feel you have to spend big bucks.

Juice station setupClose up of Juice Bar

When Life Hands You Lemons

Finally it was set up time. Really you could set this up anywhere and in a variety of ways, but I opted to go with a bit of a rustic look that had a fresh and citrus twist. I used some wooden gift boxes to create the shelves. I lined these with vibrant wrapping paper that I brought from Warehouse Stationery. And I then added a chalkboard sign which I made out of an old picture frame that I found in a second hand shop.

And there you have it – one ‘Make You Own Juice Station’. There are so many reasons why I love this idea. Yes it’s healthy, looks good and tastes great, but it is also a help-yourself-solution to serving beverages that is fun and interactive. A little bit of pre-planning and setting up beforehand means you can enjoy the time you have with your guests even more.

Sign off


© 2015 As You Wish Events Ltd.  Want to use this article in your E-newsletter, blog, or website? You can as long as you include this complete statement: Auckland, New Zealand – Event Planner & Designer Nadine Crozier publishes the ‘As You Wish Events’ blog filled with secrets, tips and how-tos for planning your fabulous event. Get your exclusive inspiration, tips and tricks at http://www.asyouwish.co.nz.  As You Wish Events is an event planning and design company based in Auckland, serving the Auckland region and certain areas of Northland.

The Ultimate Guide to Creating Stunning Lolly Buffets

The Ultimate Guide to Stunning Lolly Buffets

Who doesn’t enjoy a sweet treat every now and then? To be honest, I probably enjoy them way more than ‘every now and then’, and when I’m faced with a stunningly put together Lolly Buffet (or Candy Buffet – depending on where you are from) the likelihood of me resisting is even smaller. But I love Lolly Buffets for more than just the sweet treats – when put together well they add to the décor of the occasion; if you’re only serving a light dessert option they help add to this part of the menu; they make for a fun and interactive party favour option; and lastly, they create an awe and wonder that brings out the inner child from even the oldest of guests.

Lolly buffet in gold mint and white

But what does it mean to put a Lolly Buffet together well? What is it that makes the difference between throwing some bowls full of lollies on a table, and creating that space which inspires awe and wonder in your guests? Really it comes down to following certain steps. Steps which I’m sharing with you here today.

Before you do anything else you need to ask yourself a few questions. How many guests are you catering for? This will determine the quantity of sweets you will need. What is your colour scheme? This will help guide your sweet selection and overall design. What style are you going for? Rustic, Boho Chic, Classic, Elegant, Modern etc. And do you wish to add any design elements? These are things like glitter, crystals, and specific patterns etc. This will also help guide your overall design.

Once you have this sorted, it’s time to go sweet shopping. I suggest breaking your sweet search down into 3 categories.

Bulk Lollies:

These are the kinds that are usually sold by the packet e.g. M&Ms, Jellybeans, Milk Bottles, Liquorice Allsorts, Marshmallows, Chocolate Éclairs, Fruit Bursts etc. Quantity wise, I would recommend buying around 100g – 150g per person of this type of lollies.

Lolly buffet in gold mint and white - bulk lollies
Lolly Buffet, in gold mint and white - bulk lollies
Designer Sweets:

These are more likely to be sold individually or in smaller amounts. They tend to cost a little more and look rather fancy. Examples of these are Ferrero Rocher, truffles, handmade fudges etc. Of course, if you are keen, you can always have a go at making some of these yourself. Quantity wise, aim for one piece per person – give or take a few.

Lolly buffet, in gold mint and white - designer sweets
Display Sweets:

These can be anything you like really – it is all in the way they are packaged to match the theme. Some examples are cake-pops, Hershey’s chocolate bars, and mini bags of candyfloss. I would also be inclined to include those swirly lollipops and rock candy-pops in this category. Quantity wise, whatever you like. These are mostly used to fill in spaces on the buffet table and make it look more decorative.

Lolly buffet in gold mint and white - display sweets cakepops
More Shopping Hints:

Whatever sweets you choose make sure they fit in with your colour scheme – this contributes to your overall design. Also if you have favourite lollies that don’t work in with the scheme, don’t despair, consider packaging them so they do match.

Lolly buffet, in gold mint and white - bulk candy repackaged to match the theme

Lastly, shopping at your local supermarket or at the nearest Warehouse can be a little frustrating when you are looking for specific colours – so I recommend shopping with online lolly shops such as Crazy Candies, LollyShop and Hey Hey Candy. These companies are all based in New Zealand and they organise most of their lollies by colour.

Lolly buffet in gold mint and white - apothacary jars

Now that you have purchased all the sweets it is time to design the layout of the buffet table. Let’s break this down into 3 parts also.

The Vessels:

While the fancy apothecary jars with their curvy lids look lovely, you certainly can still achieve great results without them. Hunt around to find a selection of jars, vases, glasses, trays etc. that will work with your selection of sweets and overall design. Mason jars and jam jars would work perfectly for an occasion with rustic design elements. Crystal bowls, cake stands and cut glass vases from Nana’s china cabinet or the second-hand store would work beautifully for a more elegant, classic themed. These day most hire companies stock a variety of lolly vessels too. You will also need to find scoops, spoons or tongs for the handling of the lollies. And last but not least the little lolly bags or favour boxes for your guests to fill.

Lolly buffet in gold mint and white - apothacary jars
Here’s a few extra tips for filling your vessels:
  • Put your larger bulk lollies, like marshmallows, into your bigger containers.
  • Show off your designer sweets by using trays or cake stands. We used photo frames with paper in them that matched our theme.
  • If the containers look too empty once you’ve put the lollies in, you can place an upside-down cup in it first to take up some of the space in the container.
Lolly buffet in gold mint and white - apothacary jars
The Placement:

The two words to remember here are levels and symmetry. When you look at the layout of your buffet table you should see 3 obvious height levels – flat (at the front of the table), medium (around the middle of the table), and tall (towards the back of the table). This can be achieved with the size of the vessels but tends to look even better when you use risers (boxes covered in paper or painted to match the theme). Symmetry is basically trying to have the right-hand side of the table mirror the left-hand side of the table.  Just keep in mind that this isn’t an exact science – if you have a play with these aspects before hand you will generally find a balance that works.

Lolly Buffet in gold mint and white - buffet layout
Lolly buffet in gold mint and white - buffet centrepiece
The Printables:

You can do everything mentioned thus far and have a nice Lolly Buffet, but I believe it is this step that will make it truly stunning. Whether you design the printables yourself or buy them it doesn’t really matter. The main thing is that they pull together your overall design, which includes your colour scheme, design elements and style.

Lolly buffet in gold mint and white - printable swing tags

Lolly buffet in gold mint and white - printable tent cards

Lolly buffet in gold mint and white - printable wrap and flat label

Oh and don’t forget the signage informing your guests of how to use this enchanting space. This will further enhance your guests’ experience.

Lolly buffet in gold mint and white - printable signage


I hope this guide sets you well on your way to creating your own stunning Lolly Buffet. Of course if you wish to have the pleasure of enjoying one of these without all the hard work you can always get in touch with us. As always, feel free to like and share this post with your friends.

Sign off


© 2015 As You Wish Events Ltd.  Want to use this article in your E-newsletter, blog, or website? You can as long as you include this complete statement: Auckland, New Zealand – Event Planner & Designer Nadine Crozier publishes the ‘As You Wish Events’ blog filled with secrets, tips and how-tos for planning your fabulous event. Get your exclusive inspiration, tips and tricks at http://www.asyouwish.co.nz.  As You Wish Events is an event planning and design company based in Auckland, serving the Auckland region and certain areas of Northland.


Go the All Blacks!

Create your own Sports Bar at home!

We’re now getting down to the final rounds of the 2015 Rugby World Cup. What better time to gather with friends and watch the games. Technically even the most casual of ‘get-togethers’ qualifies as a party so why not kick things up a notch and set up a refreshments station for all your guests to enjoy. Here’s some great ideas and products to help get your creative juices flowing.

All Blacks Party Supplies

Set up a table that is in view of your TV, but not obstructing it, and add a few decorations to it. If you’re not keen on making them yourself, then Build a Birthday have a great selection to choose from, and you can order them online too.


All Blacks food products

Next you need food. Some of New Zealand’s favourite brands are supporting our team by going black, so why not make use of them. Photo credit: 100% Pure New Zealand


All-Blacks-Popcorn-Tin-Nz-Kettle-Korn

I think these tins full of popcorn, are a must. Available at most major supermarkets, not only is it a great game watching snack it adds to the décor. Photo credit: Countdown


Game Watching Food Recipes

So that all your snack food isn’t out of a packet, choose 1-2 sweet and savoury options to add to the table. Here’s some tasty ideas from KitchMe – if you choose dishes that can be prepared in advance, even better.


All Blacks Cookies

And if you feel like getting a bit fancy, you could even give these a try. Photo credit: The Whole Cake and Caboodle

Now while this may seem like a lot of work, as my Mum will often say, ‘there is a method to my madness’. Not only will this look amazing and help build a great atmosphere for watching the game – because you have put out everything your guests could possibly need on this “self-serve” food and beverage station, you’ll get to enjoy the game more because you won’t have to keep getting up to get things.

For more ideas check out our Rugby/Football Party pin board on Pinterest, and if you do give this a go we’d love to see your photos.

Sign off


© 2015 As You Wish Events Ltd.  Want to use this article in your E-newsletter, blog, or website? You can as long as you include this complete statement: Auckland, New Zealand – Event Planner & Designer Nadine Crozier publishes the ‘As You Wish Events’ blog filled with secrets, tips and how-tos for planning your fabulous event. Get your exclusive inspiration, tips and tricks at http://www.asyouwish.co.nz.  As You Wish Events is an event planning and design company based in Auckland, serving the Auckland region and certain areas of Northland.


The Cheat’s Iced Cookie

The Cheat's Iced Cookie - Title Image

I love having Iced Cookies on the party menu. They always look colourful and fun, and they decorate the food table too. For my son’s recent Space Rocket party we absolutely had to have iced rocket shaped cookies and they most definitely had to match the rest of the party’s design. I really didn’t have the time or patience to make them myself, nor did I want to spend the money to have them professionally made (last time I got a quote for a detailed iced cookie it was around $12 each – I love cookies, but I don’t love them that much!). So when I came across this idea, I was pretty keen to give it a go. So armed with my computer, a few graphics skills and a recommendation from a couple of friends for a company called Photocake, I was off on a mission.

I started out by purchasing a rocket shaped cookie cutter from Kiwi Cakes and then created my rocket image to fit the cutter. This took a little bit of trial and error – having to print it out a few times to see if it would match, but I got there without too much fuss. Then I tiled multiple copies of my rocket onto a page that matched the measurements listed for the size project that I wanted to use on the Photocake website (this was an A3 Landscape Edible Image). I followed the remaining instructions to complete the order – pretty straight forward.  They then printed my images onto a thin layer of fondant like icing and couriered it to me.

A couple of things I need to mention here are that Photocake only prints what you upload and submit – so if you get your sizing or positioning wrong it’s not their fault. Also every printer and computer screen has some variances in colour so be prepared for the fact that the printed icing image may vary slightly from your screen. And lastly due to copyright laws you must own the rights or have permission to upload your chosen image.

Edible Image on arrival

You can see I added a few other images to my page which I used as cupcake toppers.


The edible icing image arrived in good time and was very well packed. Overall I was super impressed with Photocake’s service.

Then it was baking time. Once the rocket shaped cookies were cooked and cooled I used the cookie cutter to cut out the rockets from the icing sheet.

Cutting out the rocket ships

I then brushed the cookie with a little water before placing the icing on top of it so that the icing would stick. And it was done!

Finished iced rocket cookies

All that was left to do was to serve and then eat them.

Rocket cookies on display

If you decide to have a go at making your own iced cookies the cheat’s way, we’d love to hear from you. Either send us an email or tell us about it on our Facebook page.


Sign off


© 2015 As You Wish Events Ltd.  Want to use this article in your E-newsletter, blog, or website? You can as long as you include this complete statement: Auckland, New Zealand – Event Planner & Designer Nadine Crozier publishes the ‘As You Wish Events’ blog filled with secrets, tips and how-tos for planning your fabulous event. Get your exclusive inspiration, tips and tricks at http://www.asyouwish.co.nz.  As You Wish Events is an event planning and design company based in Auckland, serving the Auckland region and certain areas of Northland.


Space Rocket Party

Space Party Title Photo

I couldn’t believe that another year had passed us by, when we recently celebrated my son’s 4th birthday. This year it was a Space Rocket theme.  Earlier on this year I found this awesome rocket ship puzzle at Kmart. We have had hours of great imaginative play with this simple toy. We’ve taken many trips to Jupiter and occasionally Saturn or Mars, so it was only natural that this became the inspiration for the whole party.

Party Highlights:
  • I really wanted iced rocket shaped cookies but didn’t want to spend the time piping on all the little details. So I was pretty excited to create an image that matched the cookie cutter and then to have it printed onto icing by a company here in Auckland called Photocake. (More about this next week.)
  • As always we work hard to have the food match the theme too. So this time we had Cupcakes decorated with our printables; Planet Pops; Rocket Cookies; Star Sandwiches; Meteorite Meatballs; Saturn Rings (Burger Rings).
  • I always try to have a combination of games and activities at each party I create – this time we made a cardboard rocket shaped playhouse to match the theme, along with Galactic play-dough and a game we called ‘Twinkle, twinkle eat a star’. This game involved cookies in the shape of stars hanging across the doorway for the kids to try and eat without using their hands. Very entertaining to watch!
  • I love to use child sized chairs, so I was super excited to find that Carlton Party Hire in Henderson had just added to their range child sized Chavari chairs – eeek! They have been available overseas for a number of years, but have only just arrived in New Zealand. In fact I was the first person to hire these ones. They looked so cool and matched the theme perfectly.
  • Lastly, I have a bit of a thing with the concertina rosettes at the moment so I was thrilled to use them in the birthday banner and as coasters.


Kids Space Rocket Party Table SettingKids space rocket party table setting 2

Kids space rocket party table centrepiece

Kids space rocket party kids chavari chairs

Kids space rocket party helium balloons

Kids space rocket party table setting from above

Kids space rocket party centrepiece

Kids space rocket party astronaut

Kids space rocket party drink bottles and coasters

Kids space rocket party table setting and playhouse

Kids space rocket party playhouse

Kids space rocket party playhouse and food table

Kids space rocket party game galactic play-dough

Kids space rocket party favours

Kids space rocket party favour bags with printables

Kids space rocket party food table

Kids space rocket party iced cookies

Kids space rocket party cookie printables

Kids space rocket party cupcake printables

Kids space rocket party printables

Kids space rocket party planet pops

Kids space rocket party cakepops

Kids space rocket party theme colour candy

Kids space rocket party themed candy

Kids space rocket party buffet table

Kids space rocket party star sandwiches

Kids space rocket party star sandwiches and printables

Kids space rocket party saturn rings printables

Kids space rocket party meteorite meatballs

Kids space rocket party meatballs

Kids space rocket party birthday cake

Kids space rocket party cake topper

Kids space rocket party rosette banner

Kids space rocket party birthday banner

Kids space rocket party food and banner

Summing Up:

With every party that I do I put a lot of time, thought and energy into it. Sometimes I even get stumped over what to do next. But when the day arrives and it all comes together perfectly and the guest of honour just beams from ear to ear it is all worth while.

If you have any questions or comments regarding how we put this theme together or if you would like us to create a party for you then please contact us either via email or through the comments section below.

Vendor Credits:


Sign off


© 2015 As You Wish Events Ltd.  Want to use this article in your E-newsletter, blog, or website? You can as long as you include this complete statement: Auckland, New Zealand – Event Planner & Designer Nadine Crozier publishes the ‘As You Wish Events’ blog filled with secrets, tips and how-tos for planning your fabulous event. Get your exclusive inspiration, tips and tricks at http://www.asyouwish.co.nz.  As You Wish Events is an event planning and design company based in Auckland, serving the Auckland region and certain areas of Northland.


Coca-Cola Theme Party

Earlier this year I put together a Coca-Cola themed party for my husband’s birthday, and I have finally got the photos sorted and ready to share. It was a fairly casual occasion so it mainly consisted of a Burger Bar, Drinks Station and Dessert Table.

 Party Highlights:
  • The burgers were soooooo gooooood! Everyone made their own, along with all the trimmings we had two main meat options – Cola BBQ Shredded Chicken and Cola Beef Patties.
  • Drinks were simple – Coke, Sprite, OJ and Water.
  • Décor wise I loved the paper circle garlands. We used vellum paper and overhead transparency sheets to create a look reminiscent of bubbles.
  • Desserts were also simple. We had ice cream sodas with you guessed it Coke, donuts from Dunken Donuts to which we added our own Coca-Cola glaze and some iced cookies in the shape of Coke bottles.


Burger Bar 1

Burger Bar 2

Burger Bar 3

Burger Bar 4

Burger Bar 5

Burger Bar 6

Burger Bar 7

Drink Station 1

Drink Station 2

Drink Station 3

Dessert Table

Dessert Table 8

Dessert Table 2

Dessert Table 3

Dessert Table 4

Dessert Table 5

Dessert Table 5

We hope you liked this party as much as we did. If you have any questions or comments regarding how we put this theme together or if you would like us to create a party for you then please contact us either via email or through the comments section below.


Sign off


© 2015 As You Wish Events Ltd.  Want to use this article in your E-newsletter, blog, or website? You can as long as you include this complete statement: Auckland, New Zealand – Event Planner & Designer Nadine Crozier publishes the ‘As You Wish Events’ blog filled with secrets, tips and how-tos for planning your fabulous event. Get your exclusive inspiration, tips and tricks at http://www.asyouwish.co.nz.  As You Wish Events is an event planning and design company based in Auckland, serving the Auckland region and certain areas of Northland.

Kicking Off a Soccer Party

Inspirations for a Soccer Themed Party

Putting all the FIFA scandal aside, it is pretty cool that New Zealand can play host to another World Cup. With the FIFA U20 Soccer World Cup now well underway I thought it would be a good time to gather up some ideas for a Soccer themed party.

ticket-invitations

As seen on: Catch My Party


Team Party

As seen on: Catch My Party


There’s lots of fun to be had with a theme like this, whether it’s a birthday party, a party to celebrate your or your kid’s soccer team or even for the watching world cup finals with friends. So be creative, have fun and we hope you are inspired for your own party.

Sign off


© 2015 As You Wish Events Ltd.  Want to use this article in your E-newsletter, blog, or website? You can as long as you include this complete statement: Auckland, New Zealand – Event Planner & Designer Nadine Crozier publishes the ‘As You Wish Events’ blog filled with secrets, tips and how-tos for planning your fabulous event. Get your exclusive inspiration, tips and tricks at http://www.asyouwish.co.nz.  As You Wish Events is an event planning and design company based in Auckland, serving the Auckland region and certain areas of Northland.


Little Bunnies and an Easter Egg Hunt

Easter Header

We had a lot of fun putting this Easter party together.  We hope you’ll find some inspiration amongst these photos for your Easter celebrations.

1

These cute little baskets were super easy to make.

2

I liked the idea of having a defined child-sized entrance way. The handmade paper bunting was perfect for this.

3


4

Sometimes an overgrown garden is a Stylist’s dream.

5

Dotted along the pathway were the bunnies guarding their nests of eggs, ready for the children to visit.

6

The bunnies and other characters were crafted from white cardstock and coloured paper accents.

7


19

The pathway led to a little table that was set for a special morning tea.

11

To set the party scene we hung a handmade ‘Happy Easter’ bunting banner and then set the table to match.

18


15

Instead of serving Hot Cross Buns, we thought we’d have a go at making some Hot Cross Bun cupcakes. Oh, so yummy!

16

As an additional ‘take home’ gift we put together these cute ‘little bunnies in a nest’ inside glass cupcake domes.

20


22

Check back next week to learn how to make these lovely little baskets.


All the best for your Easter preparations.

Sign off


© 2014 As You Wish Events Ltd.  Want to use this article in your E-newsletter, blog, or website? You can as long as you include this complete statement: Auckland, New Zealand – Event Planner & Designer Nadine Crozier publishes the ‘As You Wish Events’ blog filled with secrets, tips and how-tos for planning your fabulous event. Get your exclusive inspiration, tips and tricks at http://www.asyouwish.co.nz.  As You Wish Events is an event planning and design company based in Auckland, serving the Auckland region and certain areas of Northland.