A Bowl of Chocolate

12 Days of Christmas 2014 – Day 7

CB4

Here is another simple, yet stunning dessert option for you to impress your friends with over the Christmas season and beyond.

CB3

To get started you’ll need a packet of Chocolate melts or buttons, some water balloons, non stick baking paper and a tray.

Begin by inflating the water balloons.  Make sure each balloon is clean by rinsing them under warm water.  Be sure to dry them thoroughly as water and chocolate do not like each other.  Line the tray with the non-stick baking paper – and then you’re ready for the next stage.

Melt the packet of Chocolate melts in the microwave, cook for short periods of time (1 minute or less) and always at 50% power.  Stir well between each cooking time and be patient.  If you rush this process you are likely to ruin the chocolate.  When the chocolate is of a smooth consistency take a balloon and press it into the chocolate until it reaches about half way – high enough to create a bowl. Then lift the balloon out of the chocolate and place onto the tray and leave to set.  Repeat the process until you have your desired number of bowls.

Once the chocolate has set hard you will need to carefully deflate the balloons.  I did this by snipping a hole near the balloon’s knot and then carefully peeling the balloon out to reveal the bowl.

CB 1

You can then fill your chocolate bowl with whatever filling you like.  I opted for a chocolate mousse with a cream and berry garnish.  Other ideas could be Ambrosia or for a healthier option, a fresh fruit salad.  I hope you enjoy this idea and have some fun making your own.

Sign off


Brown Paper Packages …

12 Days of Christmas 2014 – Day 6

Gift Wrap 1

‘Brown paper packages tied up with string, these are a few of my favourite things’.  This song has been playing over and over in my head all day, while putting this article together.  There is truth in these lyrics – brown paper packages do happen to be one of my favourite things.  It is also true that there is nothing new about wrapping gifts in brown paper, but in recent years it has again regained popularity.

There are a few reasons I like using brown paper to wrap my gifts.  Firstly, it is stronger that your regular wrapping paper, so it is less likely to rip.  Secondly, because of its neutrality it works well for any occasion. Thirdly, it creates a blank canvas on which a variety of creative trimmings can be unleashed.

Gift Wrap 2

We have tried three different ideas on these gifts.  The first is a combination of twine and a narrow ribbon (5mm wide) woven together.  It is probably the most time consuming of the ideas, but isn’t overly complicated.  For the second idea we wrapped the gift with a printed hessian ribbon and tied it in place with twine.  Simple, yet effective.  For the last idea we used two paper doilies and some more of the narrow ribbon.  We positioned the doilies and fastened them in place with a couple of pieces of double sided tape.  We then tied two separate pieces of ribbon around the gift to create the criss-cross look.  Perhaps a little more involved than the second idea, but it is still reasonably easy and very elegant looking.

I hope this inspires you to be creative this year when wrapping your own Christmas gifts.

Sign off

The Christmas Stocking Gift Exchange

12 Days of Christmas Ideas 2014 – Day 5

12576_alt3

As seen on: Garnet Hill


Secret Santa, Steal (I’m sure it has other names but that’s what we always called it) or even just drawing names from a hat – these are all fun ways to exchange gifts at Christmas time.  In fact it’s highly likely that most people reading this will have participated in at least one of these.  Well today I wish to introduce to you another Christmas gift exchange, one that’s been around for a while, but is perhaps not so well known by us Kiwis.

The Christmas Stocking game, as I call it (I’m open to suggestions for a new name), is ideal for groups of around 5 – 10 people.  Each guest brings to the party a Christmas stocking with their name on it, as well as a number of small gifts to match the number of guests attending.  I suggest setting a value such as $2 – $5 per gift.  As people arrive they hang their stockings in various places around the house, and at a designated time everyone goes and fills all the stockings, by placing one of their gifts in each of the stockings.  Once all the stockings have been stuffed, everyone can collect their stockings and gather together for opening them.  You can make up your own rules for how this is done if you like, but when I’ve played each person takes turns to reveal one item at a time.  This can be rather amusing depending on the gifts.  It’s especially fun when the giver puts a lot of thought into personalising their gifts to match the receivers.

You could easily put your own twist on this game so it is more tailored to suit your group of friends.  If your friends are into arts and crafts then maybe you could stipulate that all gifts are to be homemade.  Maybe your group are big chocolate lovers so stipulate that all the gifts have to have something to do with chocolate – the possibilities are endless.

This may, or may not work for you, but if you’re tired of the same old gift exchange year in and year out why not have a go.

Sign off


Christmas Bling

12 Days of Christmas Ideas 2014 – Day 4

Glitter Vase 1

This year I am loving the glitter and bling for my Christmas Décor.  So I guess that is why I have fallen in love with these DIY glitter vases.  They are so simple yet beautifully bring the sparkle and shine to any room or table setting.

Here is what you need to make one of your own:

  • A glass vase
  • PVA glue
  • Paint brush
  • Glitter
  • Polyurethane varnish spray


Glitter Vase 2

Begin by painting the sides of the vase with PVA.  Make sure you have good even coverage, particularly on any corners, but not so much that it will run or drip. Sprinkle the glitter all over and then shake off the excess. Set aside to dry overnight.  Once it’s dry, dust off any loose glitter before repeating this process a second time.  When the second coat has dried, again dust off any loose glitter then spray with the polyurethane varnish to seal it. If you find that the vase is still shedding glitter after it has dried you may need to apply a second coat of varnish.

Glitter Vase

Now you are ready to enjoy this stunning glitter vase whether it’s as part of your Christmas décor or as a gift for a friend.


Mini Layered Cakes

12 Days of Christmas Ideas 2014 – Day 3

Christmas is synonymous with entertaining and when is come to entertaining I think there is nothing better than a simple way to create a delightful and memorable experience for my guests.  These beautiful Mini Layered Cakes are one of those ways.

dscf3079

To make these amazing little cakes all you need is a flat cake (approx. 4cm deep), a yummy icing or filling and a round cookie cutter (approx. 7cm diameter).  Use the cookie cutter to cut out rounds from the cake, then split them horizontally through the middle.  Add some of the filling to the middle and some on the top.  Then garnish to finish.

dscf3057

I have tired this idea here with a Red Velvet cake and Cream Cheese and Mascarpone Filling.  But I could also imagine it working well with a Chocolate brownie and Mascarpone cream or even a Chocolate Cake with a Ganache.  I’m sure the options are endless and if you came up with a good one we’d love to hear about it.


Homemade Play-dough Gifts

12 Days of Christmas Ideas 2014 – Day 2


The Playdough Packaged

I love homemade gifts.  To me they say “I thought of you and I took the time to make something that you would like”.  I recently planned a party that had play-dough as one of the activities.  I was reminded how novel it can be and how people of all ages will always take the opportunity to mould and shape all kinds of creations.  The other thing I was reminded of was how as parents we will often shy away from letting our little children play with it for fear that they will eat it and that the ingredients may not be safe for them to consume.

This is why I thought these homemade play-dough gifts are ideal.  The children can have all the joy of playing with the play-dough, and the parents can have piece of mind that the ingredients are safe should it end up in their children’s mouths.

Homemade play-dough is very easy to make, and so you can create your own play-dough gifts, I thought I would share with you my favourite play-dough recipe.  All the ingredients are available from your local supermarket, and are commonly used in baking, which is how we know it’s safe to eat.   However, because of the high salt content I would still discourage it.

Play-dough Recipe
  • 1 cup Salt
  • 2 cups Flour
  • 4 tsp. Cream of Tartar
  • 2 Tbsp cooking Oil
  • 2 cups of water
  • Food colouring

Place all of the ingredients into a large saucepan.  When it comes to adding the food colouring the more you add the more intense the colour will be.  I quite like the strong colours, so I usually add up to 2 teaspoons.  Just bear in mind that as you cook the dough the colour will deepen.  Mix all the ingredients together until it becomes a smooth paste and then place over a medium heat to cook it.  It is important to stir the mixture constantly – this helps to distribute the heat throughout the mixture and will also stop the dough from burning (Note: it is normal for some to stick to the bottom of the saucepan).  As it cooks the mixture will start to stiffen and the colour will deepen.  You will know it’s is ready when it clumps into one big ball, and doesn’t stick to you when you touch it – this usually takes 3-5 minutes. I then turn the play-dough out onto a hard surface and knead it for a bit to insure an even consistency.  It will be quite warm but it is not likely to burn you.  This play-dough will last for months & months, as long as you keep it in an air-tight container.

The Playdough Process

To make the gifts I chose to make 3 batches of play-dough in primary colours.  I figured the play-dough could then be mixed together to make other colours.  I then cut a piece from each colour, wrapped it in plastic-wrap (to keep it air-tight) and layered them into a 8cm x8cm clear cupcake box.  I then finished it off by tying it with a white organza ribbon and adding a rainbow coloured gift card that I designed.  This amount of dough easily makes 6 gifts of this size.  And if you decide to make your own and would like to use our gift cards you can download them here for free.

 Playdough Gift Card Download Here


I hope you enjoy making your own play-dough, whether its for Christmas gifts, party favours or even just as a holiday activity.  If you have any questions or comments we’d love to hear from you.  You can either leave a message in the comments box below, email us or join us on our Facebook page.


Creating Christmas Memories – a guide to an activity based Advent calendar

12 Days of Christmas Ideas 2014 – Day 1

Welcome to As You Wish Events’ 12 Days of Christmas Ideas for 2014.  It was this time last year when we launched this blog with 12 Days of Christmas Ideas, so I guess you can say it is our Blog’s 1st Birthday.  Last year we began with our 5 favourite Advent Calendars, and because I love the countdown to Christmas and how it builds anticipation for the actual day, I thought we’d begin this year’s ideas with how to create an activity based Advent calendar.

Last Christmas, with my son being old enough to appreciate Christmas more fully, we decided that we wanted to do all we could to create great Christmas memories.  So I set out to fill our advent calendar with experiences that would do just that.  And thus this guide was born.  Many of our examples reflect the values we hold as a family, but I’m sure that this guide can inspire you to come up with activities of your own, that will work for you and yours.

Playgroup

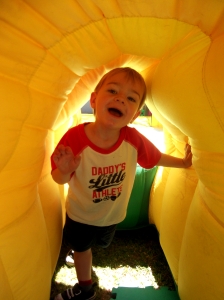
Fun on the Bouncy Castle at Playgroup

Christmas Social Group Functions – A great place to start is by adding all the Christmas functions from social groups you belong to.  So for us the first things that went on the advent calendar last year were the Christmas party at playgroup, the Children’s Christmas Production and family fun day at church.

Community Events – Next look around your community to see what Christmas events are happening for the public, and select a few that you would like to go to and add them.  If cost is an issue for you, don’t fret.  Many community events are gold coin donation or free to attend.  We ended up choosing a ‘Live Nativity Drive Through’ put on by a local church and going to see Christmas light displays around our area. Light Up Christmas is a great website for finding the best light displays in your area and it even helps you to plan the best route to take.  And of course we included a trip to see Santa at Smith & Caughey’s Enchanted forest.

Sign to Santa's House

The Enchanted Forest at Smith & Caughey, Queen St

Gatherings with Family and Friends – Don’t be afraid, to be the first to suggest that you should get some dates down on paper.  Pre-planning does help relieve the stress of the season.  Last year we began the tradition of building Gingerbread houses with the cousins, so that became one of our advent activities.  I also thought that a picnic at a playground would be something my son would really enjoy, so we invited a couple of friends and took with us some juice in Christmas decorated bottles and fairy-bread (which we called Angel-bread because we made it with an angel cookie cutter and Christmas coloured sprinkles).  Simple, but great fun.

Things you have to do anyway, but with a Christmas twist – There are always things that can’t be avoided so why not work them into the calendar.  We had to travel to be with family so we decide to build that into our Christmas advent activities.  The Christmas twist we added was that we would stop at a beach along the way for a run around and Ice cream, to which we added some Christmas coloured sprinkles.  A friend of mine recently told me about how the New World Supermarket in Ponsonby, Auckland, do Christmas in a big way.  They add special displays among other things – so maybe grocery shopping could even be a fun advent activity.

Christmas decorating – This is one of my favourites, partly because I love to decorate but also because you can break it down into stages and make it last more than one day. We started with putting up the Christmas tree and decorating it together as a family. Another day we set up our Nativity Scene and on a couple of other days we put up other specific decorations.

Christmas baking & crafts – I like to make Christmas cookies so we designated a day or two for my son and I to do baking.  I measure out the ingredients and we count them out together as he tips them into the bowl.  He also helps with the mixing.  Of course the part that was most fun for him was licking the bowl and eating them after.  We also made Christmas decorations together like paper chains and lanterns which we added to the tree and around the house.

Baking day

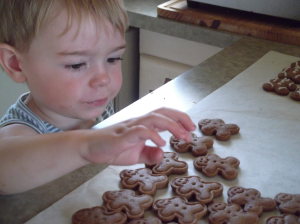
My son with the cookies – a dangerous combination

At home activities for the kids – By this stage the Advent calendar should be getting pretty full.  To fill in some of the final spaces we did things like Christmas colouring-in pages, watching Christmas DVDs, and reading Christmas stories.

At home activities for the family – For the last of the spaces consider adding some family activities.  For our family activities we made a short Christmas video greeting; had a family movie night complete with popcorn and a Christmas movie of course; and celebrated Christmas’ gone past by looking at Christmas photos from years gone by.


So there you have it, an activity based advent calendar that will create beautiful Christmas memories for you and your family.  Now if you do get to the end of this guide and you still have gaps to fill, there is nothing wrong with adding in a few chocolates. Or you can join us on our Facebook page and we might be able to help you come up with a few more ideas.


Table Setting – What you need to know.

It has surprised me the number of times I’ve come across people working in the food service industry that don’t know how to properly set a table.  However I guess that it shouldn’t be that surprising with more of us eating in front of the TV or in cafés and restaurants that roll their cutlery in a paper serviette – not that there is anything wrong with that.  But when you’re faced with a more formal or special occasion, you may like to brush up on your table setting skills as it is a simple and low cost way to add style to your event.

To look at a fully set table it can be rather daunting.  You are most definitely not alone if you find yourself thinking “Really, how many glasses and forks do I need?”  The important things to remember are that a well set table shouldn’t have any unnecessary items, and that all you have to do is work your way from the outside in.


casual-table-place-setting

If it is your job to set the table a few things you need to remember are that the forks all go on the left of the dinner plate and the knives and spoons go on the right, with the glasses above them.  The bottom edge of the cutlery and the lower rim of the plate should all line up so that they are approximately 3 cm in from the edge of the table. This way guests should be able to sit down without knocking them.

formal-place-setting

For the more formal of occasions, usually when the menu is pre-plated, a bread plate and knife is added above the forks, and the dessert spoon and cake fork are placed above the dinner plate so that they can be moved into place either side of the plate space once the other courses are completed.  Napkins can be either placed to the left or on the plate.  The only other item to mention is the service plate, sometimes called a Charger.  No food is served directly on this plate, instead it serves as an under plate for the plate holding the first course.  The service plate will then be cleared either with those from the first course or will be exchanged for the plate holding the second course.

Lastly, while there are the traditionally accepted ways of setting a table it is also quite common to tweak these to suit the specific needs of your occasion.

If you want to learn more about table settings then I recommend the following articles:


Christmas Foyer Decor

This year I was asked to decorate our church’s foyer for the Christmas season.  The flyer for the Christmas Production served as my inspiration which lead to a colour scheme of gold, black, and white with a touch of silver and yellow.  Although the church had a collection of decorations such as the trees and a few ornaments, some shopping was still needed to create a look that was new.  My favourite shopping finds were from The Clearance Shed where I found the extra large gold baubles and stylish cushion covers.

One of the permanent features in the foyer is a large blackboard wall.  On this wall my assistant and I drew up the same scene at was pictured on the Christmas Production flyer.  The mural was done completely in chalk, apart from the gold banner which was printed onto paper, cut out and stuck on.

Christmas Foyer Decor 1

The lowest cost item with the biggest impact had to be the wall hangings.  The frames had been sitting around for a while having been recused from the recycling pile.  I pulled these apart and using some stripy wrapping paper and some beautiful chalkboard printables I found online at Nest of Poises and Love, Pomegranate House I put them together again to create some stunning wall hangings – all for the cost of the wrapping paper.

Christmas Foyer Decor 2

The look was finished off with a few clusters of faux presents and some icicle fairy lights.  Overall a reasonably low cost project that looked fabulous.