Creative Cutlery

12 Days of Christmas Ideas – Day 11

Creative Cutlery


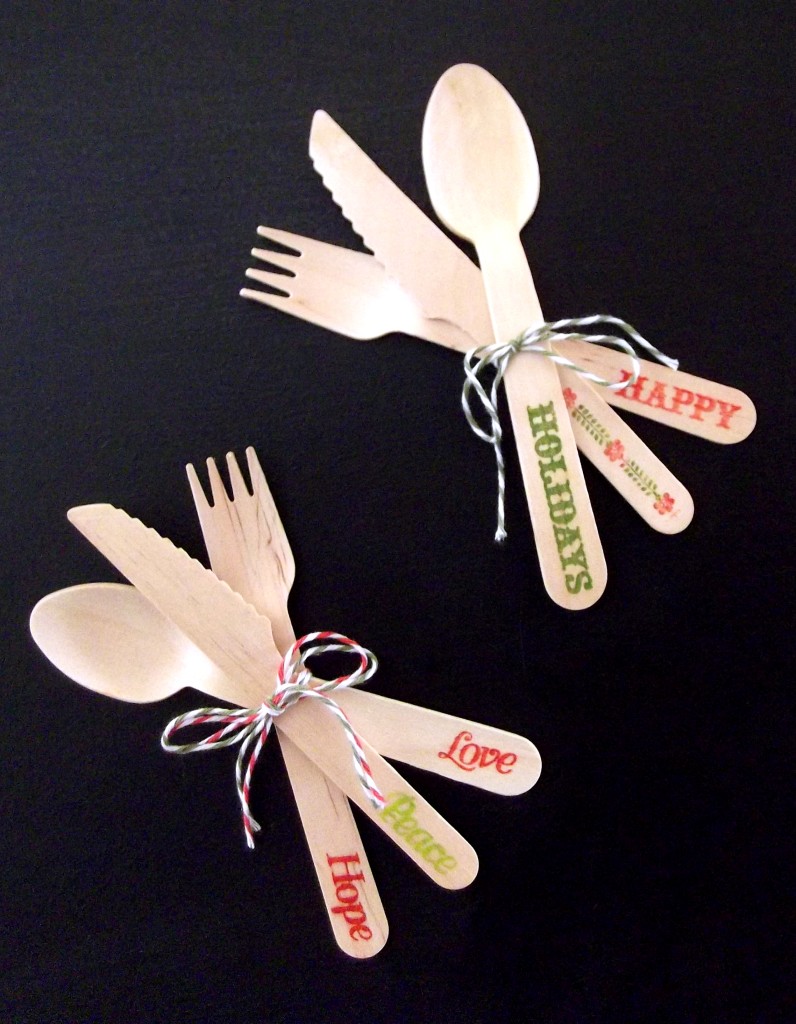
Sometimes it can be the smallest detail that gives a party that ‘Wow’ factor.  Even something as simple as presenting the disposable cutlery in a creative fashion.  I recently came across an everyday version of this idea and thought why not do this for Christmas.

I got the funky wooden cutlery from a New Zealand company called Disposable Tableware  – I’ll write more about their stylish disposable range in a couple of weeks time.  The stamps, pigment inks and bakers twine I got from Close To My Heart.

All I had to do was stamp the handle of each cutlery piece.  I found that the pigment inks worked best as they didn’t bleed as much as the water based inks.  Once the ink dried I simply tied each set together with Christmas coloured Bakers Twine.

I can just picture these on the table at a pre-Christmas BBQ or a Christmas Day dinner at the Bach – so simple, yet so festive.

The Cookie Swap Party

12 Days of Christmas Ideas – Day 10

Home baking is a lovely treat to offer family and friends when they pop in for a visit over the Christmas period.  It is also a great and inexpensive gift idea.  Having a variety available for both instances can be a lot of work which is why (as promised on Day 2 – Planning Tips for Christmas) I would like to share with you the second of the two party ideas that will help you prepare for Christmas. It’s the Cookie Swap Party.

The Cookie Swap Party is somewhat of a new concept to us here in New Zealand, but I think it is a fantastic idea for getting friends together to achieve a common goal.  Here’s how it works.

1. The Planning

Invite a few of your friends to participate.  I think 5 – 8 people is a nice number.  Each person bakes one dozen of cookies per person attending, plus 1 extra dozen for tasting during the party.  So if you have 5 people coming, each person would need to bake 6 dozen cookies.  That may seem a little scary at first but if you choose a recipe that yields a large quantity to start with and has a short baking time then all you need to do is double the recipe once and within an hour or so you should have all the cookies you need.  Another planning tip is when your guests confirm their participation, ask them what type of cookie they plan to bring.  This way you can be sure to have a good variety on the day.

2. The Cookies

A couple of points to consider when choosing your cookie recipe:

  • Make sure that they are a cookie that will handle being transported – you don’t want the cookies crumbling to pieces before they reach their intended recipients.
  • If the recipe calls for the cookie to be kept in the fridge then it is not a good recipe to choose – you don’t want them to spoil before they reach their intended recipients.
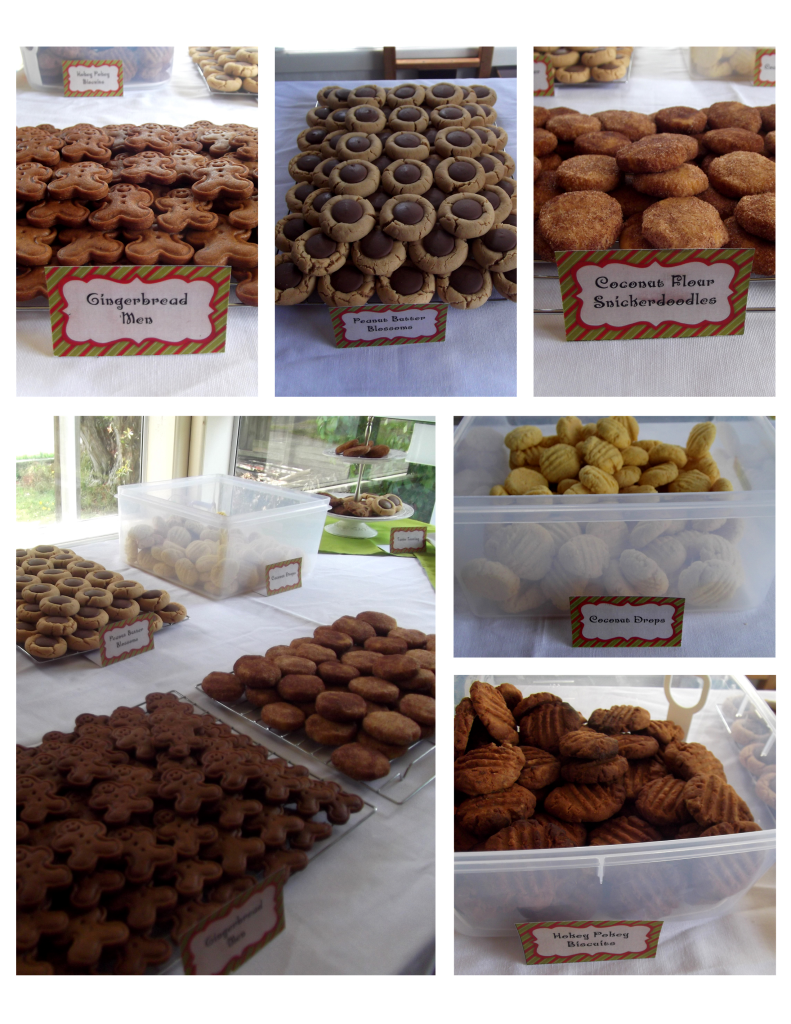
  • You might also like to find out if any of your friends would like a gluten and dairy free option in which case I found the most amazing recipe for Coconut Flour Snickerdoodles. Yum, Yum!

The Cookies - gingerbread

When everyone arrives for the party layout the cookies for swapping on the table.  Label the cookies so everyone knows what they are getting.  If there are gluten and dairy free options make sure everyone knows which ones these are.  Before the swapping begins remind everyone that they can take one dozen of each type of cookie, including one dozen of their own.  If people are gift wrapping their cookies then they probably won’t want to take all their cookies at once, so offer paper and pens for people to keep track of what they take.


3. The Tasting

Set up the cookies for tasting in a space separate from the swapping cookies.  Be the polite hostess and offer your guests a beverage when the arrive, but also set up a little refill station so they can help themselves later if they would like another one – this way you can concentrate on wrapping your cookies and enjoying their company.

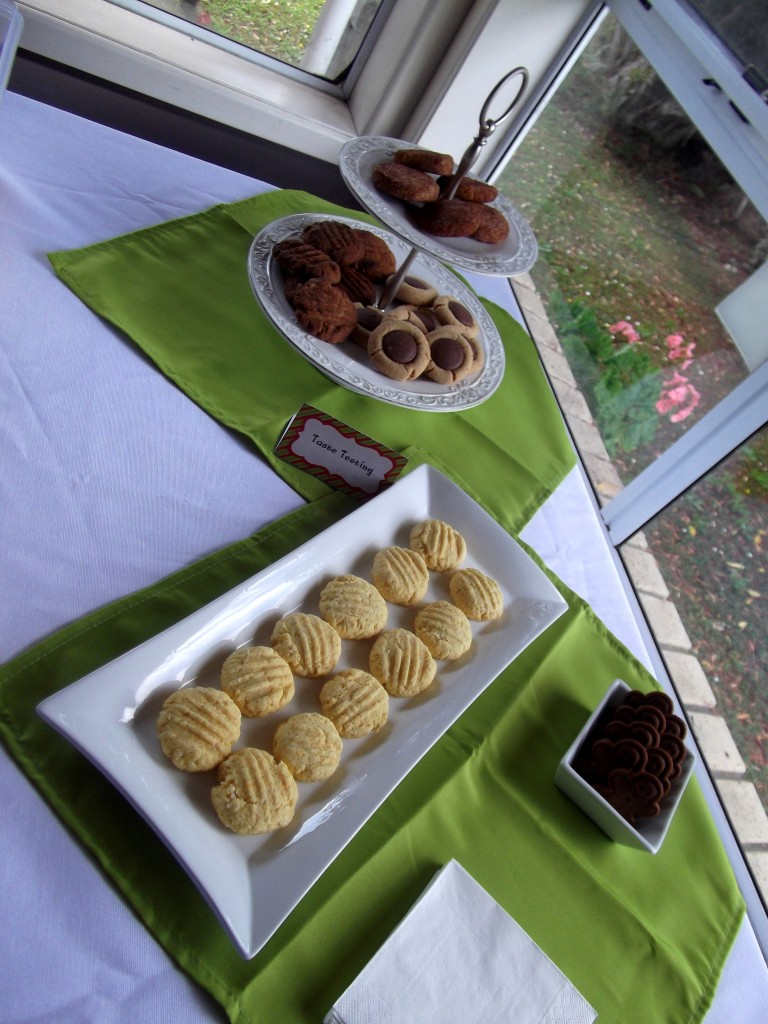
The Tasting

Tasting the cookies is my favourite part.  It’s great that the refreshments for the party are provided without any extra effort, but I think it is even better that everyone then knows exactly what it is they are wrapping as gifts or taking home.  It’s also a great opportunity to swap recipes if something really takes your fancy.


4. The Wrapping

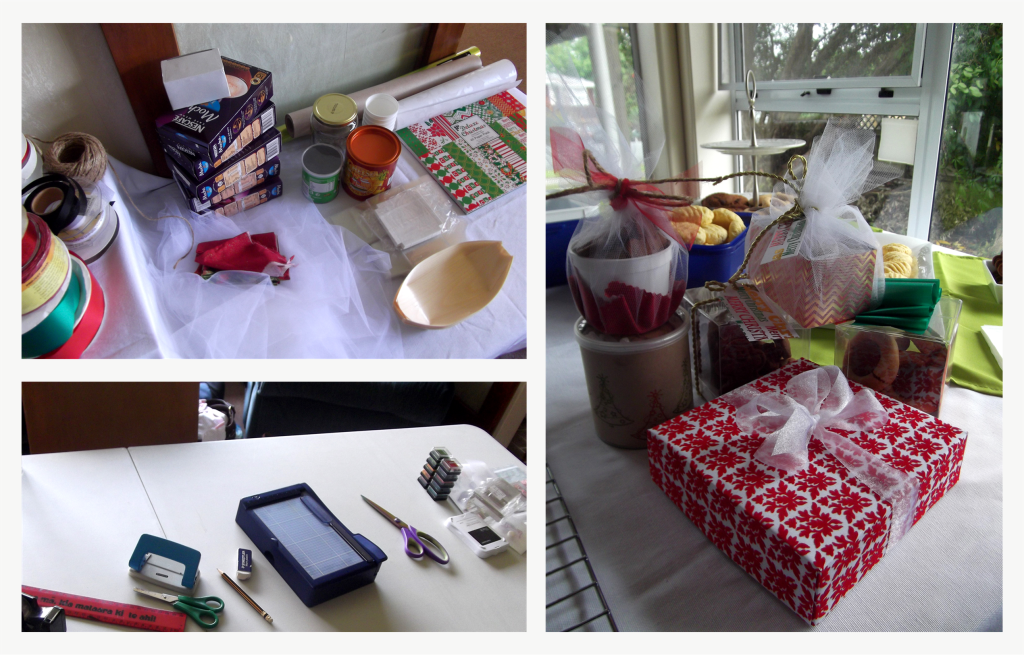
The last thing you’ll need to set up is a wrapping station.  Gather together a range of wrapping supplies.  You can choose whether you supply these yourself or if you ask your friends to contribute.  Things you could include are ribbons; favour boxes; disposable plates; recycled cans, boxes and jars that could be decorated and Christmas paper for making boxes or gifts bags.  Cellophane and lunch wrap paper are also handy to have. One idea a friend of mine suggested was to buy little glass dishes from the second hand shop and wrap the cookies up in these.  You’ll also need things like scissors, glue stick, rulers, sticky tape etc. along with anything else you might want in order to achieve your desired results.The Wrapping

Once everything is set all that is left to do is start swapping, wrapping, eating and chatting.

The photos in this post were taken at a Cookie Swap Party I had with my friends over the weekend.  It was a lot of fun, catching up, eating cookies and being creative.  I wish you just as much fun, should you try this idea with your friends.

Shot Glass Appetisers

12 Days of Christmas Ideas – Day 9

What is any social gathering without nibbles or appetisers?  For many years it was the good old chips and dip or nuts and raisins.   More recently it seems to be the deep fried mini spring rolls and samosas served with sweet chilli dipping sauce.  Now most guests would probably be happy any of these options, but why not step out of the box and wow your guests with any, or all, of these fresh and tasty shot glass appetiser recipes.

 Veggie Shooters
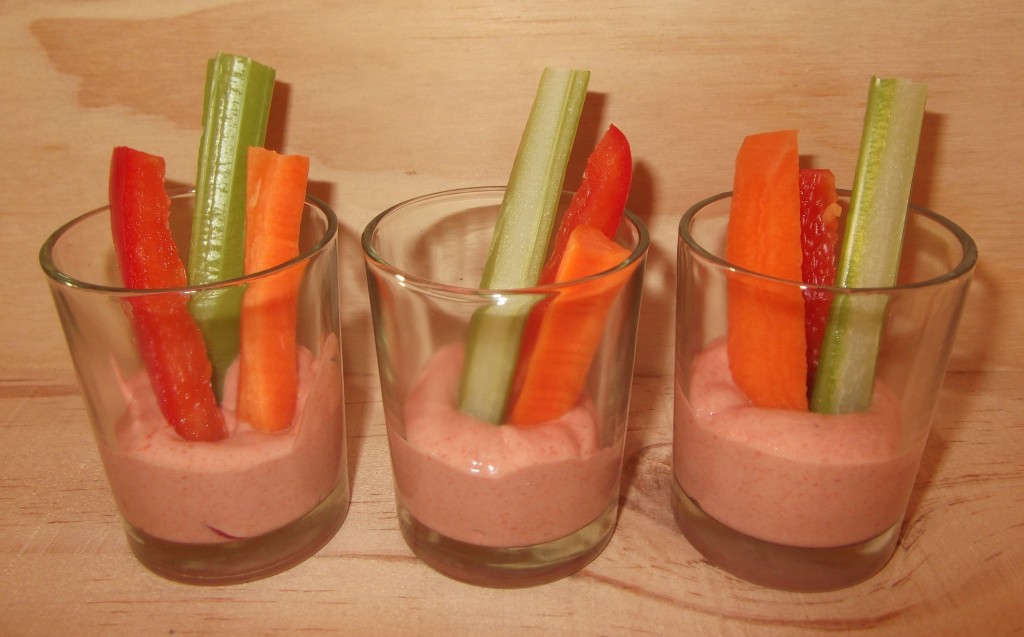
Veggie Shooters

Ingredients:  Your favourite dip, veggies like carrots, celery and capsicum cut into sticks.

My favourite dip is the Classic Kiwi dip that uses the Nestle Reduced Cream and Maggie Soup – although I like to swap the Onion soup mix for a Tomato or Tomato and Onion soup mix.  Other alternatives you could use are hummus or guacamole.

Put a couple of teaspoons of dip in the bottom of a shot glass and add the veggie sticks.


Satay Chicken Skewers

Satay Chicken Skewers

Ingredients:  400g of chicken breast chopped into pieces approximate 2cm in size. Two bottles of Watties ‘Bit On The Side’ Java Satay Sauce.

Mix the chicken with one bottle of the satay sauce, then leave in the fridge to marinade overnight or for at least a few hours.

Soak the wooden skewers in cold water for at least an hour, then thread at least 3 pieces of chicken onto each one.  It should make approximately 25 skewers.  Cook them on the BBQ, in the frying pan or under the grill.  To serve, place a couple of teaspoons of the remaining satay sauce into each shot glass and serve with a skewer on top.


Lamb Skewers with Tzatziki
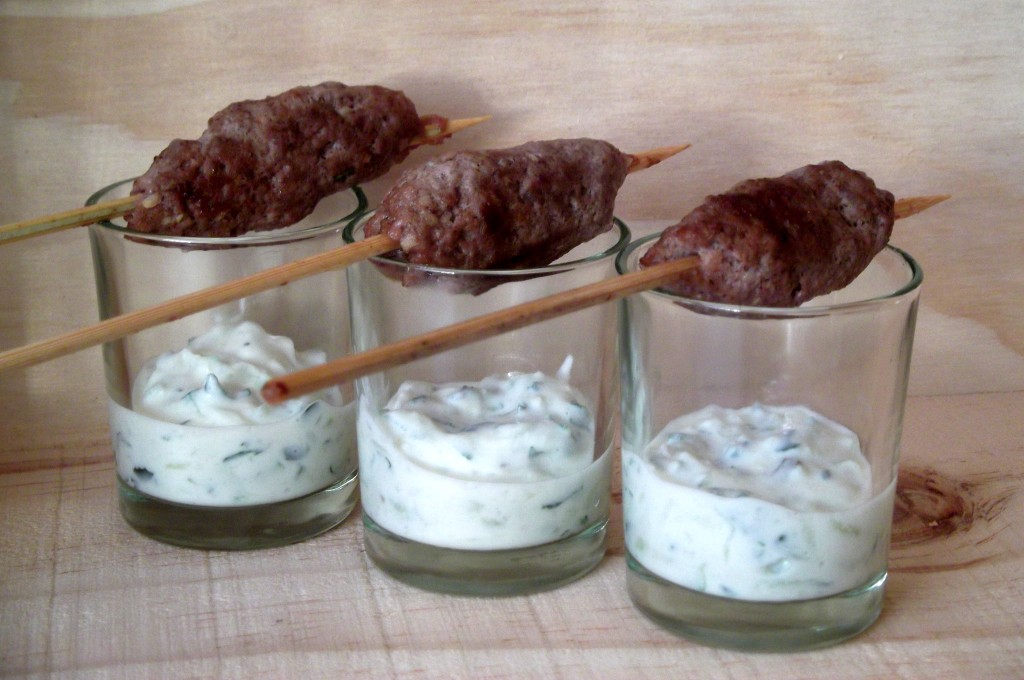
Lamb Skewers with Tzatziki

  • This recipe is based on one that I found in the ABC Delicious Cookbook named ‘Let’s Entertain’. 
  • It makes approximately 25 skewers.

Skewer Ingredients: 500g lamb mince; 3 garlic cloves; 1 tsp ground cinnamon; 1 tsp ground cumin; 1/2 tsp paprika; 1/4 tsp of salt; 2 Tbsp greated lemon rind; 1/4 cup of olive oil.

Tzatziki – 1 Lebanese cucumber; 400ml of Greek yoghurt; 4 cloves of garlic; 3 Tbsp of mint chopped; 1 Tbsp of lemon juice


To make the skewers, place all the ingredients in a bowl and mix together well using your hands.  Mould small oval shapes onto each skewer.  Put them into the fridge until you’re ready to cook them.  When you’re ready, cook them on the BBQ, in the frying pan or under the grill.

To make the Tzatziki, halve the cucumbers lengthwise and remove the seeds but leave the skin on. Grate it into a bowl, sprinkle it with salt and set it aside for 15 minutes.  Rinse the cucumber well, place in a clean tea towel and squeeze all the moisture out.  Place it back into the bowl and add the remaining ingredients, mix together well and add salt and pepper to taste. To serve, place a couple of teaspoons of Tzatziki into a shot glass and serve with a lamb skewer on top.


I like many things about this idea.  Firstly they look fabulous and very appetising when put on the serving tray.  There is just something about individual serves that captures people’s interest.  Secondly, each of these recipes is full of flavour and offers a healthier fresher option to their deep fried counterparts.  Lastly, they eliminate those infamous double dippers that we all dread.

Now if you don’t have a supply of shot glasses on hand, then there is no need to fret you can still make this idea work.  Most supermarkets and even the ‘$2’ type stores sell little plastic tasting cups that work just as well and are usually a very reasonable price.  But I would say that any little, food safe containers that you have available could be used.

So enjoy the recipes, and have fun wowing your guests.  And if you have any tried and true ideas for other shot glass appetisers or what to use as little containers we’d love to hear from you in the comments section below.
Magnetic Frame Gift Idea

12 Days of Christmas Ideas – Day 8

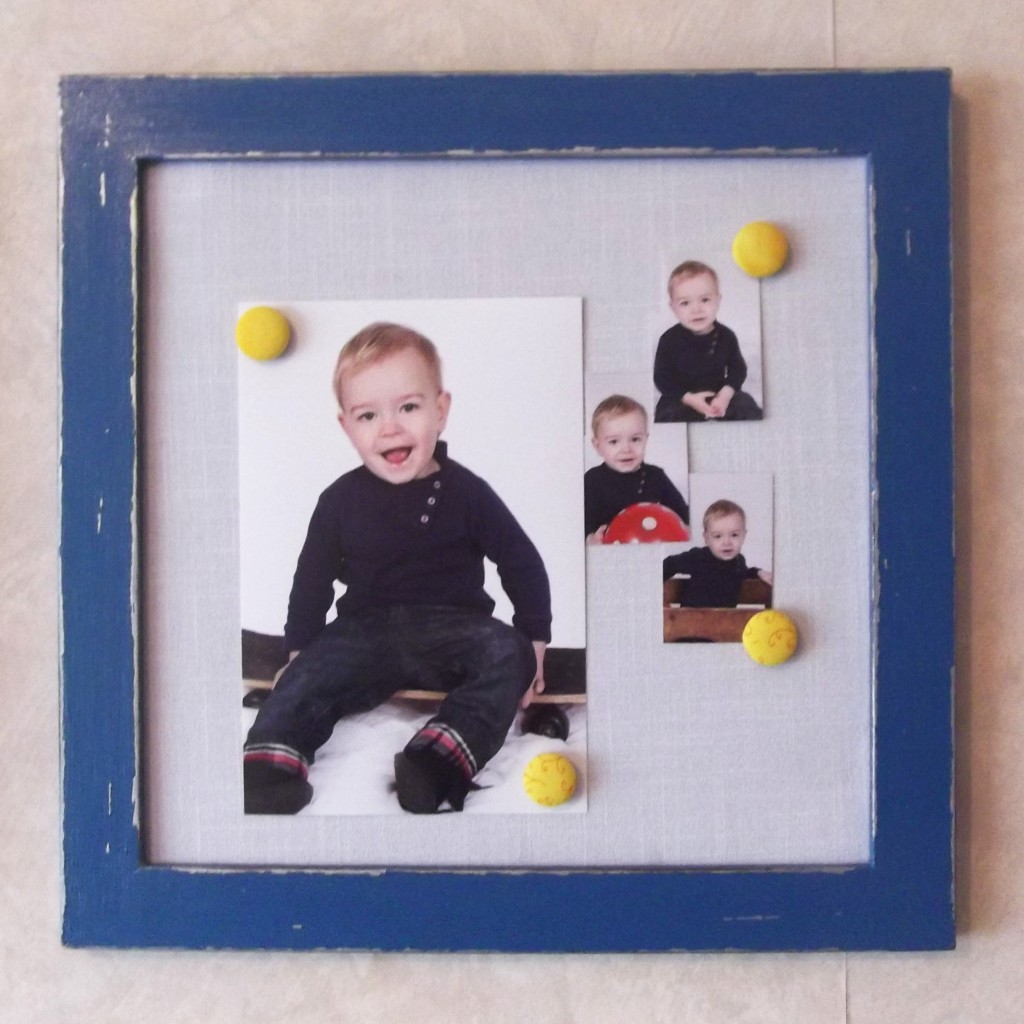
dscf1789

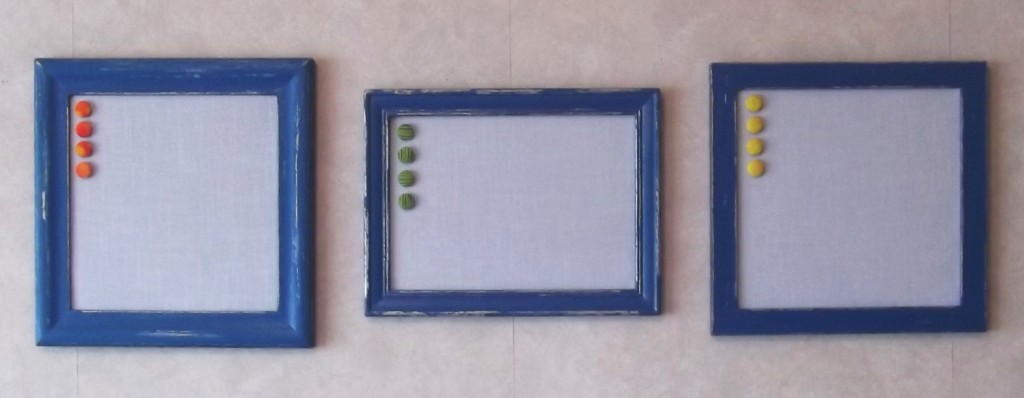
Magnetic Picture Frames are a favourite of mine.  I have seen a number of styles displayed in various people’s homes, and each time they capture my attention.  What I like most about these is that they allow you the freedom to easily update the display in a way that fits your personal style and level of creativity.  I have often looked at buying them for myself or as a gift but the price would always deter me – so recently I decided to have a go at making some myself.

Surprisingly they weren’t too hard.  I found some old frames at the second hand shop.  I liked the distressed paint effect so searched the internet for some ‘How to Guides’ and got painting. The base colour I chose was a silver and the top coat a blue.  I finished it off with a glaze that I made by watering down the sliver paint.  This gave the finished paint job a shimmery look.  Next we put the sheet metal into the frames.  We had an old filing cabinet lying around so my husband kindly cut it into pieces to fit the frames.  Because I wanted the metal to have a fabric finish to it, using a paint brush, I covered the metal pieces with PVA glue and stuck to it some white linen look fabric that I had got from the Dargaville Sewing and Curtain Centre.  Then using some little nails I fitted the metal into place along with a cardboard backing.  Lastly I covered the nails over with masking tape.  The little magnets I made out of covered buttons and a magnetic strip from Spotlight.

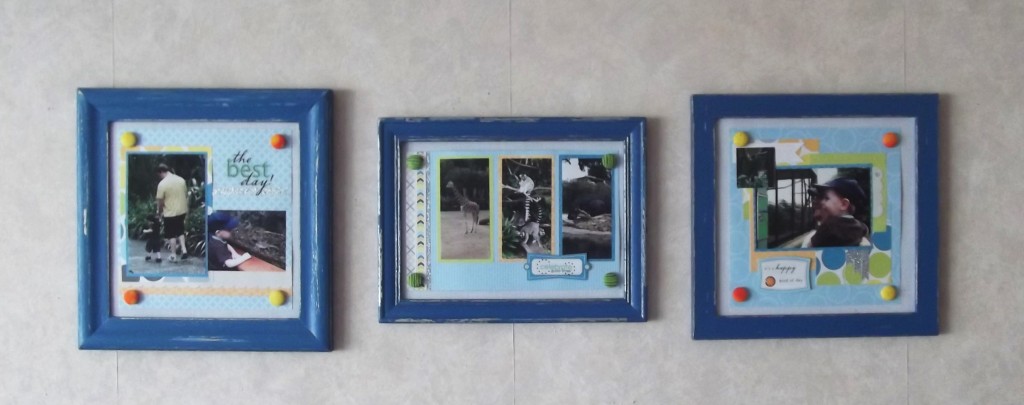
You could leave it there and give it as a gift or you could add a display of photos to give it that more personal touch.  A display could be anything from just adding a few photos like this …

Sample Display 1

 … or you if you enjoy scrapbooking it could look more like this …

Sample Display 2

… either way it looks fabulous.

If you have a go at making your own we are always excited to see the creativity of others so feel free to share in the comments section below.
Chocolate Christmas Tree Centrepiece

12 Days of Christmas Ideas – Day 7

I like table centrepieces.  They look pretty and are a simple way to decorate for a special occasion.  In fact whenever I am styling an event, one of the first things we consider are the table centrepieces.  They draw in the guest’s attention and help to set the atmosphere for the occasion, and I believe this true whether you have 20 tables at a wedding or just the one for Christmas day dinner.

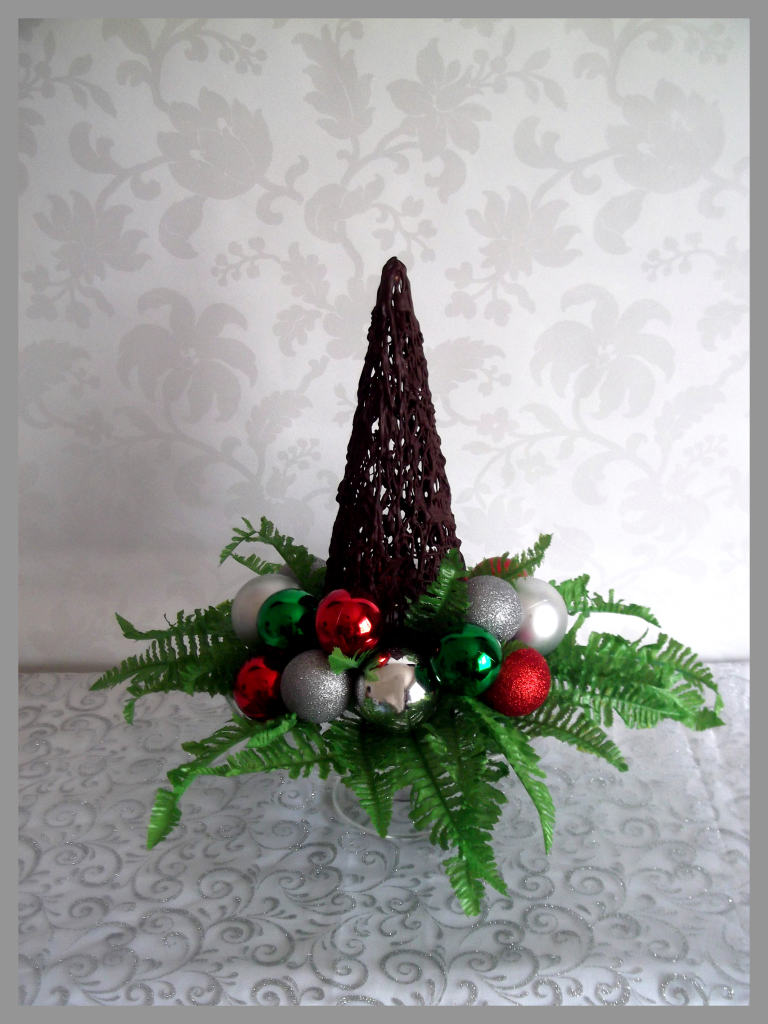
A friend mentioned today’s Christmas idea to me a few years back, but it has only been in the last few months that I decided to give it a try.  And here it is, ’The Chocolate Christmas Tree Centrepiece’.   It took me couple of tries to get this to work, but once I had the right materials it came together very quickly.

Chocolate Tree 1

The Chocolate Christmas Tree Centrepiece

How I did this was to start with a cone.  You could make one out of card or stiff paper but I just bought a polystyrene one from the craft section at The Warehouse.  I then covered the cone with baking paper, using two flat head sewing pins to hold it in place.  Then I sat it on a small ramekin so that it wouldn’t get stuck to the plate when I put the chocolate on it.  I melted the dark chocolate buttons in the microwave and allowed it to cool just enough so that I could handle it once it was in the piping bag.  Using a small round tip icing nozzle, I drizzled the chocolate all over the cone.  Once it set hard I removed the cone and gently peeled away the baking paper.  The easiest way I found to do this was by pushing a bamboo skewer into the polystyrene, then as I pulled it out I gave it a slight twist and it brought the cone out with it.

From there all that was left to do was to display the chocolate tree.  I chose to use a cake stand with some artificial greenery and Christmas tree baubles – but you could use anything you like.

If you decide to give this idea a go, I would love to see your finished product.  Either email me or leave a comment below.


My tips for working with Chocolate:

  • Your tree is less likely to collapse when you remove the cone if the chocolate has set hard.  Some chocolates seem to set harder like dark chocolate or cooking chocolate, but it is also important to consider the temperature of the room – the cooler the better.
  • When melting chocolate in the microwave, cook for short periods of time only and always at 50% power.  Stir well between each cooking time and be patient.  If you rush the process you’re likely to ruin the chocolate.

Mug Cookies in a Jar

12 Days of Christmas Ideas – Day 6

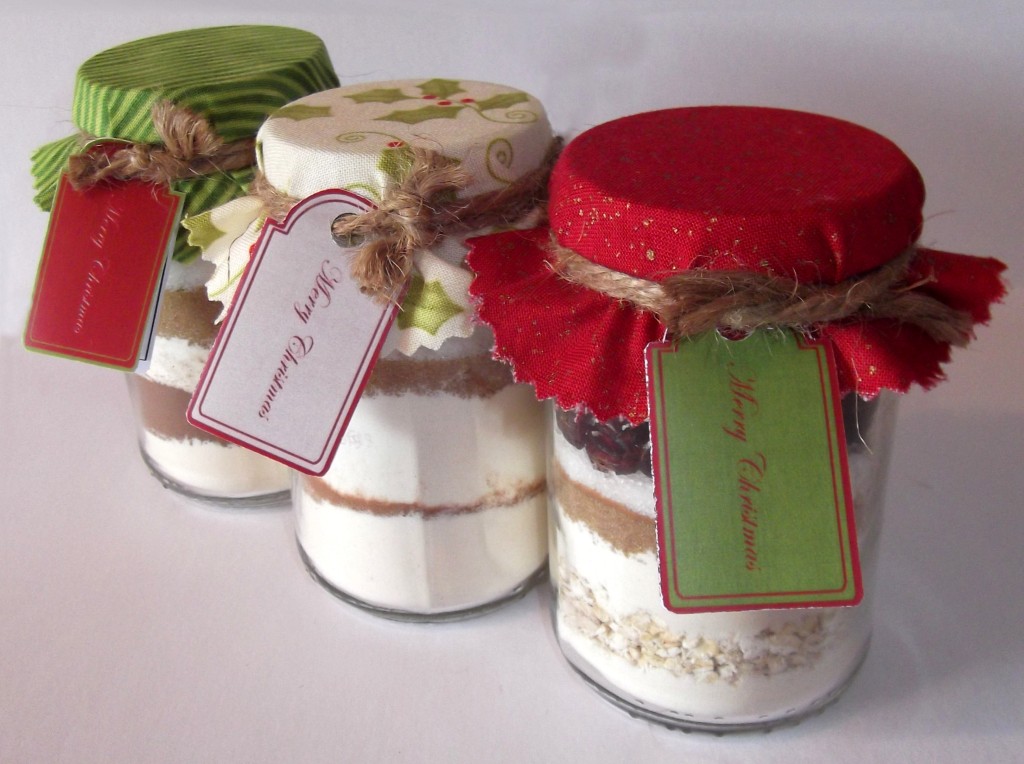
Earlier this year I was introduced to the marvellous idea of a ‘Brownie in a Mug’.  While they aren’t good for slimming the waistline, they sure do hit the spot when you’re craving something sweet and don’t have the time to bake a whole cake.   Now, as I often do when discovering a new baked item, I set out in search of the perfect recipe for this delectable dessert.  Along the way I discovered a number of recipes for cookies in a mug.  This got me to thinking – “Can I make these into mini versions of the ‘Cookies in a Jar’ idea?”  After a number of trails and the adaptation of a variety of recipes I came up with three recipes for ‘Mug Cookies in a Jar’, which is the Christmas idea I wish to share with you today.

Mug Cookies in a Jar

Mug Cookies in a Jar


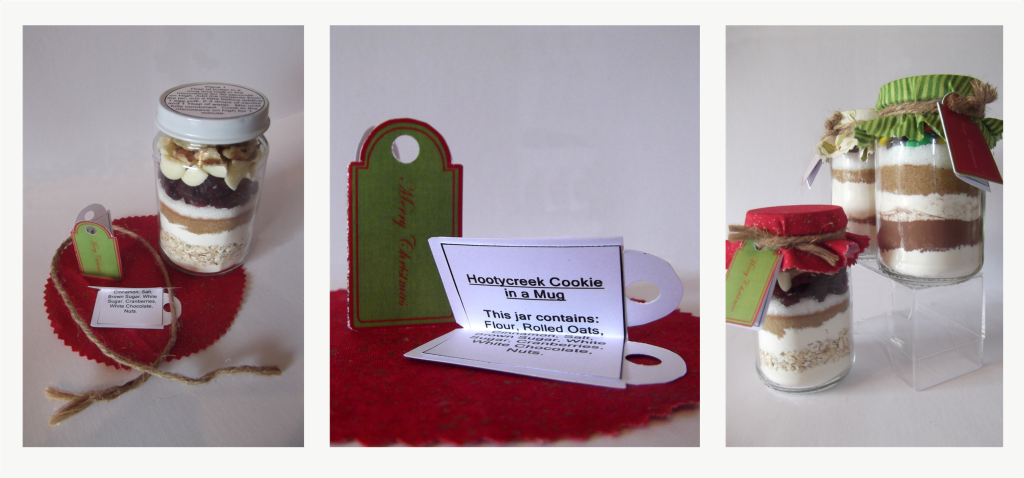
Hootycreek Cookie in a Mug

1. Layer the ingredients in a 170g jar in the order they are listed below:

  • 3 tsp of Flour
  • Pinch of Salt
  • 2 Tbsp of Rolled Oats
  • 2 tsp of Flour
  • 1 Tbsp Brown Sugar
  • 1 tsp of Cinnamon
  • 1 Tbsp of White Sugar
  • A layer of Cranberries
  • A layer of White Chocolate Chips
  • A layer of Pecan Nuts chopped.

2. Attach tag with the following instructions:

Place 1 Tbsp of butter in a mug and melt in the microwave for 30 seconds on High. Add the contents from the jar, mix a little before adding 1 egg yolk, 2-3 drops of vanilla and 1 Tbsp of water.  Mix until fully combined.  Cook in the microwave on high for 1 minute.

Rainbow Button Cookie in a Mug

1. Layer the ingredients in a 170g jar in the order they are listed below:

  •  5 tsp of Flour
  • 1 tsp of Cinnamon
  • 4 tsp of Flour
  • Pinch of Salt
  • 1 Tbsp Brown Sugar
  • 1 Tbsp of White Sugar
  • A layer of Candy Coated Chocolate buttons (e.g. M&Ms, Pebbles or Smarties)

2. Attach tag with the following instructions:

Place 1 Tbsp of butter in a mug and melt in the microwave for 30 seconds on High. Add the contents from the jar, mix a little before adding 1 egg yolk, 2-3 drops of vanilla and 1 Tbsp of water.  Mix until fully combined.  Cook in the microwave on high for 1 minute.

Sand Art Brownie in a Mug

1. Layer the ingredients in a 170g jar in the order they are listed below:

  •  4 tsp of Flour
  • 2 Tbsp of Cocoa
  • 5 tsp of Flour
  • Pinch of Salt
  • 6 tsp Brown Sugar
  • Pinch of Cinnamon
  • 3 tsp of White Sugar
  • A layer of Candy Coated Chocolate buttons (e.g. M&Ms, Pebbles or Smarties)
  • A layer of Walnuts chopped

2. Attach tag with the following instructions:

Place the contents of this jar in a mug.  Add 1/4 cup of water, 2 Tbsp of oil and 1-2 drops of vanilla.  Mix together well.  Cook in the microwave on high for 1 1/2 minutes.


I found that the best jars to use were the 170g Baby food jars.  Putting these through the dishwasher does a good job of removing the label, although sometimes there are still a few glue marks left.  I found that with a little scrub using a pot scrubber or by rubbing the marks with  Eucalyptus oil on cloth.  Pak ‘n Save sell Eucalyptus Oil in their first aid section, most pharmacies sell it too but it does tend to be more expensive.

Mug Cookies in a Jar Step-by-Step

After packing the ingredients into the jar I decorated it using a circle of fabric tied over the lid and by adding the instructions and ingredient tags.  These printable tags are available here as a free download.

Download Mug-Cookies-In-A-Jar printables

I love this idea as it can be used as a small gift on its own, as a party favour or as a unique addition to a gift basket.  I hope you like it too and have a go at making some yourself.

A Naturally Kiwi Christmas

12 Days of Christmas Ideas – Day 5

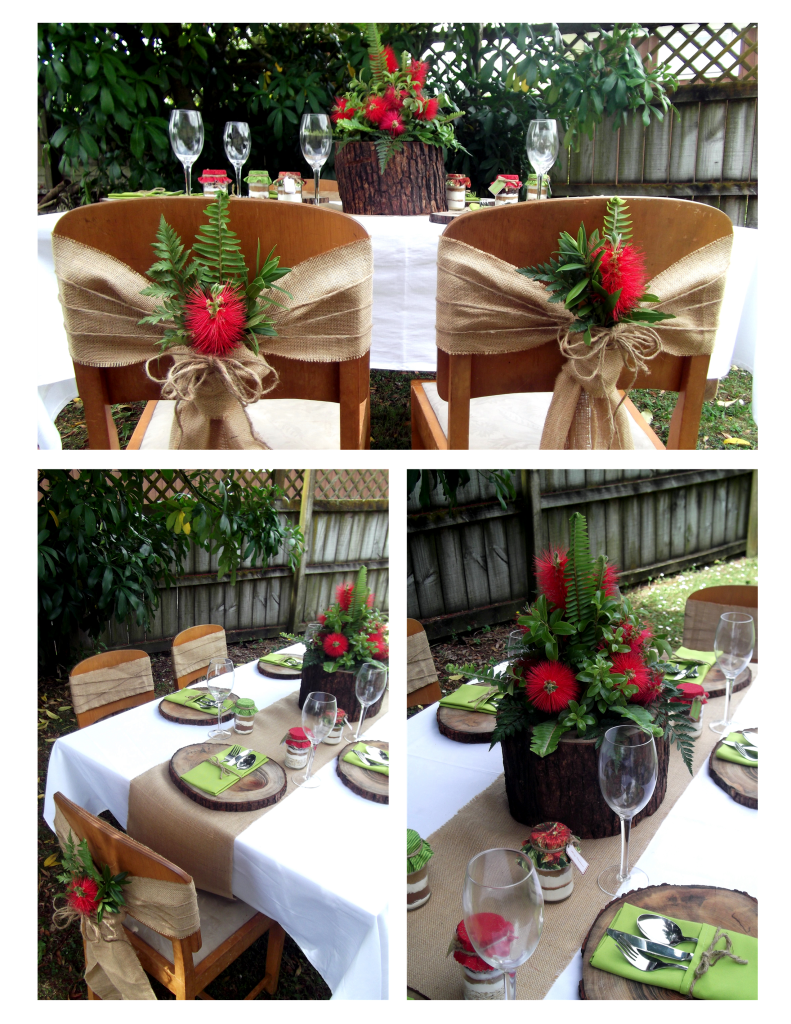
A Naturally Kiwi Christmas 1

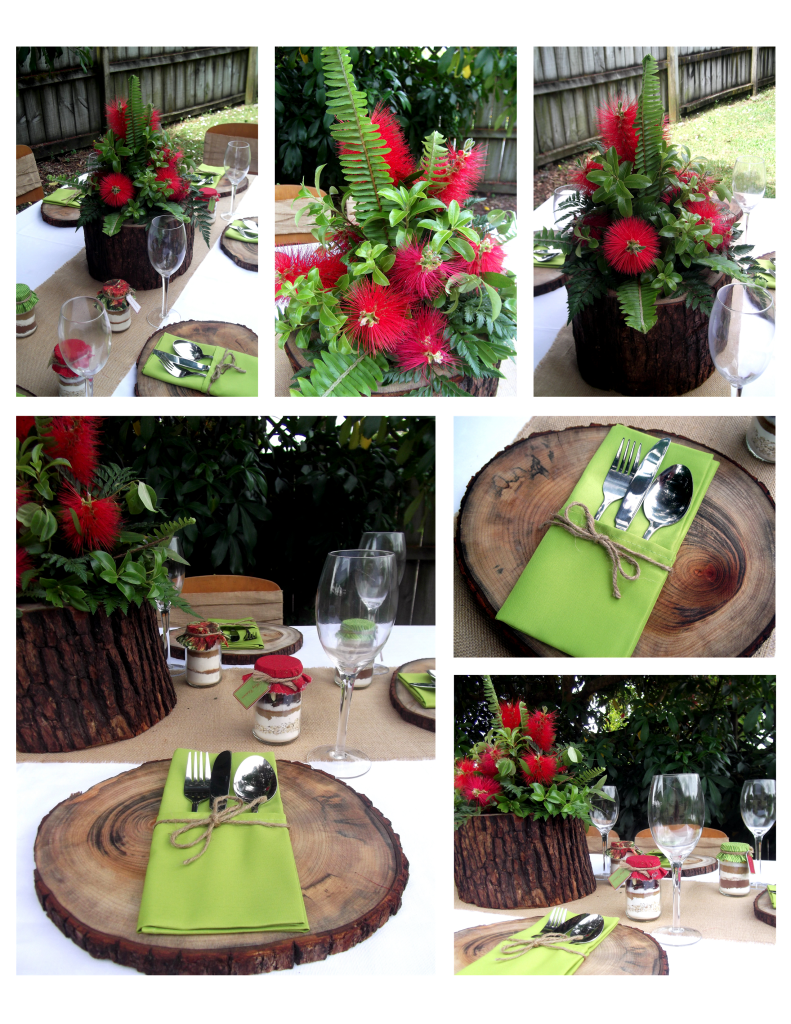
I recently had the opportunity to design and demonstrate a table setting for Christmas dinner.  I was inspired to design something that was decidedly Kiwi.  I wanted to stay true our summer time Christmas and emphasise elements of nature which I felt was consistent with our country’s clean, green image.

I started with a fresh white tablecloth and hessian table runner.  I then added the wooden placemats and centrepiece.  My father is quite the handyman so I asked him to cut cross-sections from an old log.  He then sanded these down and I oiled them with cooking oil to stop them from drying out and cracking. It was an added bonus that the oil brought out the grain in the wood.  The log we used for the centrepiece had a hole cut out of the centre.  This was big enough to fit a 2 litre milk bottle with it’s top cut off, which is what we used to arrange the flowers in. I used a variety of ferns, leafy greenery and red Bottle Brush flowers.  My intention is to use Pohutukawa flowers when I re-create the arrangement for Christmas.

A Naturally Kiwi Christmas 2

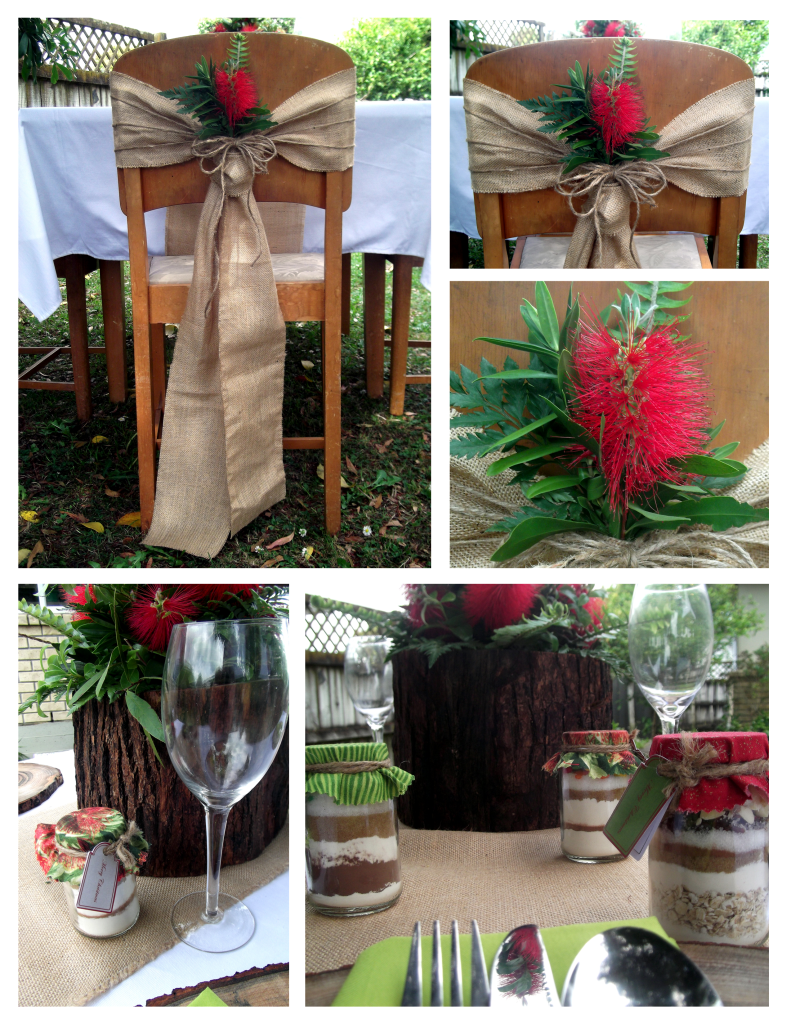
The cutlery and glassware was next placed on the table, along with sage green fabric napkins folded into a simple cutlery pouch.  Each napkin was tied with a piece of twine to finish off the look.   I wanted to make my overall design just that little more special, so I decided to decorate the chairs as well.   Any kind of chair can look great with a few decorations, even these old ones.  I cut chair sashes from the hessian and tied them around the chairs in the same way you would tie a neck tie.  I used the twine to create extra detail by wrapping it around the chair and making a bow.  I then made little arrangements with the leftover flowers and greenery from the centrepiece, and tucked them into the knot in the chair sash.

A Naturally Kiwi Christmas 3

Lastly I added my personal favourite, the favours.  I think it is always nice to add a small gift as I feel it is an extra way to show the appreciation I have for each of my guests.  The favour I used in this case was my own creation of a Mug Cookie in a Jar.  The ultimate combination of the two great ideas of Cookies in a Mug and Cookies in a Jar.  All the details on how to make these favours will feature in tomorrow’s blog.


Shopping Notes:
  • Spotlight: White Tablecloth $34.99 & Hessian $5.59 per metre
  • Dreamlands: Sage Green Napkins $14.64 for a packet of 5
  • $1, $2, $3 Store: Twine $2


Christmas Card Frame

12 Days of Christmas Ideas – Day 4

When talking about Christmas Cards I can’t help but think of my Nanna.  Such an amazing lady who for years would faithfully send Christmas cards with a newsletter tucked inside to family and friends all around the world.  As a result she would receive many in return.  I still remember going to visit her in her 2 bedroom Unit, and being amazed by how on every wall of her living room there hung a string displaying Christmas cards she had received that year.  In fact there was usually one that hung across the room too, causing us to duck our heads as we made a be-line for the antique rocking chair.

Now while I doubt I will ever get as many cards as my Nanna, I usually get a few each year which lead me to search for a simple yet creative way to display them.  Having seen a number of appealing ideas this is the one I chose to make.

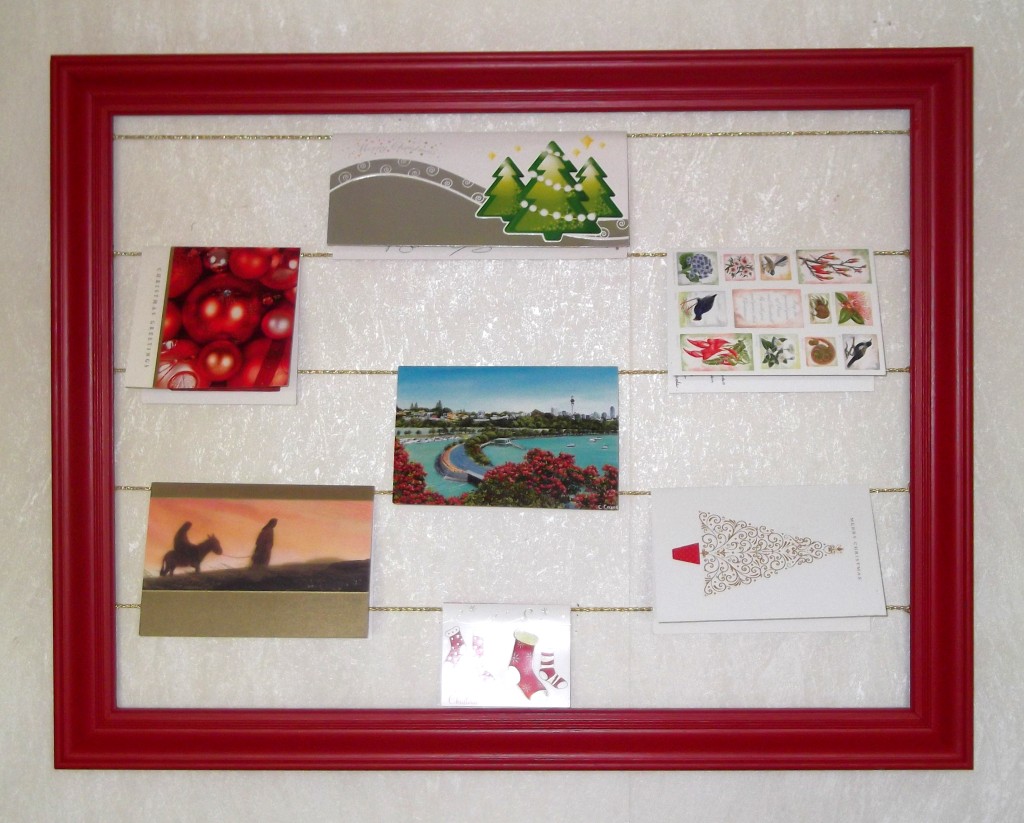
The Christmas Card Frame

The Christmas Card Frame

I liked this idea because it was simple yet effective.  It also keeps all the cards together in one space and frames them like a work of art.

It was very easy to make.  I bought a large framed picture from the second hand shop and remove the picture that was in it.  I then gave it a light sand before giving it 2-3 coats of Resene Paints’ – Red Berry.  One test pot was plenty and it only cost $4.30.

Christmas Card Frame - Step by Step

Once it had dried I measured out the points to which I attached the gold cord which I purchased from Spotlight.  To do this I put a gun staple in the frame and tied the cord to it – making sure the knot was out of sight when looking at it front on.  All that is left to do is hang it on the wall – and for that my favourite things are the Command Picture Hanging Strips.  You can get these from a variety of local stores.

Christmas Card Making Party

12 Days of Christmas Ideas – Day 3

CTMH Party

Yesterday I mentioned that I’d be sharing some party ideas, where you can get together with friends, have fun and get things done at the same time. So here is the first of two – the Christmas Card Making Party.

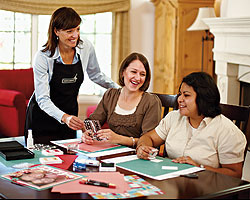
Sending out Christmas cards is lovely way to let family and friends know that you are thinking of them, and I think a handmade card is even more special.  To be honest I don’t consider myself to be good at making cards – rarely am I happy with how the finished product looks.  However, when I sit and make cards with friends the inspiration and motivation flows.  Not to mention the great conversations we have.

So why not gather a group of friends to make Christmas cards.  Inspire each other with your favourite techniques.  Organise a swap of papers or embellishments.  And chat about the things you might write in them.  Refreshments don’t need to be a big fuss – just offer a cuppa and some cookies or fruit if you want a healthier option.  Another idea could be wine and cheese – simple and no fuss.

If you like the idea but don’t know where to start then there are a couple of companies that I’d recommend.  Stampin Up and Close to My Heart both have a lovely range of paper craft supplies – their demonstrators or consultants are glad to help you learn new ways to create beautiful cards, among other things. If you would rather have a go on your own then Spotlight and the Warehouse have a good range of materials and if you need design ideas then PageMaps has a multitude of suggestions.

We’d love to see your favourite cards and hear about your party in the comments below.  Happy card making!

Planning Tips for Christmas

 12 Days of Christmas Ideas – Day 2

It is no secret that the Christmas Season can be a stressful time.  It is easy to feel overwhelmed by the many things that need to be done and inundated by the numerous Christmas and end of year functions.  Today I want to share with you some tips on how to lower your stress so you can more easily enjoy this season of celebration.

1. Write it Down

Trying to hold all the appointments and to-do-lists in your head is stressful enough in itself.  After a while they all start to jumble together and you can’t be sure if you are coming or going.  Writing it all down relieves your head from that pressure and it also removes that feeling of chaos because in the process of writing it down, what you have to do becomes clearer.

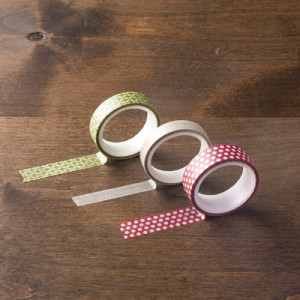
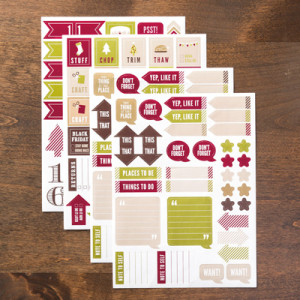
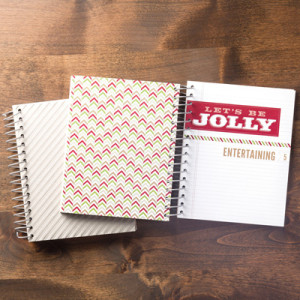
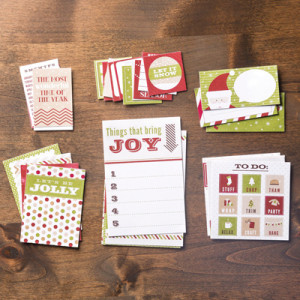
So my suggestion is grab a calendar, diary or cell phone (for those who are more tech savvy) and write in all the things you have committed your time too.  Actually if you want to have a little more fun with it I’ve seen that Stampin’ Up are selling this beautiful Journal that is already organised into planning sections and you can even purchase matching stickers and tags to make your planning more colourful.

Season Of Style Designer Washi Tape Season Of Style This And That Designer Stickers Season Of Style This And That Journal Season Of Style Designer Journaling Tags

You can keep this process of entering your time commitments simple by just including all the work and social functions you plan to attend.  Or you can go more in depth by blocking out times for set activities such as work, children’s playgroups or club meetings.  This should then give you a clearer picture of how your time is placed.  One thing I highly recommend is to plan time for rest and relaxation.  When our business is interspersed with regular times of relaxation then the feeling of being stressed is kept at bay.  Something I have also found helpful is to add an extra half hour between appointments as it means your not having to rush from one thing to the next.

The next thing to do is to write a to-do-list. This can include anything from baking to cleaning, Christmas shopping to grocery shopping, or making gifts to wrapping gifts.  This way whenever you have a gap in the calendar you can go to your list and choose something to work on.  Some of your tasks maybe time sensitive.  If that is the case then make sure you mark them accordingly.

 2. Share the Load

I was once told that we only have two hands because we are meant to ask for help when two hands just aren’t enough.  I believe that we aren’t meant to do life on our own, and being that Christmas is supposed to be a time of togetherness what better time than now to join with our family and friends to get things done.  If you’re living with others divide the chores among yourselves.  Delegate out certain jobs to family members – it might not get done exactly how you would have done it, but that’s okay, at least it is done.  If you have a big gathering of the extended family for Christmas dinner ask different family members to bring a particular dish or beverage.  Another favourite thing of mine to do is to work with others to get the job done.  I often find that working on a task with others makes that task so much more motivating and enjoyable.  In fact over the next few days I’ll be sharing some great Christmas party ideas that will do just that.

3. De-clutter

Lastly, I read an article a few years back about how clutter in our environment can cause stress.  So take a moment to consider the surroundings in your home. If there is too much stuff, pack it up and put it in the garage or under the bed – you can sort it out in the new year.  Now if it’s people that are cluttering your house this isn’t an option.  In this case I suggest that you plan outings or activities to engage them.  If some of these people are out of town family or friends who have come to stay you might like to consider arranging alternative accommodation nearby.  By doing this you are at least bringing some order to the chaos of people who have nothing to do.


This may seem like a daunting process but if you sit down now and spend a few hours planning, it will make the next month so much easier and you’ll be able to enjoy the holiday season with much less stress.