The Ultimate Guide to Creating Stunning Lolly Buffets

The Ultimate Guide to Stunning Lolly Buffets

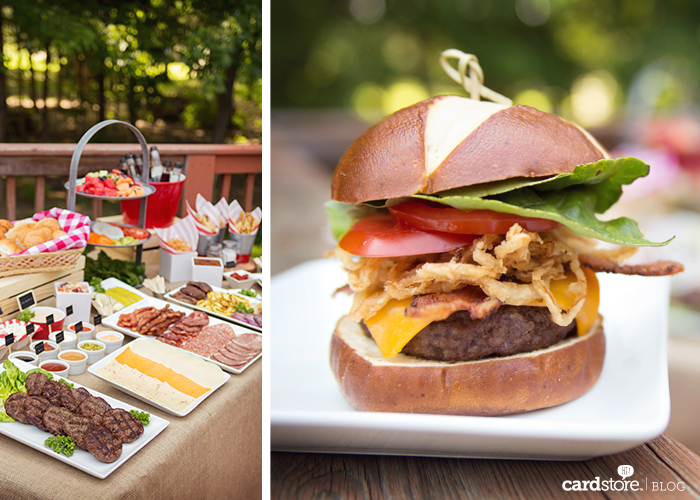
Who doesn’t enjoy a sweet treat every now and then? To be honest, I probably enjoy them way more than ‘every now and then’, and when I’m faced with a stunningly put together Lolly Buffet (or Candy Buffet – depending on where you are from) the likelihood of me resisting is even smaller. But I love Lolly Buffets for more than just the sweet treats – when put together well they add to the décor of the occasion; if you’re only serving a light dessert option they help add to this part of the menu; they make for a fun and interactive party favour option; and lastly, they create an awe and wonder that brings out the inner child from even the oldest of guests.

Lolly buffet in gold mint and white

But what does it mean to put a Lolly Buffet together well? What is it that makes the difference between throwing some bowls full of lollies on a table, and creating that space which inspires awe and wonder in your guests? Really it comes down to following certain steps. Steps which I’m sharing with you here today.

Before you do anything else you need to ask yourself a few questions. How many guests are you catering for? This will determine the quantity of sweets you will need. What is your colour scheme? This will help guide your sweet selection and overall design. What style are you going for? Rustic, Boho Chic, Classic, Elegant, Modern etc. And do you wish to add any design elements? These are things like glitter, crystals, and specific patterns etc. This will also help guide your overall design.

Once you have this sorted, it’s time to go sweet shopping. I suggest breaking your sweet search down into 3 categories.
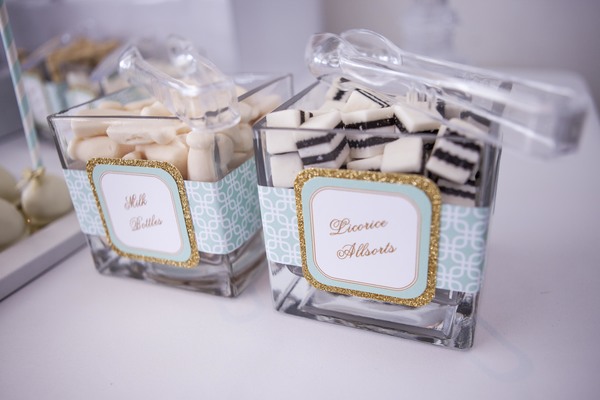
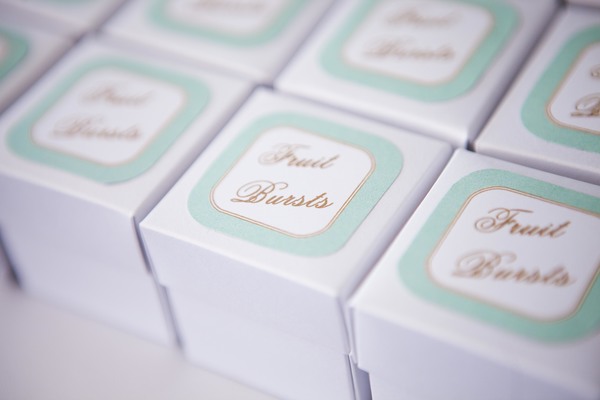
Bulk Lollies:

These are the kinds that are usually sold by the packet e.g. M&Ms, Jellybeans, Milk Bottles, Liquorice Allsorts, Marshmallows, Chocolate Éclairs, Fruit Bursts etc. Quantity wise, I would recommend buying around 100g – 150g per person of this type of lollies.
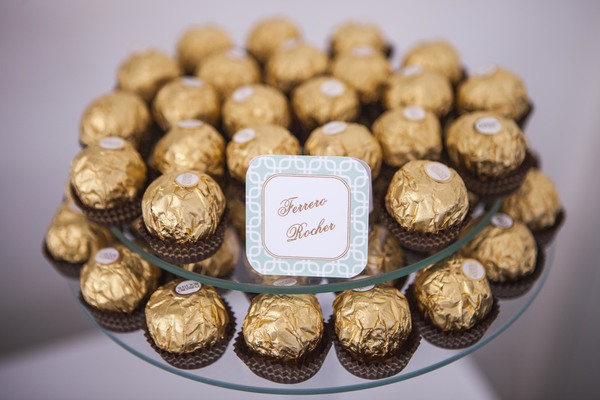
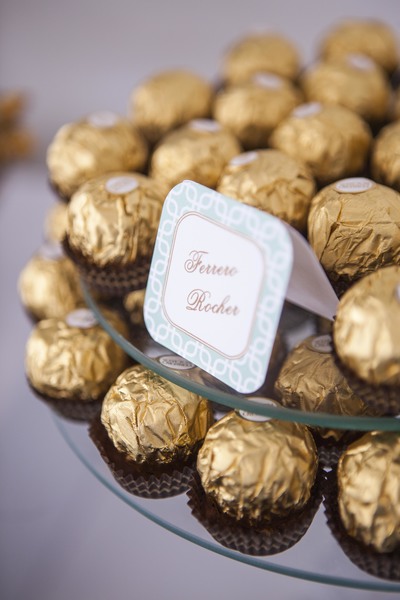
Lolly buffet in gold mint and white - bulk lollies
Lolly Buffet, in gold mint and white - bulk lollies
Designer Sweets:

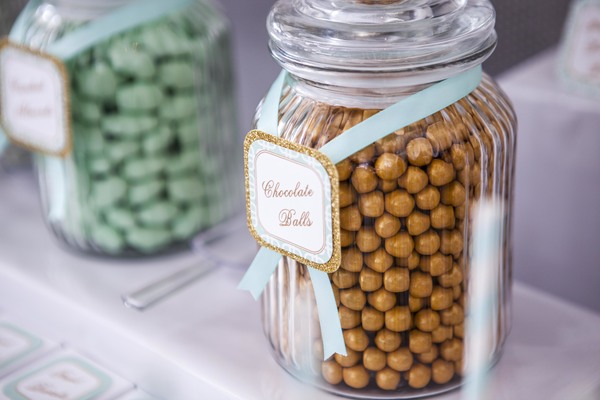
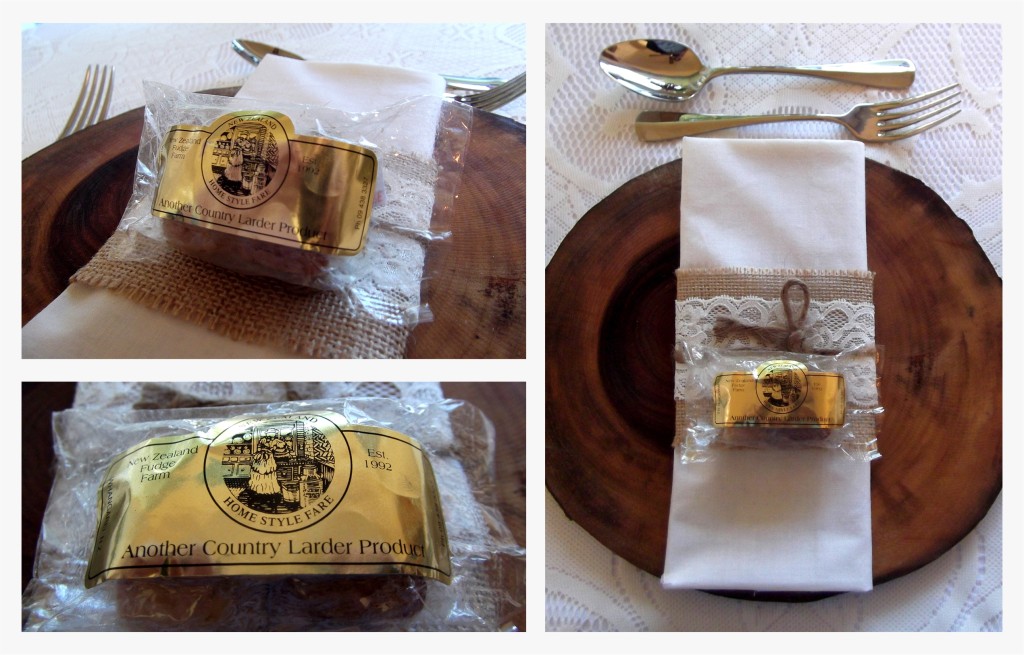
These are more likely to be sold individually or in smaller amounts. They tend to cost a little more and look rather fancy. Examples of these are Ferrero Rocher, truffles, handmade fudges etc. Of course, if you are keen, you can always have a go at making some of these yourself. Quantity wise, aim for one piece per person – give or take a few.
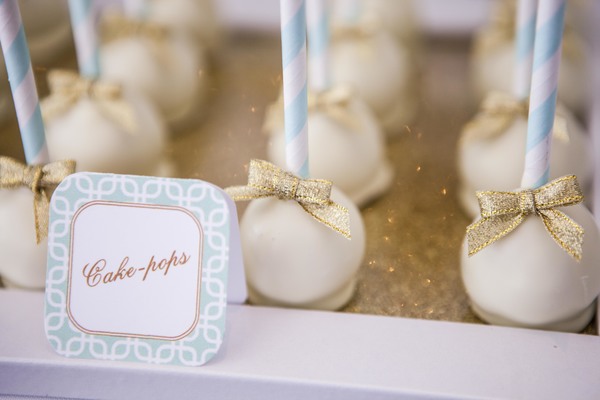
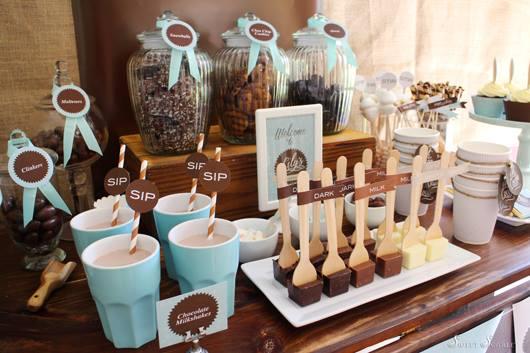
Lolly buffet, in gold mint and white - designer sweets
Display Sweets:

These can be anything you like really – it is all in the way they are packaged to match the theme. Some examples are cake-pops, Hershey’s chocolate bars, and mini bags of candyfloss. I would also be inclined to include those swirly lollipops and rock candy-pops in this category. Quantity wise, whatever you like. These are mostly used to fill in spaces on the buffet table and make it look more decorative.

Lolly buffet in gold mint and white - display sweets cakepops
More Shopping Hints:

Whatever sweets you choose make sure they fit in with your colour scheme – this contributes to your overall design. Also if you have favourite lollies that don’t work in with the scheme, don’t despair, consider packaging them so they do match.

Lolly buffet, in gold mint and white - bulk candy repackaged to match the theme

Lastly, shopping at your local supermarket or at the nearest Warehouse can be a little frustrating when you are looking for specific colours – so I recommend shopping with online lolly shops such as Crazy Candies, LollyShop and Hey Hey Candy. These companies are all based in New Zealand and they organise most of their lollies by colour.

Lolly buffet in gold mint and white - apothacary jars

Now that you have purchased all the sweets it is time to design the layout of the buffet table. Let’s break this down into 3 parts also.
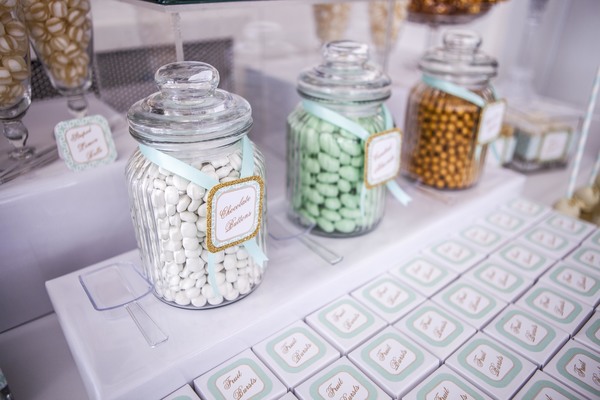
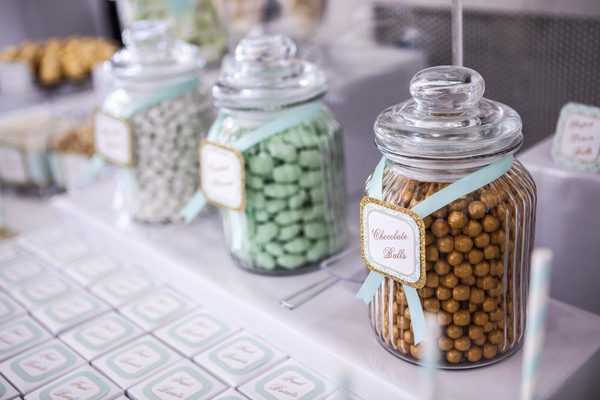
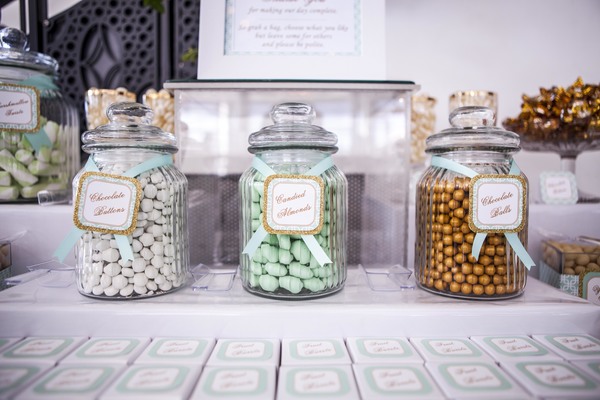
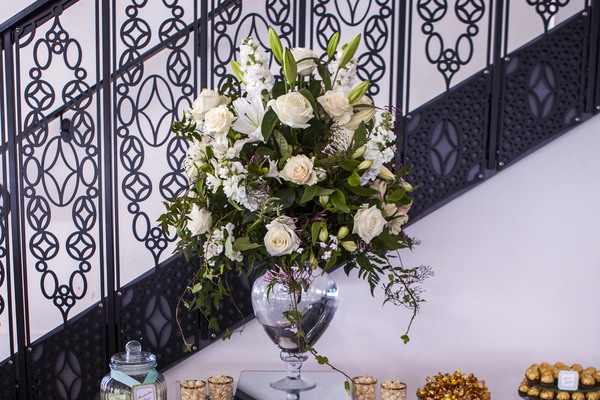
The Vessels:

While the fancy apothecary jars with their curvy lids look lovely, you certainly can still achieve great results without them. Hunt around to find a selection of jars, vases, glasses, trays etc. that will work with your selection of sweets and overall design. Mason jars and jam jars would work perfectly for an occasion with rustic design elements. Crystal bowls, cake stands and cut glass vases from Nana’s china cabinet or the second-hand store would work beautifully for a more elegant, classic themed. These day most hire companies stock a variety of lolly vessels too. You will also need to find scoops, spoons or tongs for the handling of the lollies. And last but not least the little lolly bags or favour boxes for your guests to fill.

Lolly buffet in gold mint and white - apothacary jars
Here’s a few extra tips for filling your vessels:
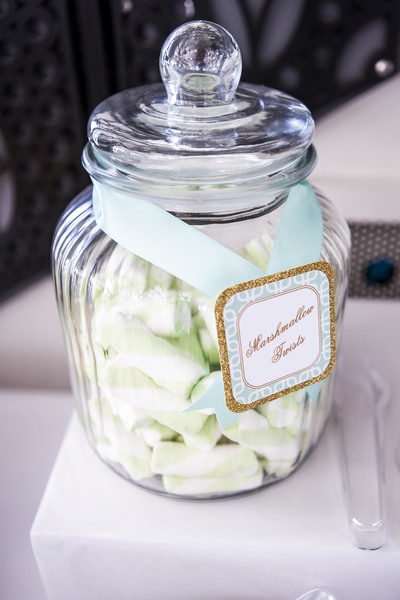
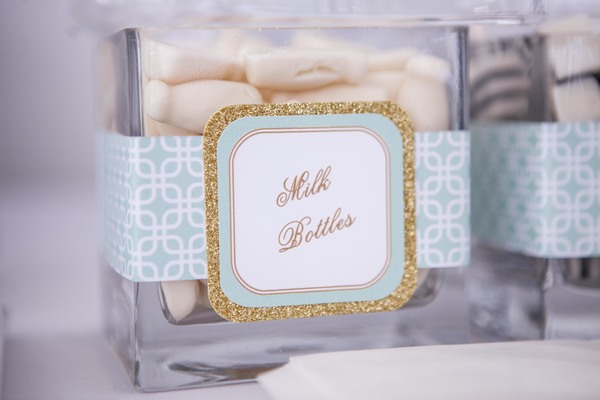
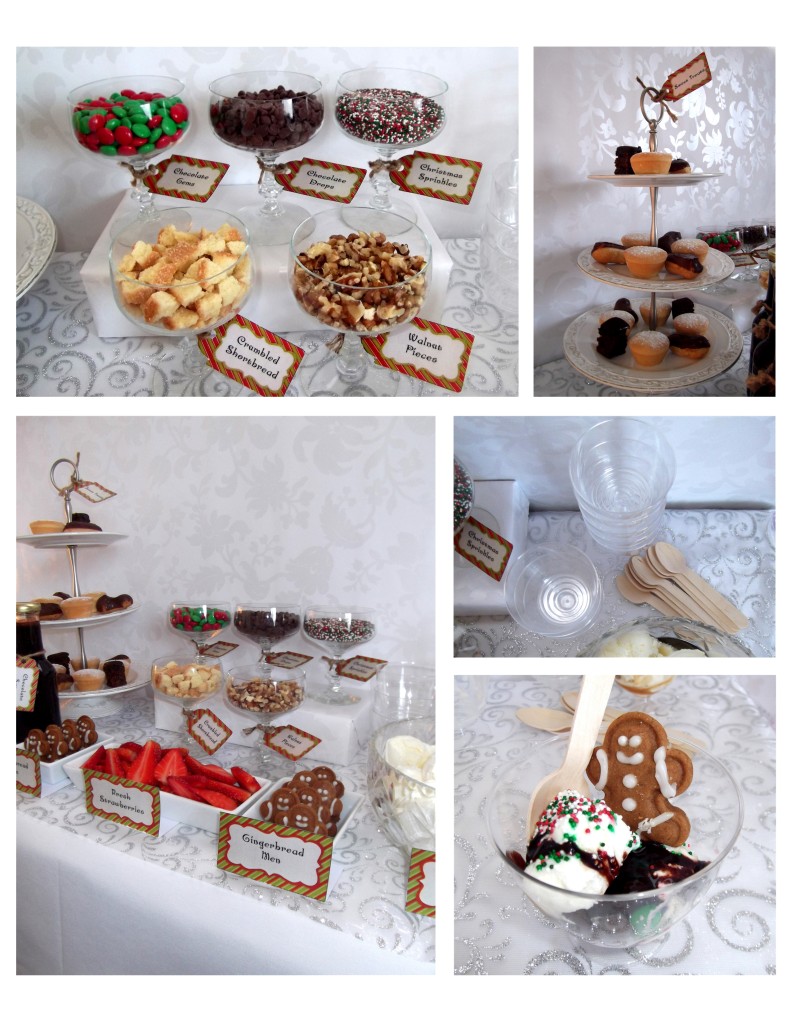
  • Put your larger bulk lollies, like marshmallows, into your bigger containers.
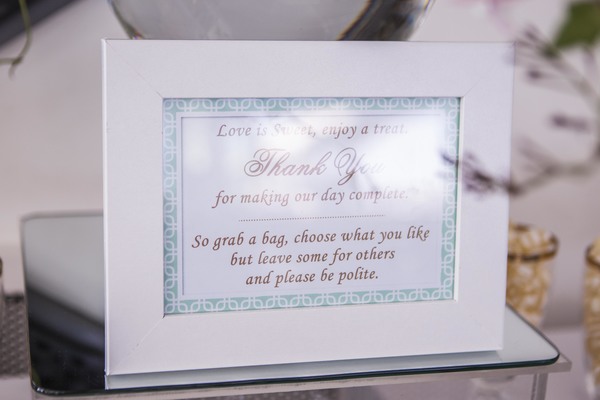
  • Show off your designer sweets by using trays or cake stands. We used photo frames with paper in them that matched our theme.
  • If the containers look too empty once you’ve put the lollies in, you can place an upside-down cup in it first to take up some of the space in the container.
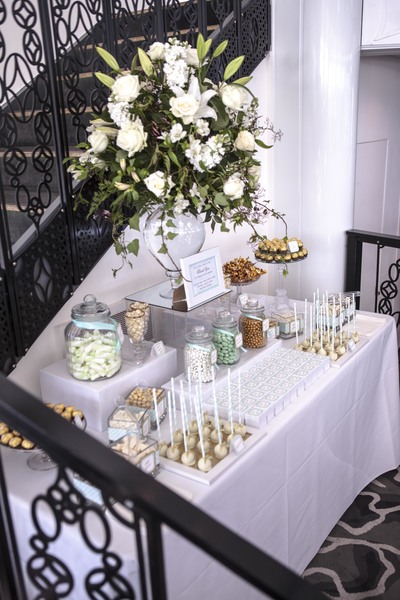
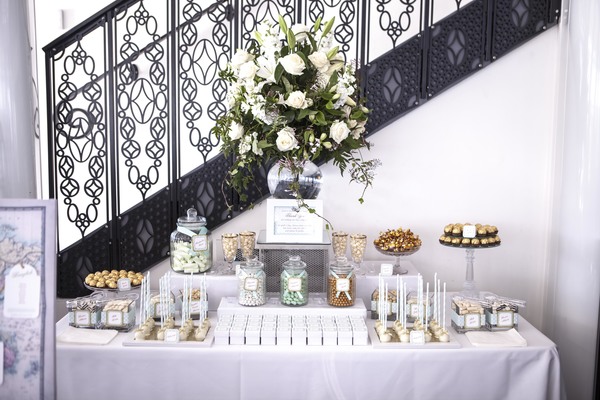
Lolly buffet in gold mint and white - apothacary jars
The Placement:

The two words to remember here are levels and symmetry. When you look at the layout of your buffet table you should see 3 obvious height levels – flat (at the front of the table), medium (around the middle of the table), and tall (towards the back of the table). This can be achieved with the size of the vessels but tends to look even better when you use risers (boxes covered in paper or painted to match the theme). Symmetry is basically trying to have the right-hand side of the table mirror the left-hand side of the table.  Just keep in mind that this isn’t an exact science – if you have a play with these aspects before hand you will generally find a balance that works.
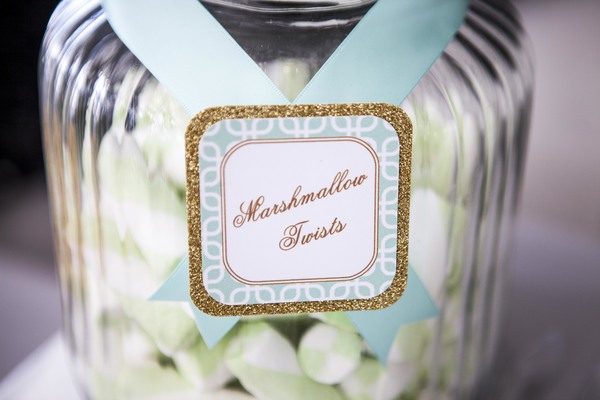
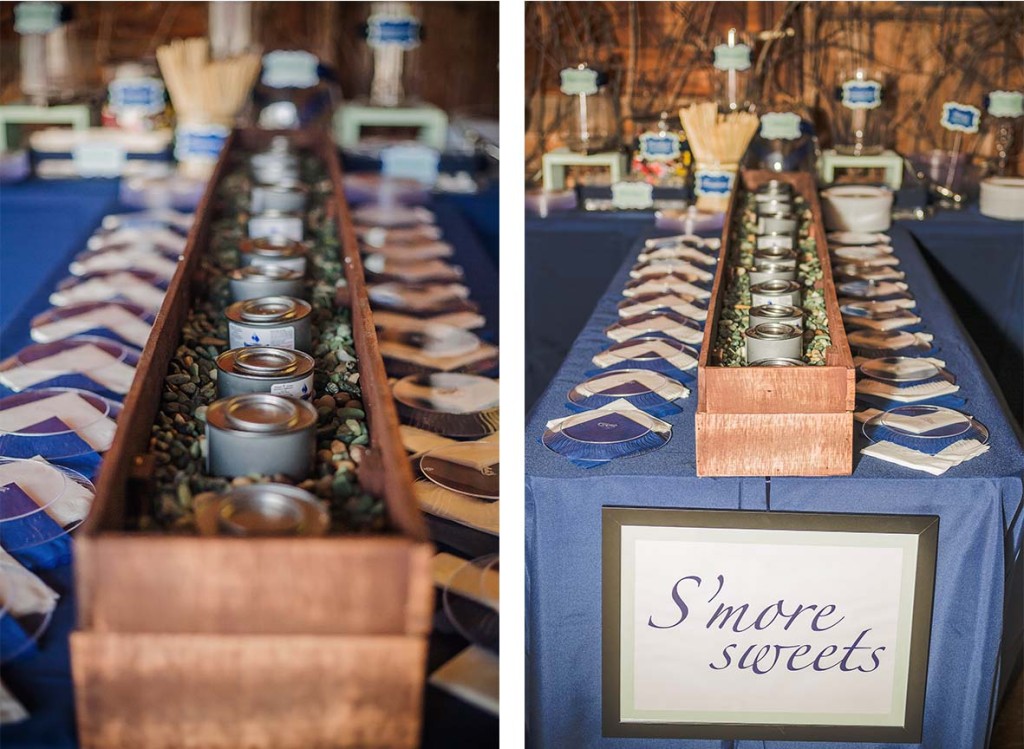
Lolly Buffet in gold mint and white - buffet layout
Lolly buffet in gold mint and white - buffet centrepiece
The Printables:

You can do everything mentioned thus far and have a nice Lolly Buffet, but I believe it is this step that will make it truly stunning. Whether you design the printables yourself or buy them it doesn’t really matter. The main thing is that they pull together your overall design, which includes your colour scheme, design elements and style.

Lolly buffet in gold mint and white - printable swing tags

Lolly buffet in gold mint and white - printable tent cards

Lolly buffet in gold mint and white - printable wrap and flat label

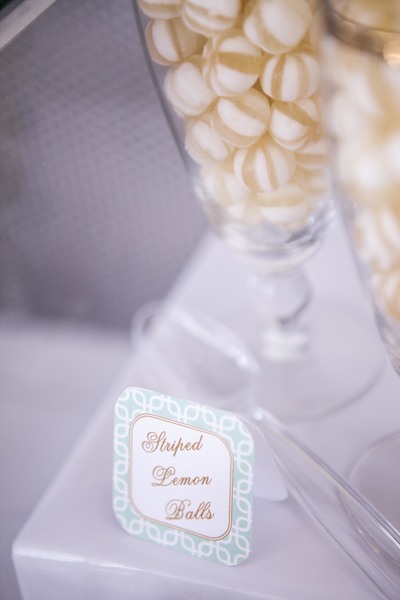
Oh and don’t forget the signage informing your guests of how to use this enchanting space. This will further enhance your guests’ experience.

Lolly buffet in gold mint and white - printable signage


I hope this guide sets you well on your way to creating your own stunning Lolly Buffet. Of course if you wish to have the pleasure of enjoying one of these without all the hard work you can always get in touch with us. As always, feel free to like and share this post with your friends.

Sign off


© 2015 As You Wish Events Ltd.  Want to use this article in your E-newsletter, blog, or website? You can as long as you include this complete statement: Auckland, New Zealand – Event Planner & Designer Nadine Crozier publishes the ‘As You Wish Events’ blog filled with secrets, tips and how-tos for planning your fabulous event. Get your exclusive inspiration, tips and tricks at http://www.asyouwish.co.nz.  As You Wish Events is an event planning and design company based in Auckland, serving the Auckland region and certain areas of Northland.


The Cheat’s Iced Cookie

The Cheat's Iced Cookie - Title Image

I love having Iced Cookies on the party menu. They always look colourful and fun, and they decorate the food table too. For my son’s recent Space Rocket party we absolutely had to have iced rocket shaped cookies and they most definitely had to match the rest of the party’s design. I really didn’t have the time or patience to make them myself, nor did I want to spend the money to have them professionally made (last time I got a quote for a detailed iced cookie it was around $12 each – I love cookies, but I don’t love them that much!). So when I came across this idea, I was pretty keen to give it a go. So armed with my computer, a few graphics skills and a recommendation from a couple of friends for a company called Photocake, I was off on a mission.

I started out by purchasing a rocket shaped cookie cutter from Kiwi Cakes and then created my rocket image to fit the cutter. This took a little bit of trial and error – having to print it out a few times to see if it would match, but I got there without too much fuss. Then I tiled multiple copies of my rocket onto a page that matched the measurements listed for the size project that I wanted to use on the Photocake website (this was an A3 Landscape Edible Image). I followed the remaining instructions to complete the order – pretty straight forward.  They then printed my images onto a thin layer of fondant like icing and couriered it to me.

A couple of things I need to mention here are that Photocake only prints what you upload and submit – so if you get your sizing or positioning wrong it’s not their fault. Also every printer and computer screen has some variances in colour so be prepared for the fact that the printed icing image may vary slightly from your screen. And lastly due to copyright laws you must own the rights or have permission to upload your chosen image.

Edible Image on arrival

You can see I added a few other images to my page which I used as cupcake toppers.


The edible icing image arrived in good time and was very well packed. Overall I was super impressed with Photocake’s service.

Then it was baking time. Once the rocket shaped cookies were cooked and cooled I used the cookie cutter to cut out the rockets from the icing sheet.

Cutting out the rocket ships

I then brushed the cookie with a little water before placing the icing on top of it so that the icing would stick. And it was done!

Finished iced rocket cookies

All that was left to do was to serve and then eat them.

Rocket cookies on display

If you decide to have a go at making your own iced cookies the cheat’s way, we’d love to hear from you. Either send us an email or tell us about it on our Facebook page.


Sign off


© 2015 As You Wish Events Ltd.  Want to use this article in your E-newsletter, blog, or website? You can as long as you include this complete statement: Auckland, New Zealand – Event Planner & Designer Nadine Crozier publishes the ‘As You Wish Events’ blog filled with secrets, tips and how-tos for planning your fabulous event. Get your exclusive inspiration, tips and tricks at http://www.asyouwish.co.nz.  As You Wish Events is an event planning and design company based in Auckland, serving the Auckland region and certain areas of Northland.


What Should I Do With My Wedding Bouquet?

I love flowers – I feel that they bring an element of life and beauty to any setting. And it’s no surprise that one of these settings are weddings.  Whether you choose to have flowers in your décor or not, most brides will always choose to have flowers for the bridal party. Now it’s not everyday that you walk around with a bouquet of flowers in your hands, so it’s only natural that some brides will forget them and others will feel awkward holding them. So what are you supposed to do with your bouquet? Is there a right way to hold it? Where should you put it when you need your hands for something else? And at the end of the day what do you do with it then? These are just some of the questions I’ll answer today.

So your planning is complete and your wedding day has arrived. In your planning you will have determined how the bouquets are going to get to you on your wedding day – so you will either have arranged delivery with the florist or organised with your wedding planner or trustworthy friend to collect them for you. Make sure that you have your bouquets onsite with you at least 2 hours before you are due to leave for the ceremony, so that your photographer can capture some beautiful detail shots just like the one above. Also if you are having some pre-ceremony photos with your bridesmaids and parents make sure you are holding your bouquets for these too.

With all you pre-ceremony photos complete it is now time to leave for the ceremony. Remember to take your flowers with you. This may seem a little obvious but in all the excitement it is easy to forget something, and believe me it does happen. If you are worried you’re going to forget, ask a couple of people to specifically remind you (maybe even set an alarm on their phone as a backup).

You have now arrived at your ceremony venue and excitement is building as you prepare to walk down the aisle. You and your bridesmaids are all holding your bouquets – but are you holding them correctly? Yes, there is a correct way to hold your flowers. You should have a steady grip with both hands, holding the bouquet just below your waistline. But do keep your arms slightly bent, as this will reveal the curve of your waist. Of course two hands isn’t really an option if you are being escorted down the aisle, but you can still hold your bouquet in this position with one hand.

The main reason for holding the flowers lower, is so that you don’t hide the details on the bodice of your dress. But I also think it causes you to have better posture when you’re not all hunched over your bouquet of flowers and this will mean that all the photos taken of you walking down the aisle will be far more flattering.

Having walked down the aisle you now stand before the love of your life. The celebrant asks you to face each other and hold hands for the exchanging of the vows and rings. You now need your hands free from your flowers, so you simply turn to your Maid of Honour and gracefully hand her your bouquet. When it comes time to sign the register, she will need to give them back to you, so that you can take them with you and place them on the signing table while you and your groom sign. Assuming your Maid of Honour and Bestman are signing as your witnesses, she can do the same thing when they sign. By doing this you are naturally creating a more beautiful photo opportunity.

seancraig photography

Photo credit: seancraig photography

As you leave the ceremony for photos, again remember to take your bouquet with you. Incorporating your flowers into your wedding photos can turn a nice wedding photo into a stunning wedding photo. I see a lot of wedding photos, and when the bouquets are left out it often feels like the photo is unfinished. The cost of flowers and photography often represents a large portion of the wedding budget so it only makes sense that you get the most out of them.

Its party time! The MC has announced your arrival and you enter the reception ready to celebrate with your family and friends. And yes, you are still carrying your bouquet. As you are seated you look for somewhere to put your flowers. Again this is a great opportunity to make the most of your bouquets. I suggest placing the bouquets either along the front of the bridal/head table in a way that works in with the table decorations or place them on the cake or gift tables.

Later in the evening you might choose to throw your bouquet – this is something you should decide on during the wedding planning process. Some brides who wish to keep their bouquet, but still want to throw one will either throw one of the bridesmaid’s or have an extra one made up especially.

The Ruche Blog

Photo credit: The Ruche Blog

Now that your wedding day has come to end you can say farewell to your bouquet, however many brides choose to keep them. There are many lovely ways to preserve and display your wedding flowers. You can see some of these on one of our boards on Pinterest.

I hope that by having read this you can now feel confident that you know exactly what to do with your wedding bouquet.

Sign off


© 2015 As You Wish Events Ltd.  Want to use this article in your E-newsletter, blog, or website? You can as long as you include this complete statement: Auckland, New Zealand – Event Planner & Designer Nadine Crozier publishes the ‘As You Wish Events’ blog filled with secrets, tips and how-tos for planning your fabulous event. Get your exclusive inspiration, tips and tricks at http://www.asyouwish.co.nz.  As You Wish Events is an event planning and design company based in Auckland, serving the Auckland region and certain areas of Northland.


How to Avoid Giving the Worst Wedding Speech Ever

Speeches

Photo by thephotographer.co.nz

You can imagine that being in the profession that I am in, I have listened to many wedding speeches. Most have tugged on the heart strings, brought smiles to the faces of the guests and tears of joy to their eyes. But then there are those that will forever be remember for all the wrong reasons. These are the kind that simply make you want to hide under your chair or take that unnecessary trip to the bathroom. So today I’m going to share 3 keys on how to avoid giving the worst wedding speech ever.

1.  Keep it about the bride and groom. Wedding speeches are supposed to be short. 2 – 3 minutes at the most. Any longer and everyone’s eyes start to glaze over, they start checking their watches or (my pet-peev) destroying the centrepieces. So think carefully about what you are wanting to say. Cull out all the long winded back stories and your unnecessary personal opinions so you have plenty of time to get to the point, which is to honour the bride & groom and their parents. After all if it wasn’t for all of them, you wouldn’t be there.

2.  Humour is tricky. If you are going to tell a funny story about the bride or groom, please, please, please make sure other people will find it funny too. Test it out on some family and friends who are going to be brutally honest with you. It is better you hear it from them, than face an awkward silence from 100 or so guests. If you do tell a story that is proven to be funny I recommend at the end of it, draw it to some conclusion that compliments the bride or groom for their good character. This helps bring the mood back from embarrassing to warm and fuzzy.

3. Write it down. I can not stress this point enough. So many people think, “Nah, it’ll be right” and then they get up to give the speech and they bomb out big time. I can all most guarantee, whether you are an experience speech-maker or not, when you get up there the nerves will get you and your mind will go blank. At least if you write it down (and practice it too before the wedding day) you can read what is on your paper. To be honest I have no problem with people reading their wedding speeches, it is far better than the alternative.

So there you have it 3 things that will keep you from giving the worst wedding speech ever.

Sign off


© 2015 As You Wish Events Ltd.  Want to use this article in your E-newsletter, blog, or website? You can as long as you include this complete statement: Auckland, New Zealand – Event Planner & Designer Nadine Crozier publishes the ‘As You Wish Events’ blog filled with secrets, tips and how-tos for planning your fabulous event. Get your exclusive inspiration, tips and tricks at http://www.asyouwish.co.nz.  As You Wish Events is an event planning and design company based in Auckland, serving the Auckland region and certain areas of Northland.


The Planning Diary

12 Days of Christmas 2014 – Day 11

02 – Sarita L3
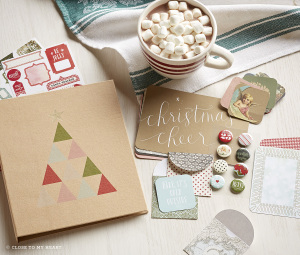
When it comes to reducing stress around a busy event filled time of year, pre-planning is the number one key. Another key is to write everything down – that way you are reducing the strain on your brain that comes from trying to remember all the things you are supposed to do.  This year I thought I should take my own advice and write all my Christmas planning down, and to do this I found this beautiful Christmas diary from Close to My Heart.

Their Christmas Crush Album has 15 beautifully designed pages, including a few little plastic sleeves to slide in notes, photos or whatever else takes your fancy.  My plan is to write into it all our advent activities; other appointments; Christmas décor plans; shopping lists; to-do-lists; travel plans; menus; recipes and photos.  Then at the end of the season I’ll also have a lovely keepsake.

However you decide to plan for this Christmas I hope it frees you up to enjoy the season even more and if you’re interested in purchasing your own folder like this one then click through to Close to My Heart and order online.  If you want to see how I get on with putting mine together, connect with us on Facebook as I’ll be adding the occasional update.

Sign off


The Cupcake Dome

12 Days of Christmas Ideas 2014 – Day 10


Cupcake dome
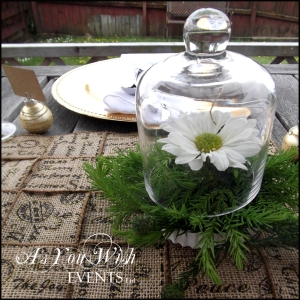
Here is a little gift idea to add to this season’s collection.  These cute Cupcake Domes are perfect for party favours and those small thank you gifts we like to give at Christmas time.  Despite what the name suggests they are surprisingly versatile – they can be used for much more than just cupcakes.
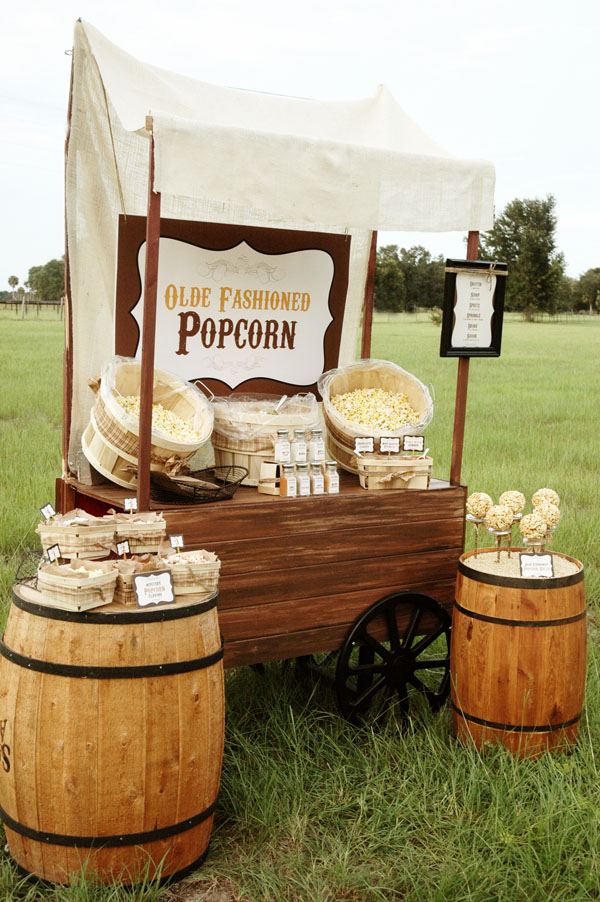
Pictured here, we have used them as a container for a small flower arrangement.  Some other things I’ve seen them used for are as follows:

  • Stacks of homemade sweets, such as fudge, rum balls & truffles.
  • You could even do chocolate coated strawberries.
  •  Or creating scenes like in a snow globe, using small figurines or other ornaments.


If you are interested in adding some of these to your Christmas shopping list, you can pop in and see Beryl at Covers Decoration Hire in New Lynn (they have these in their retail section) or contact us and we can help you find some.

Sign off


5 Creative DIY Food Stations

There is no doubt that DIY food stations have become a hugely popular choice for special occasions around the globe.  I must say I’m in love with this idea – to the point that if I’d thought of it 10 years ago our wedding would have most likely featured some of the ideas below.   Why are the so popular?  I think it comes down to three things:  1) They allow simple favourites that are generally easy to make and inexpensive, to be served at even the fanciest of occasions.  2)  The way they are presented intrigues people, it doesn’t matter who you are. 3) It’s food that entertains, giving guests a shared experience as well as a full belly.

So without further ado here are 5 Creative DIY Food Stations that have caught my attention.

1.  The Popcorn Bar
The Rustic Popcorn Bar

It is all in the presentation.

As seen on: Pen N’ Paper

2.  Ice Cream Sundae Buffet
Ice Cream Sundae Buffet

Such an easy dessert option, that will keep your guests coming back for more.

As seen on: As You Wish Events

3.  S’mores Bar
Smore Bar

S’mores make a tasty dessert or even a fancy supper. I can just imagine serving one up to guests at a summer BBQ, once the sun has gone down and the cool night air moves in.

 As seen on: Waffle Design

4.  Make your Own Burger Bar
Summer BBQ Idea

What a great way to dress up a summer BBQ. A ‘Make Your Own Burger Bar’ could be ideal for any occasion be it dinner with friends, Christmas dinner or a backyard wedding.

As seen on: Cardstore

5.  Hot Chocolate Drinks Bar
Hot Cocoa Bar Party

I love how this bar takes an everyday beverage and makes it extra special.

As seen on: Paperblog

The Fantastic Fudge Cake

Food is such a big part of any celebration, and one particular food item that usually makes it onto the menu is cake!  So this week I thought I would share one of my favourite cake recipes with you.  As children my sisters and I loved to help mum with the baking.  One year we were given a kids recipe book which had this lovely fudge cake recipe in it.  It was probably the first cake I ever baked on my own and because it was so easy to make it quickly became a family favourite.

There are so many reasons why I love this recipe.  Because this cake has no eggs, butter or milk it makes it a very economical cake to make, as well as making it a great recipe for those who are on a dairy free diet.   I also love the versatility of this recipe.  It can easily be baked as a Bundt cake, cupcakes or even a fancy birthday cake.  Not to mention it makes a delicious dessert on a cold winter’s night simply by pouring a hot chocolate sauce or custard over it while it is still warm.  But of course the most important reason is that it tastes great!

Digger Birthday Cake

I used the fudge cake recipe to make this digger birthday cake.


Fudge Cake

Ingredients:

  • 1 ½ cups of Flour
  • 2 Tbspn of Cocoa
  • 1 cup of Sugar
  • 1 cup of Water
  • 6 Tbspn of Oil
  • 1 Tbspn of White Vinegar
  • 1 tsp of Baking Soda
  • 1 tsp of Vanilla
  • ½ tsp of Salt


Method:

Mix flour, sugar, cocoa and water together in a bowl.  Add Vanilla, Vinegar, Oil, Baking Soda and salt.  Mix together well.  Pour into a floured or lined tin and bake in the oven for 35-40 mins at 180C° or in the microwave for 6-7mins (cover while cooking) on High.

Variation:  Make as cupcakes. ¾ fill Patty Pans and bake for 20-30mins.  Makes 12

Fabulous Fudge Favours

 New Zealand Made Wedding Favours from The NZ Fudge Farm


I believe that Oprah Winfrey was right when she said ‘Love is in the details’ and as an event designer I believe that favours are one of those details. As a result I often find myself helping my clients to source favours for their events and if they have a large number of guests coming from overseas then they are often keen to have something that is New Zealand made.

Recently I was pleased to discover that the New Zealand Fudge Farm, based in Whangarei, sells a two piece pack that works perfectly as a wedding or party favour.

Fudge Farm Favours

The New Zealand Fudge Farm’s fudge has to be my all time favourite fudge.  The perfect fudgy texture just melts in your mouth.  Their standard two piece pack has one piece of their Chocolate Fudge and one piece of their Russian Fudge, giving your guests some added variety.  They are very reasonably priced and the staff there are always very helpful and friendly.

So if you are looking for a sweet treat to add as your wedding or party favour, consider giving the New Zealand Fudge Farm a call to place your order.


Sundae Buffet

12 Days of Christmas Ideas – Day 12

Well here we are – Day 12 of ’12 Days of Christmas Ideas’.  So many ideas to choose from yet somehow I managed to whittle it down to 12 of my favourites.  Today’s idea is not only a favourite of mine, but a favourite with everyone whenever I set one up.  It is the Sundae Buffet.  Plus with today’s idea we are offering a free download of Christmas tags and buffet labels.

Sundae Buffet for Christmas Day

I have done Sundae Buffets for a few years now and whether its for children or adults they always prove to be popular.  Being that Christmas Day can often be a hot one here in New Zealand I thought it would be great to create one that is very Christmassy and will go well along side Christmas Dinner.  A simple solution to dessert – they are fairly easy to set up and most of the prep-work can be done well in advance.  Not only that they look incredible!

For this Sundae Buffet I have used dishes that I have collected over the years (mostly from my grandmothers when they cleaned out their china cabinets), but you can use anything to hold your toppings.  It doesn’t need to be a great expense. I’ve seen people use paper bags and terracotta pots.  I suggest you look around your home and see what you have available.  If you decide you do need to buy some dishes try the second hand shops, they often will have a variety of suitable dishes.

Sundae Buffet Topping Ideas

It’s so easy to get carried away with the number of toppings you add to a Sundae Buffet.  Keep in mind that a little can go a long way. I always like to start with either Vanilla or French Vanilla Ice cream, that way it keeps the toppings as the main feature and flavour.  I then work at having a selection of toppings from the following categories: Sprinkles; Sauces; Fruit (Fresh or Frozen) and Sweet Treats.  Depending on the occasion I might add a few extras – for example being that this Sundae Buffet was a Christmas theme, I added the little Gingerbread Men.

For the sprinkles I started with the chocolate drops, then chopped up some shortbread biscuits and walnuts.  I also decided I just had to have some Christmas coloured candies and 100s and 1000s.  I found an online candy store (based in NZ) called Crazy Candies.  Their candies are sorted by colour which meant I could easily find what I wanted. I ended up buying one pack of their red chocolate gems and one pack of their green chocolate gems.  I was very impressed with their service and how quickly they delivered.  To get the mix of 100s and 1000s that I wanted I ended up buying one packet of each colour and mixing them myself.  I got mine from an awesome little cake decorating shop in New Lynn, Auckland called Miss Bon Bon.  If you do plan to visit, try and go on a Friday as it is cupcake day and they are just divine.  You can place orders with them over the phone if you live further afield. Alternatively Pretty Baker have a good online store that also supply these.

For the sweet treats you can have anything you fancy.  I like to keep them bite size since it’s it really just about having a taste and you don’t want them to take up the entire sundae cup.  For this Christmas theme I went for mini Christmas mince tarts, Christmas cake and mini chocolate éclairs.  For the Sauces I always feel that 3 is a good number – in this case I choose Maple Syrup,  Homemade Mixed Berry Sauce and Homemade Chocolate Sauce.  Lastly I added in the fresh Strawberries.

Sundae Buffet Topping 2

Once you have your toppings all sorted it’s just a matter of setting it up, putting out the sundae dishes ( I suggest using small ones – people can always come back for seconds) and adding the buffet labels.  You can either make your own our download our editable designs.

Download Christmas 2013 Tags & Buffet Labels

So that brings us to the end of our ’12 Days of Christmas Ideas’.  We’d love to hear your feedback about any of the ideas and if you decide to try out any for yourself we’d love to hear how you got on.

Merry Christmas, may your countdown to Christmas 2013 be creative, low-stress and most of all enjoyable.