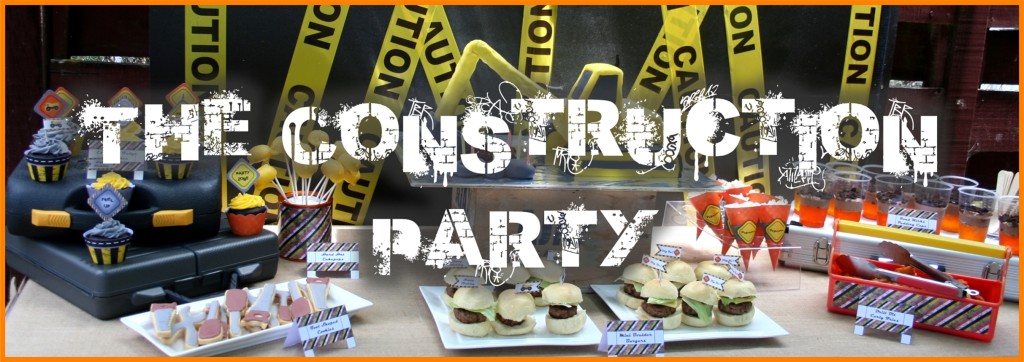
The Construction Party


The Construction Party Header

Back in February I had the privilege of designing a Construction themed birthday party for a young man who was turning six years old.  This was such a great theme to do as there was no shortage of ideas.

Party Highlights:
  • Once again I was really pleased with how the printables turned out.  Out of these the Toolbox Favour box and the little flags have to be my favourites.
  • I loved planning and making the food to match the theme.
  • I was so pleased to find yellow plastic construction party hats at a $ value store and the tool shaped erasers at Manna Christian Store in Henderson – they fitted the theme perfectly.
  • The ‘Build your own Gingerbread House’ activity was a hit, entertaining guests both young and old.
  • And probably the best part for me was the Birthday Boy’s unmistakable excitement and awe for how it all came together.
 Construction Party Blog - The Decor

Party Décor:

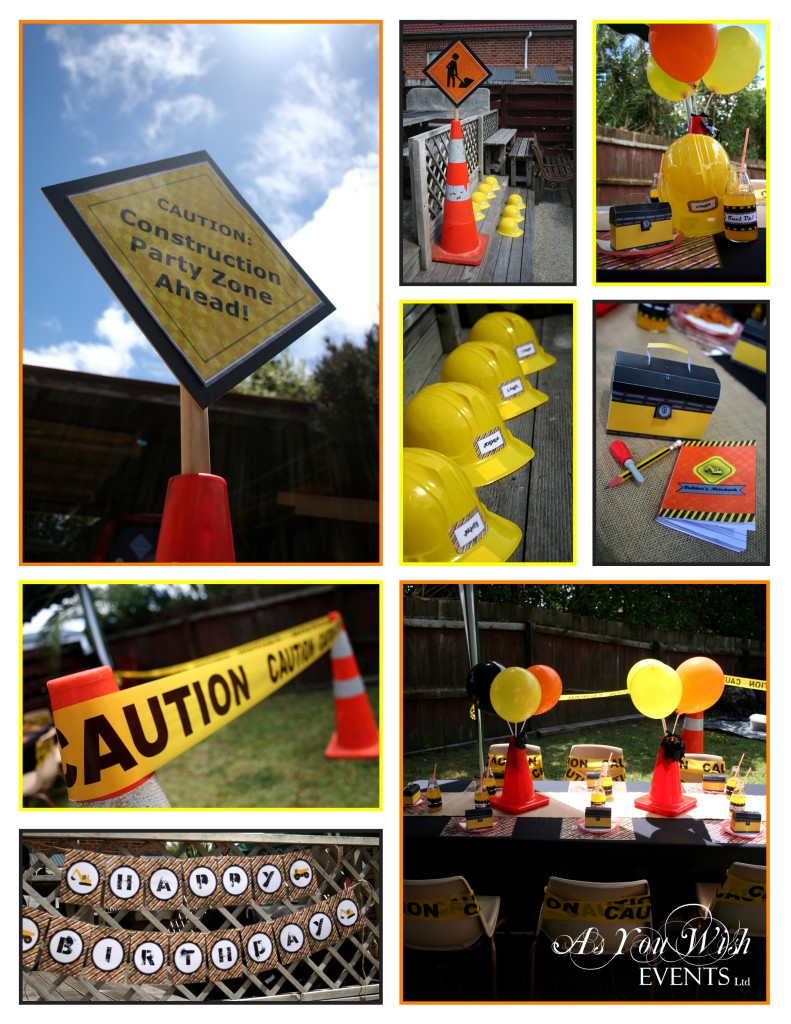
The weather was brilliant for this outdoor party.  As the guests arrived they were directed to the backyard by signs made especially for the occasion.  One of the first things they would have seen on reaching the backyard was the big birthday banner, from the Construction party printable collection.  We created the dining space by using the gazebo and a couple of giant road cones paired with ‘Caution’ tape.  We also used the ‘Caution’ tape to wrap around the backs of the chairs and the backdrop for the food table.  The guest table had two small road cone centrepieces and a hessian table runner, along with place settings consisting of a placemat, plate, serviette, themed drink bottle and favour box.

Party Favours:

Each guest received a construction party hat along with a Toolbox, favour box.  These were a little tricky to put together but looked great in the end.  Each favour box contained a tool shaped eraser, pencil and a ‘Builder’s Notebook’.  The covers for the notebooks were from the printable collection which we wrapped around some little notebooks we found at a $ value store.
Construction Party Blog - The Entertainment

The Entertainment:

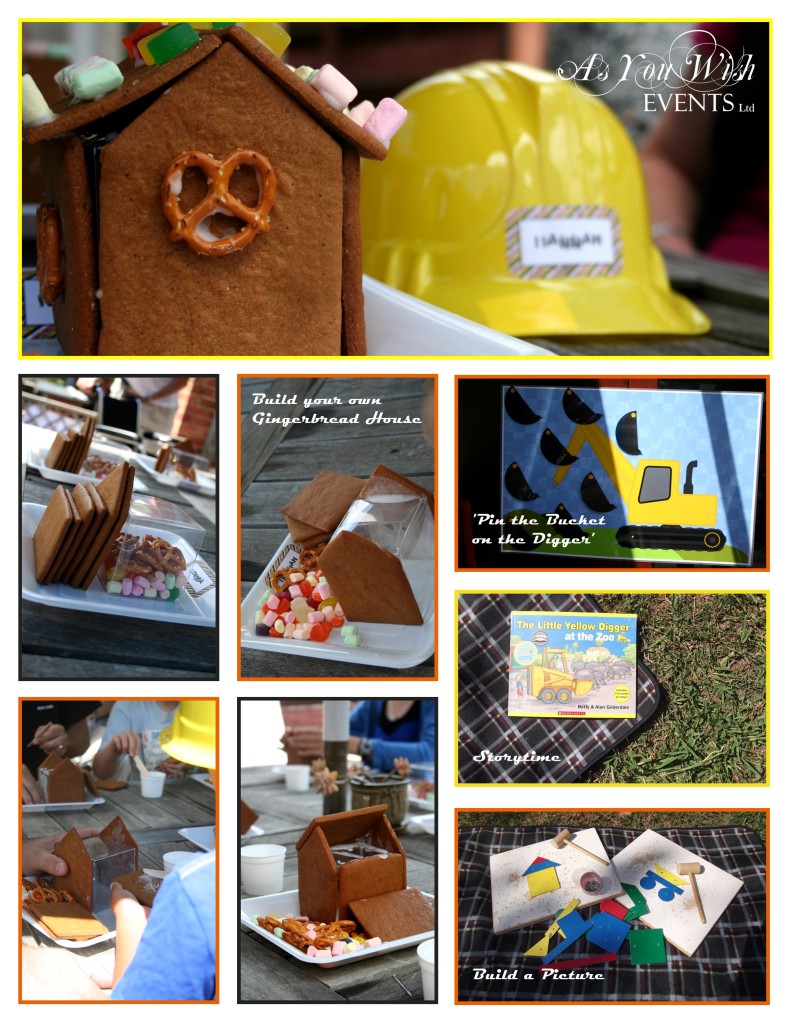
There was no shortage of things to do at this party.  The main activity was to ‘Build your own Gingerbread House’.  Each guest was given their own ‘kit set’ containing everything they would need for building their house.  After giving a quick demonstration and appointing a couple of the dads as the foremen for the job site, we left them to it.  As the party progressed the guests played ‘Pin the Bucket on the Digger’ – simply a theme appropriate version of ‘Pin the tail on the Donkey’; played with the build a picture set and listened to our storyteller read one of the popular ‘Little Yellow Digger’ books.
Construction Party Blog - The Food

The Party Food:

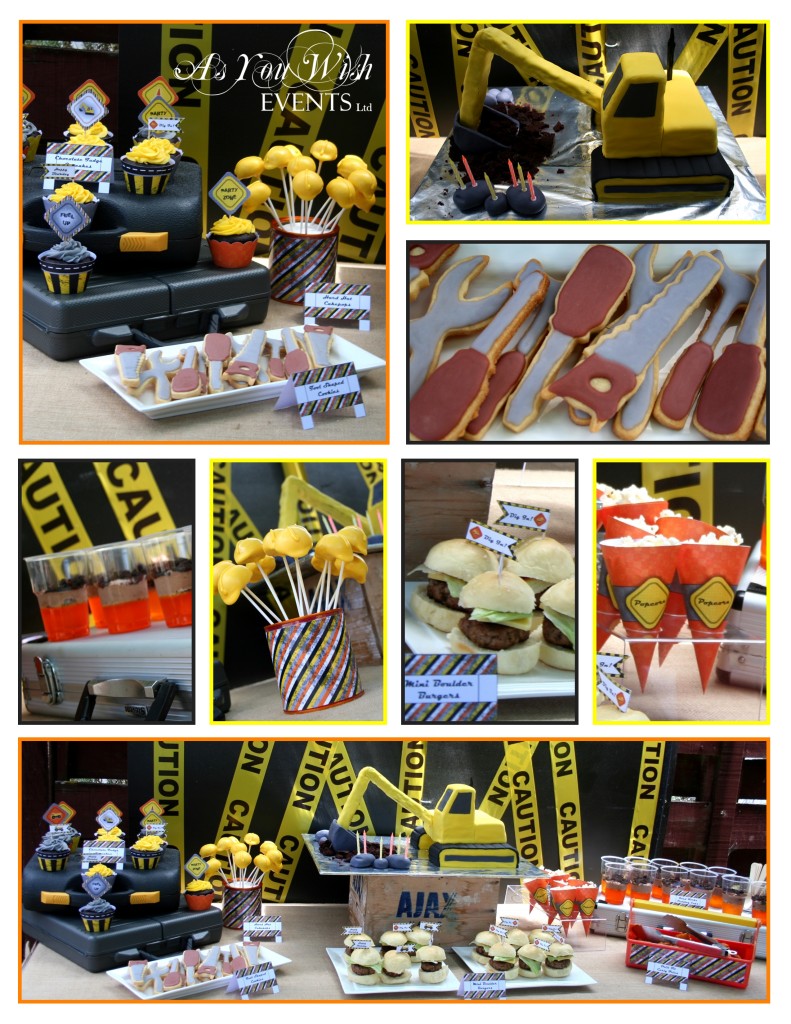
This was an exciting menu to put together.  We had:

  • Chocolate Fudge cupcakes – displayed with wrappers and toppers from the Construction Party printable collection.
  • Hard hat cake pops
  • Tool-shaped cookies
  • Mini Boulder Burgers – displayed with little flags from the Construction Party printable collection.
  • Popcorn served in cones from the Construction Party printable collection.
  • Drill bit curly fries
  • Road Works Pudding Cups.

The buffet table was set up using a variety of toolboxes and an old nail box along with a few other pieces we had handy.  We used labels from the Construction Party printable collection to tie everything together.  At the centre of the buffet table was the amazing ‘Digger’ birthday cake made by a family friend.

Summing Up:

Overall this was a fabulous party to put together.  The most challenging part was dealing with the heat from the sun – but once we had everything properly positioned under the gazebo and umbrella we were good to go.  Everyone seemed to enjoy themselves, especially the Birthday Boy.

If you have any questions or comments regarding how we put this theme together or if you would like us to create a party for you then please contact us either via email or through the comments section below.

 Vendor Credits:
  • Party Printables: As You Wish Events Ltd
  • Décor & Styling: As You Wish Events Ltd
  • Catering: As You Wish Events Ltd
  • Photography: Christine Kehinde
  • Cones hired from Hirepool
  • Caution tape purchased at Super Cheap Auto


The Evolution of the Cardboard Wedding Camera

I have a great passion for photos.  For me they breathe life back into the memories I have of days gone past and allow me to relive the emotions and remember the people with whom I shared those moments with. You could say there is magic in them.  I believe that this is one reason why photos should always play an important role in your wedding day.  Now I think it goes without saying that you should always have an official photographer – one who knows what they are doing and has a style that suits yours – but what I really want to talk about today is capturing those candid moments that happen when the official photographer is busy elsewhere.

In the late 90s the disposable cardboard wedding camera set out on its rise to popularity as the preferred way for guests to capture these very moments.  But with the advances we’ve seen in technology in recent years is this still our best choice?


The Disposable Cardboard Camera

Disposable Wedding Camera

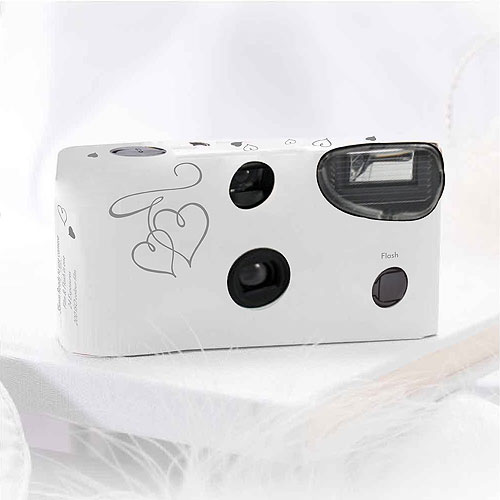
For us here in New Zealand the trend of placing disposable cameras on the guest tables began it’s rise to popularity around the mid 2000s.  Around that time I had two weddings that chose to use them.  We found a 10 pack of cameras at an affordable price that had a design that worked with their theme.  Away their guests went, clicking photos to their hearts content.  Then it came time to develop them.  Being that they were film cameras we had no choice but to develop the whole film which generally cost somewhere between $20 – $30, only to find that most of the photos were blurry, and those that weren’t had the top of someone’s head cut off.  I think that one of those brides, after developing a couple of films, gave up on the rest and threw them out.  Overall a rather costly and disappointing experience.

From that point on I looked for alternative options to offer my clients.  I found that a few companies overseas were offering a similar solution to the disposable cameras, but rather with digital cameras that you could hire. Unfortunately no one in NZ had picked up on that idea in time for the next wedding so we had to come up with something else.


CDs for Guest’s Photos

Photo CDs

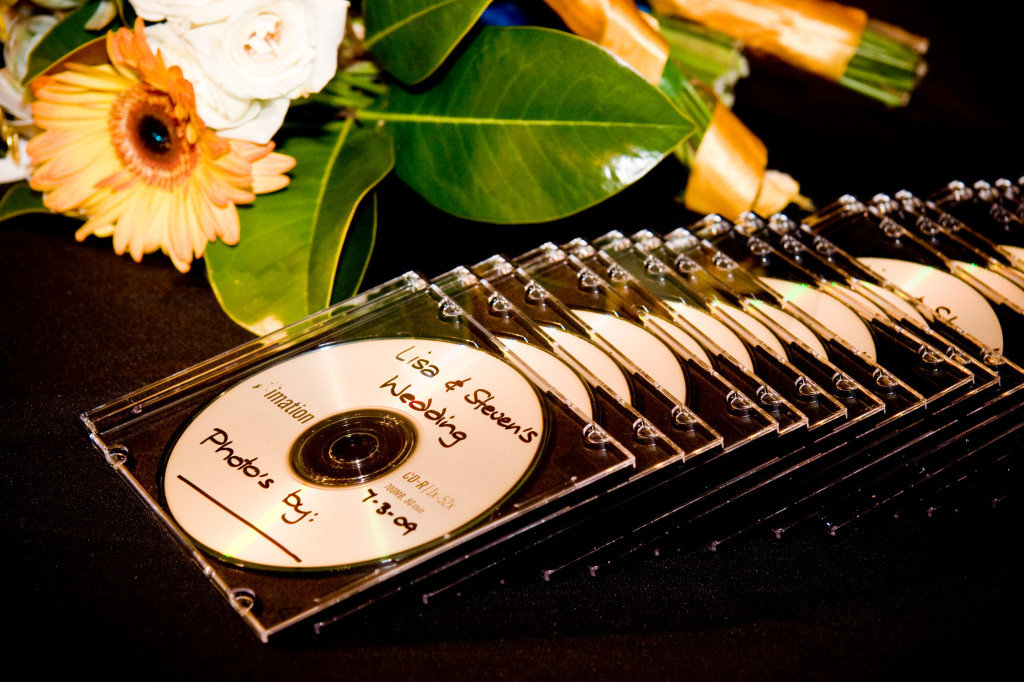
By this time digital cameras had become increasingly popular.  This Bride and Groom were confident that many of their guests had digital cameras and that they would bring them along.  So this time we gave out CDs, labelled with the Bride and Grooms details, for the guests to take home, download their photos onto and then post to the Bride and Groom.  This idea had better success because the guests could check their photos as they took them, meaning they were of a higher quality and the Bride and Groom could be more selective about the ones they chose to develop.  Sadly there were still a few downsides.  The first being that it is very hard to predict how many guests will take a CD, so we ended up with CDs and envelopes leftover.  Secondly, not everyone remembered to send their photos to the Bride and Groom, meaning they had to chase people for the photos.  Overall for the cost of around $30 – $50 it wasn’t a bad idea.


Photo Sharing Apps

WedPics

Now with smart phones and mobile access to the internet there are a number of apps that can be downloaded onto your phone through which you can take photos and share them to a personalised online album. My favourite of these apps is WedPics.

WedPics wedding app is a free, fun, and an easy way for your guests to share their photos & videos of your special day.  It is available for both iPhone and Android, and if your cell phone isn’t smart enough then you still have the option of uploading photos from you digital camera.  The pros of this modern solution to the disposable cardboard camera are that it costs nothing to set up and because it is instant you are less likely to have to chase people to send you their photos.


 Conclusion

Ultimately all these options are still viable for any event, you just have to consider your event, your guests, your budget and the look and feel that you are aiming for. For me the strength of the app option and ability to immediately upload photos from your phone or later from your digital camera is very attractive especially at no cost.

There are plenty of other options out there like Facebook, Instagram or shared file services like Dropbox. It would be great to hear from you on what you have seen or done, and whether they worked well or not.

Counting Down to Valentines Day – Part 2

What to do, what to do?  Dinner and a Movie?  Sometimes we can easily get stuck in a rut when it comes to date ideas, so here are  5 Valentine’s Date ideas, to spark your dating creativity.

1. ‘A Great Pick Up’ – Sometimes what could be a rather unimaginative date idea can be made memorable by arriving to pick up your date in an unexpected mode of transportation.  Yes there is the cliché limousine, but why not try something different like a scooter, horse, tandem bicycle, golf cart or roller blades.

2. ‘On a Mission’  – Just like the old party game ‘Treasure Hunt’, set up a series of clues for your date to follow in order to find you.  When they do find you, you are waiting with a fun activity to do together or a romantic dinner.

3. In the Park – If you happen to be in the Auckland region over the summer months there are a great selection of free outdoor movies and concerts that you can take your date too.  Take along a picnic and enjoy the outdoor entertainment together.  For more details on when and where these events are taking place click here.

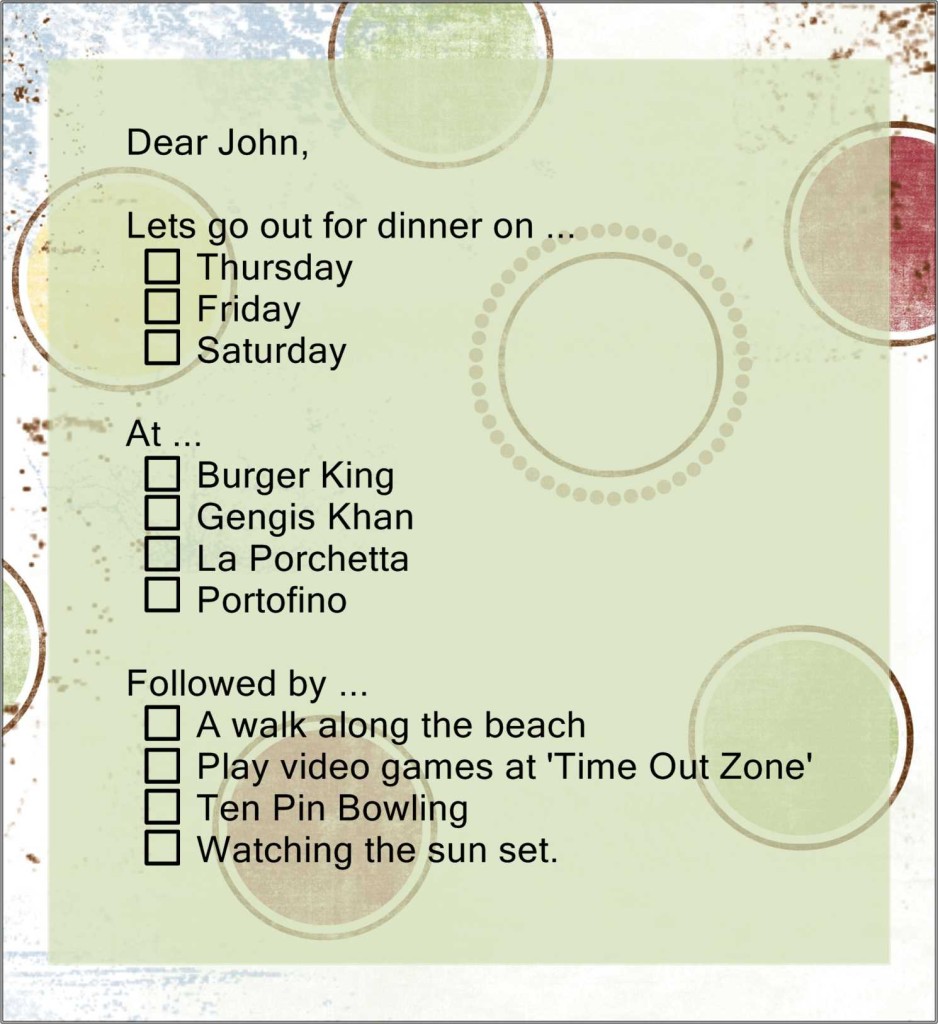
4. ‘Decisions, Decisions’ – If you are tired of being the one who always makes the date plans then here is a great idea for you.  Send your loved one an invitation for a date. However, create multi-choice options for the when, where and what so they have to make the decision for once. Here is an example …

Invitation Example

5. ‘A Rotic Evening’ – While Valentine’s Day is considered to be more for couples, why should the singles miss out on celebrating love.  Rotic is simply ‘romantic’ without the ‘man’.  So arrange a girls night with a group of single friends.  Why not have a candle light dinner and watch a good chick flick.

For more ideas and resources try The Romantic.com, alternatively if you have some creative ideas for dates please share them in the comments section below.  But more than anything we hope you enjoy your Valentine’s Day.

Counting Down to Valentines Day – Part 1

Every Valentine’s Day celebration needs a yummy sweet treat to accompany it and this idea I found on the Sprinkle Bakes website couldn’t be more perfect.

Chocolate Cupcakes with Flaming Strawberries

Chocolate Cupcakes with Flaming Strawberries

What could be more Valentines Day than Chocolate and Strawberries, but then to add the fiery flare of the flambé truly gives this dessert a unique twist.  I must admit that I’m a bit of a pyromaniac, having grown up in a family that really enjoys fireworks, and a lover of all things that sparkle and shine which is why I think this idea appeals to me so much.

Heather at Sprinkle Bakes has all the fabulous instructions on her blog, all the links in this post will take you there.  I do suggest you practise the technique of flambé beforehand as it can be a bit tricky – Heather has some great tips for this on her blog also.  So have fun, be creative, but still do be careful – it is fire you’re playing with after all.

More Toolbox Favourites

Today it is all about Hooks.  Last month I posted an article about 3 of my favourite toolbox items and today I plan to continue with this theme by showing you 3 types of hooks that I find to be very useful.

Toolbox Pt21. ‘S’ Hooks

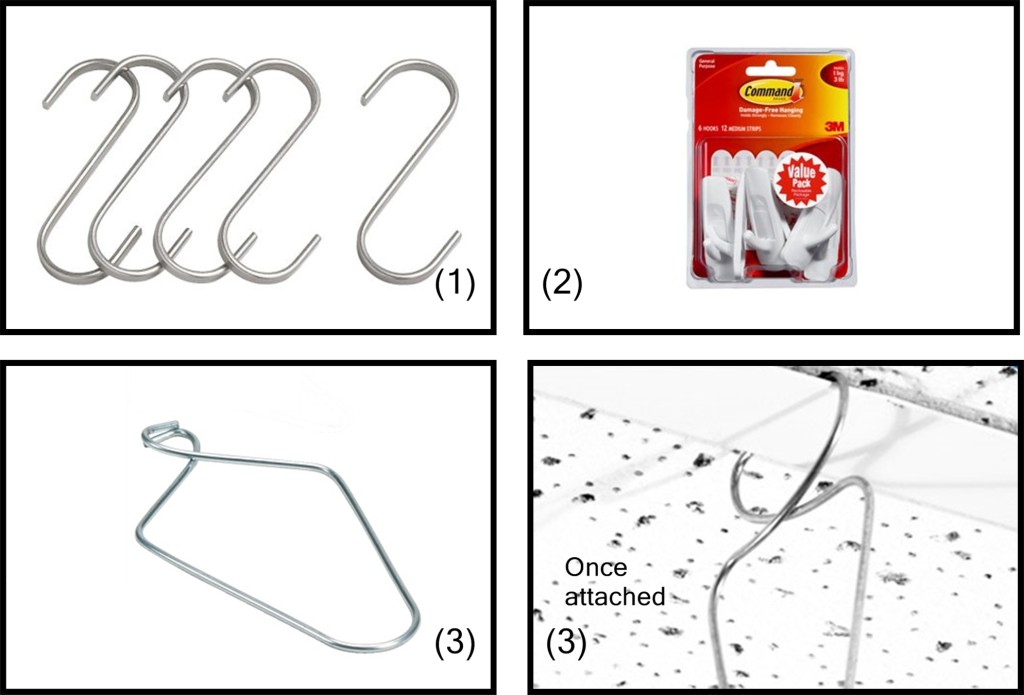
The ‘S’ hook is a quick and simple way of hanging a decoration that would usually require string.  They can also turn pre-existing railings, rods, nails or bolts into hooks.  For example, I have used them to hang oversized curtains onto the rods of those old winding windows you find up high in classrooms or community halls; chandelier crystals from tree branches; and paper lanterns from a client’s back porch.  These are available at most hardware stores and variety discounter stores such as the ‘$1, $2, $3 Shops’.  I tend to buy mine at the later as they are usually cheaper.

2. 3M Command Hooks

Most venues these days will have restrictions on what you can use to hang decorations up with – which I think is absolutely fair since their walls may start to resemble Swiss cheese if they didn’t.  The problem comes when these venues don’t offer any existing options for hanging decorations, which is when the range of 3M Command Hooks can really come in handy.  They come in a variety of shapes and sizes.  You should choose which hooks to use based on the weight of the objects you wish to hang.  Some people can have difficulty removing the hooks cleanly, but if you follow the instructions on the back of the pack you should have success.  If you still don’t feel confident with the removal of these hooks then I suggest you have a few practice runs at home before the day of your big event.  3M Command Hooks are available from most supermarkets, hardware stores and The Warehouse.

3. Suspended Ceiling Display Clips

Okay, so technically it is more of a clip than a hook, but you can still use it to hook decorations on to a suspended ceiling.  This type of ceiling is often found in converted warehouses or office spaces, which is why you’ll find a lot of modern churches will have them.  These ceilings are made up of a system of rails and ceiling tiles.  The clips simply clip onto the rails (as shown in the picture above) and from there you can add anything you like – as long at it isn’t too heavy.  These are a little harder to come by being that they are more of a shop merchandising item but the folk at the Celebrations Group – Party Mad do sell them and I have always found them to be very helpful.

All of these hooks have been useful to me at various times but unless you are decorating for events on a regular basis, save yourself some money by taking a good look at your venue and determining beforehand what hooks you will need on the day of your event.  Having the right tools for the task at hand will make your event less stressful and therefore more enjoyable.

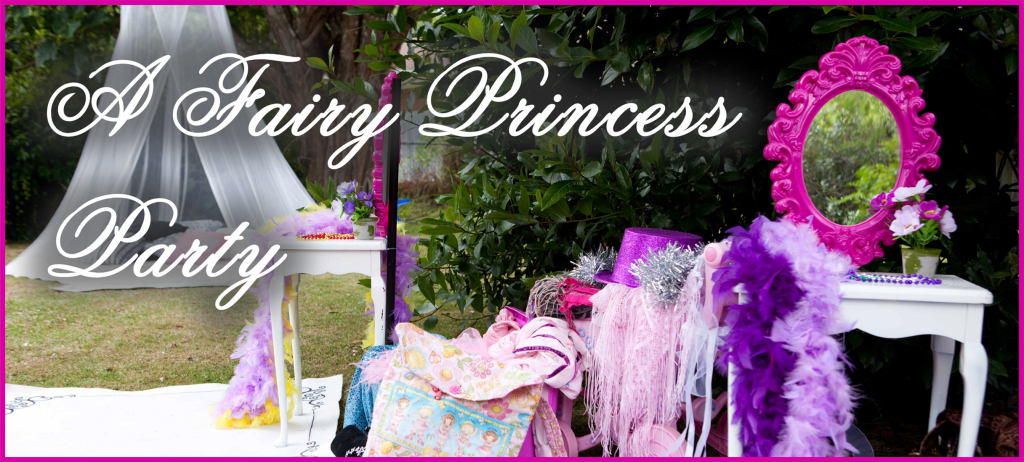
Fairy Princess Party


Fairy Princess Party

One of my earlier printable designs recently underwent a fairy-makeover for my niece’s 5th birthday party.  The weather was just perfect for the outdoor party which took place in their back yard last weekend.

Party Highlights:
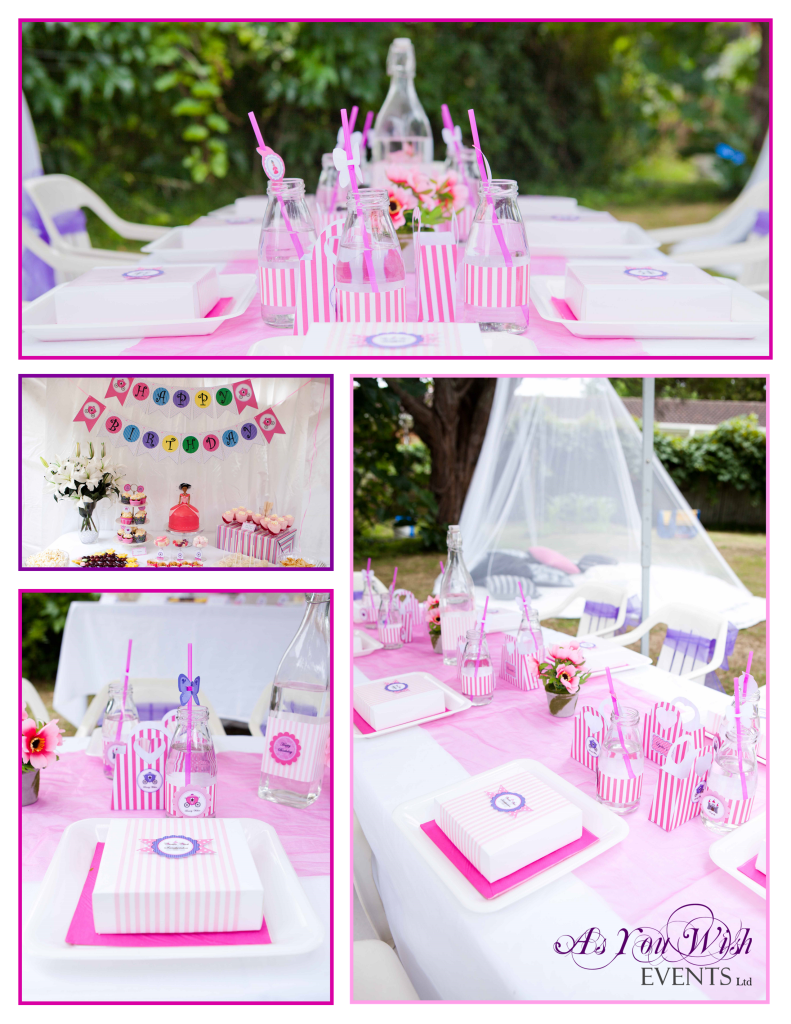
  • The pretty pink and white ‘Fairy Princess’ party printables.
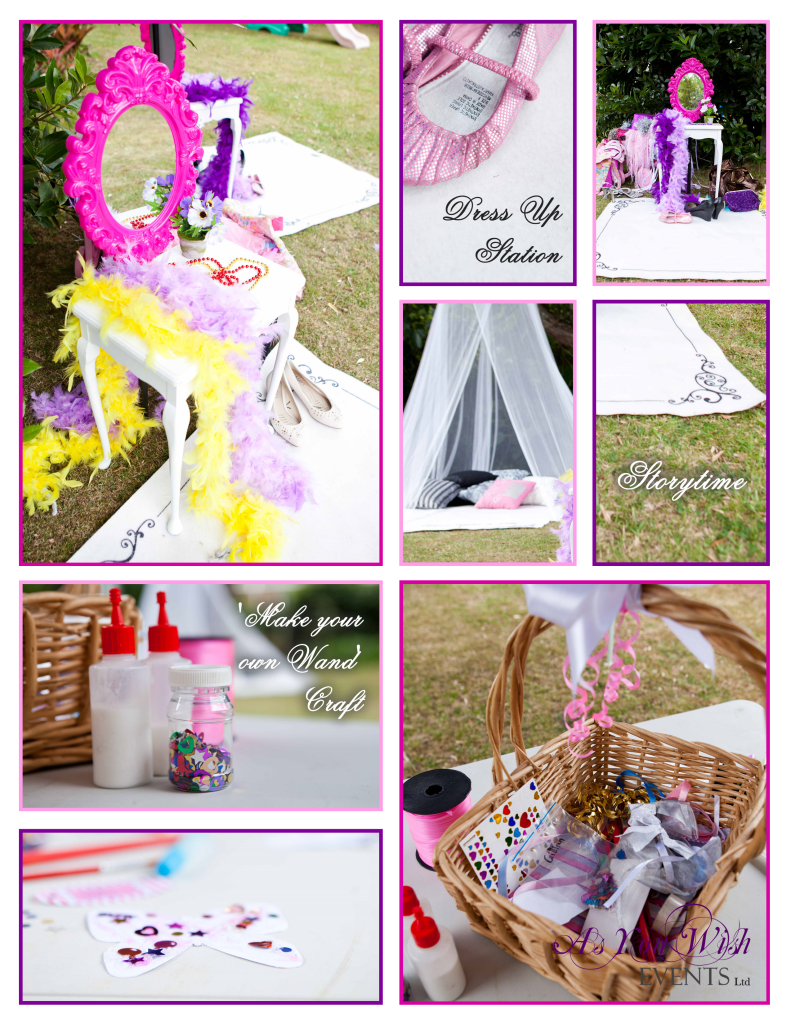
  • The Dress Up stations with ornate pink mirrors.
  • Gran dressing up as the ‘Fairy Grandmother’ who read the guests a beautiful book in the ‘Storytime Tent’.
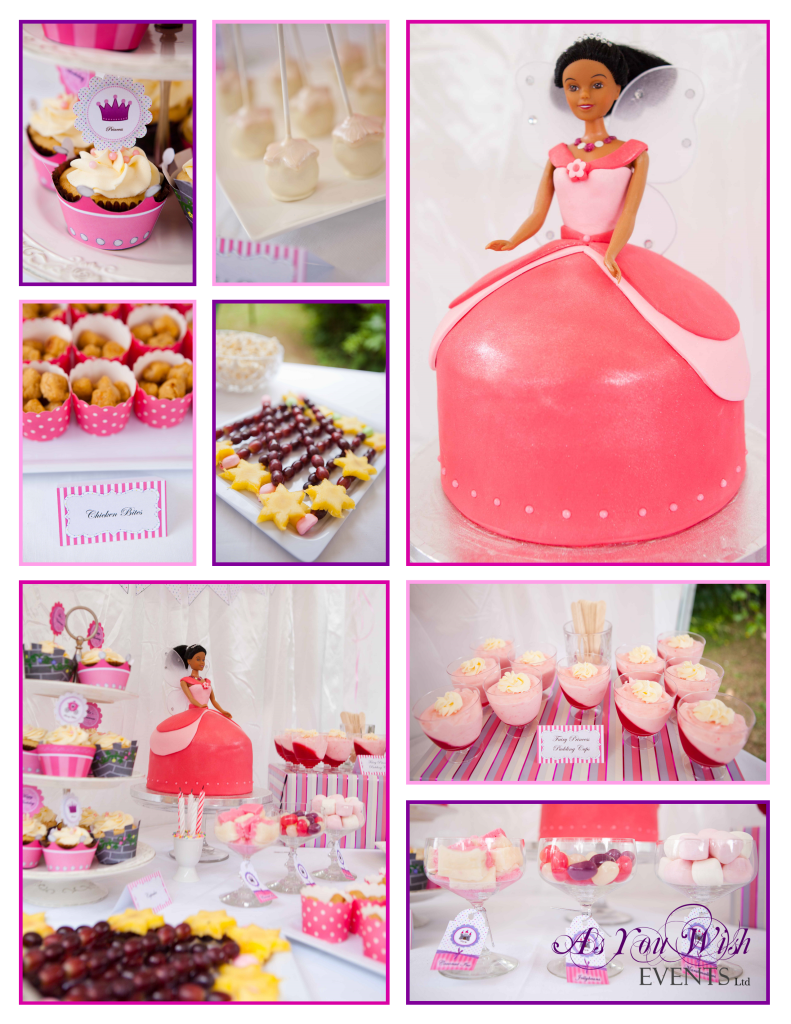
  • The Fairy Princess Pudding cups and Fruit Wands.
  • And when I asked my niece her favourite thing she said “the presents”.

Fairy Princess Party Pt1

Party Décor:

This time around we started out with our party printables which gave us the colour scheme of pink and white and a splash of purple. Much of the décor was determined by the activities we had planned.  I had some old white carpet runners sitting in my storeroom waiting to be thrown out, but instead I decided to cut them down to mat sizes and draw designs on them.  I then used these to define the areas for eating, dress up and story time.  I wanted to keep the eating area looking clean and bright – which was achieved through the use of white tablecloths and a white satin backdrop. This also created a background on which the party printables could really stand out.  A few other items I had in my storeroom were the two little white tables that I was able to pair with ornate pink mirrors from The Warehouse to create child-sized dressing tables for the Dress Up station.  The ‘Storytime Tent’ was made from a Mosquito Net that I got on special at Briscoes along with all the cushions I could find.

 Party Favours:

As part of the party printable set, we designed a lovely little handbag box.  In each box was a mini chocolate bar, a pink balloon, a sparkly hairclip and a lip gloss.

Fairy Princess Party Pt2The Entertainment:

Instead of games we opted for three activities.  We had the ‘Make Your Own Wand’ craft; the Dress Up Station and Story time.  As the guests arrived they were able to join in with making their own wand and once they were done they were free to play with the dress ups or wherever else there imagination took them.  Towards the end of lunch we sung happy birthday and the beautiful cake was cut.  At the same time Gran came out dressed up as the ‘Fairy-Grandmother’ to read all the guests the story of ‘The Rose Princess and the Special Gift’.  This was then followed by the opening of the presents.

Fairy Princess Party Pt3

The Food:

On the menu we had:

  • Castle Club Sandwiches – these were served in little lunch boxes placed at each guest’s place setting.
  • Crinkle Cut Fries
  • Popcorn
  • Chicken Bites – served in little cupcake cases purchased at Countdown.
  • White Chocolate Cake Pops
  • Vanilla Cupcakes – displayed with wrappers and toppers from the Fairy Princess printable collection
  • Fairy Princess Pudding Cups
  • Fruit Wands
  • And a mini candy buffet with 3 types of theme coloured lollies.

The buffet was set up using a collection of glassware, white platters and a box that I covered in stripy paper.  The fabulous centrepiece on the buffet was the amazing doll cake made by Sweet Bites Cakes – a decadent chocolate mudcake – yummy!

Summing Up:

It was really fun to transform my sister’s backyard into a fairy princess’ garden.  Everyone seemed to enjoy themselves having plenty of activities do and yummy treats to eat.

If you have any questions or comments regarding how we put this theme together or if you would like us to create a party for you then please contact us either via email or through the comments section below.

Vendor Credits:
  • Party Printables: As You Wish Events Ltd
  • Décor & Styling: As You Wish Events Ltd
  • Catering: As You Wish Events Ltd
  • Photography: Adam Ferris
  • Cake: Sweet Bites Cakes


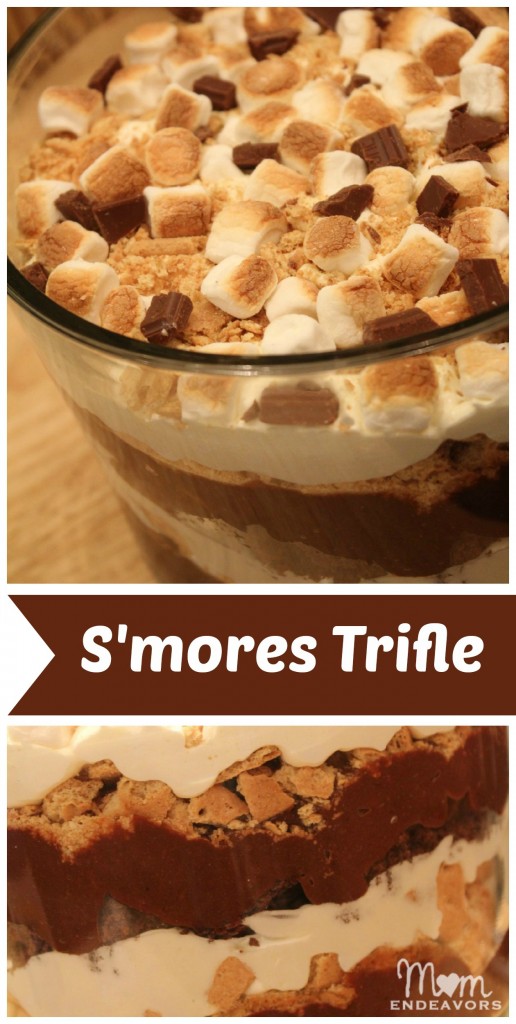
A Brownie S’mores Trifle – WOW!

I recently discovered on Momendeavours.com a recipe for exciting new take on the trifle.  A Brownie S’mores Trifle – it looked and sounded so amazing I just had to try it.  Christmas day seemed like a great opportunity.  My Mum-in-law (we were with the in-laws for Christmas) was happy for us to try out something new, because in previous years there always seemed to be heaps of the traditional trifle leftover and it usually ended up going to waste.

Brownie-Smores-Trifle-516x1024

Oh so yummy!

 As seen on Momendeavors.com

The full recipe in available on Momendavors.com with great instructions and photos – but as it is an American based site these are my ‘available in New Zealand’ substitutions:

Brownie S’mores Trifle Ingre­di­ents:

  • 1 box brownie mix (or your favourite from scratch recipe) – Personally, I’d go with a ‘from scratch recipe’ but the box mix works as well.
  • 1 large box or 2 small of instant choco­late pud­ding (approx. 4 cups) – This is basically 2 of the standard sachets that are available in Kiwi supermarkets. 
  • 1 sleeve of gra­ham crack­ers, bro­ken (about 9 crackers) –  I believe that the closest match we have is the Wheaten Digestive Biscuits.
  • 1 tub of whipped topping – I used freshly whipped cream.  A 300ml bottle seemed to be enough.
  • 1 small jar of Marsh­mal­low Crème – I couldn’t find this in the supermarkets at the time, so we made our own using a recipe from Chow.com (click here for the recipe), however I have since seen it in the spreads section at Pak ‘n’ Save.  Just as a side note, if you do decide to make your own Marsh­mal­low Crème using this recipe in NZ we call corn syrup, glucose syrup.
  • 1 C mini marshmallows – These are readily available in most Kiwi supermarkets.
  • optional: 1 Hershey’s Bar – Occasionally you’ll find these in the stores, otherwise chocolate buttons work too.

We greatly enjoyed our trifle on Christmas day this year and there were no leftovers that went to waste.  Thanks Momendeavors for this great recipe.  I hope to make it again soon.


Christmas Foyer Decor

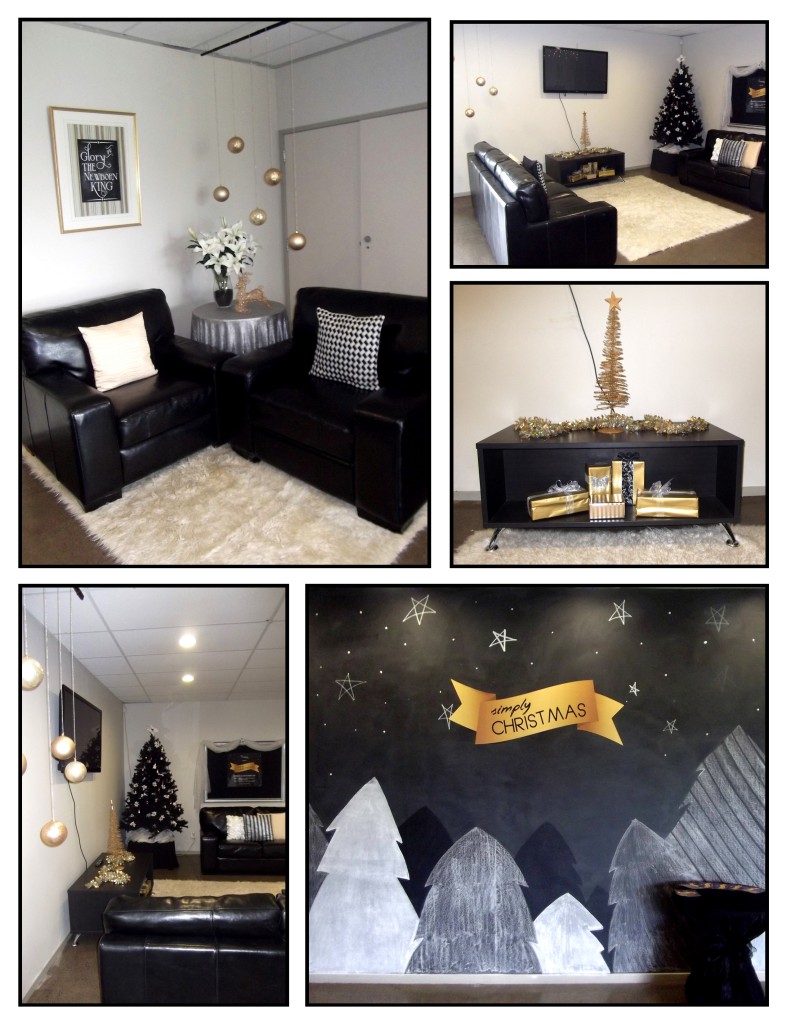
This year I was asked to decorate our church’s foyer for the Christmas season.  The flyer for the Christmas Production served as my inspiration which lead to a colour scheme of gold, black, and white with a touch of silver and yellow.  Although the church had a collection of decorations such as the trees and a few ornaments, some shopping was still needed to create a look that was new.  My favourite shopping finds were from The Clearance Shed where I found the extra large gold baubles and stylish cushion covers.

One of the permanent features in the foyer is a large blackboard wall.  On this wall my assistant and I drew up the same scene at was pictured on the Christmas Production flyer.  The mural was done completely in chalk, apart from the gold banner which was printed onto paper, cut out and stuck on.

Christmas Foyer Decor 1

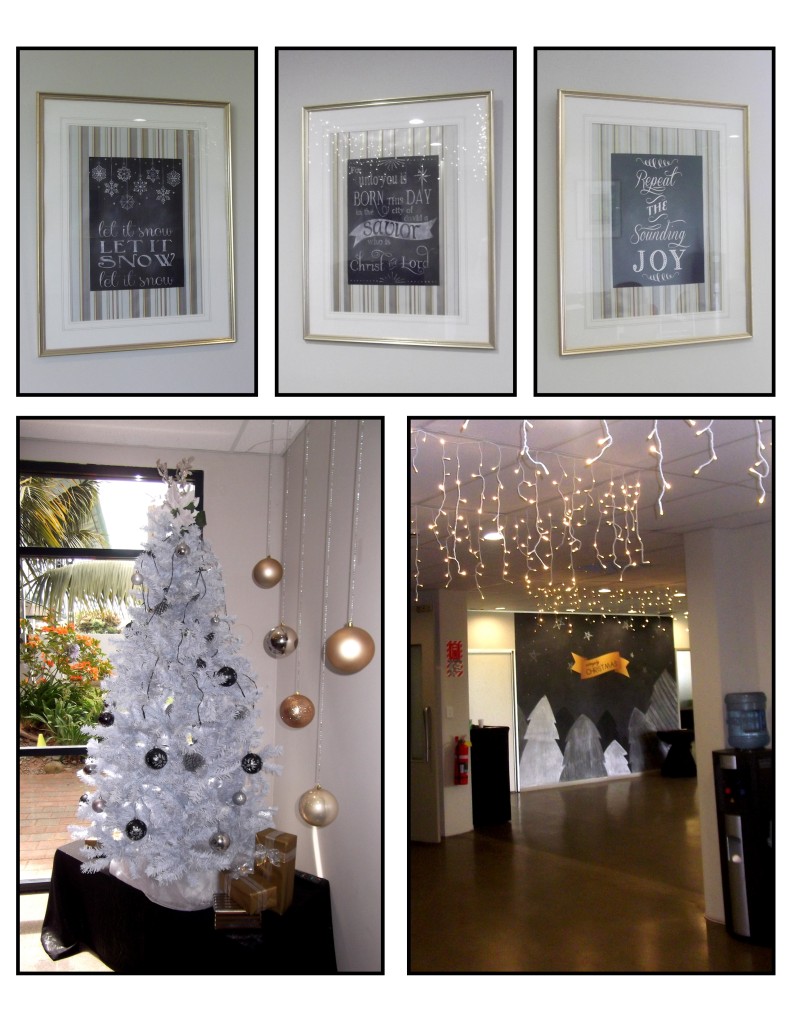
The lowest cost item with the biggest impact had to be the wall hangings.  The frames had been sitting around for a while having been recused from the recycling pile.  I pulled these apart and using some stripy wrapping paper and some beautiful chalkboard printables I found online at Nest of Poises and Love, Pomegranate House I put them together again to create some stunning wall hangings – all for the cost of the wrapping paper.

Christmas Foyer Decor 2

The look was finished off with a few clusters of faux presents and some icicle fairy lights.  Overall a reasonably low cost project that looked fabulous.

3 Toolbox Favourites

Recently I have been reminded that the ‘glitter and glam’ of decorating is only as good as the tools you have on hand to assemble them.  Over the last week I have been working on decorating a foyer for Christmas – on a couple of occasions my assistant remarked that she absolutely loves my toolbox and that its the best toolbox ever.  It’s nice of her to say so, but any toolbox that has the tools and materials that happen to be needed for the job at hand will always appear to be the “best ever”.   Having said that it is often one of the things people forget about when decorating for an event, so I thought I would open my toolbox and share a few of my favourite items with you.

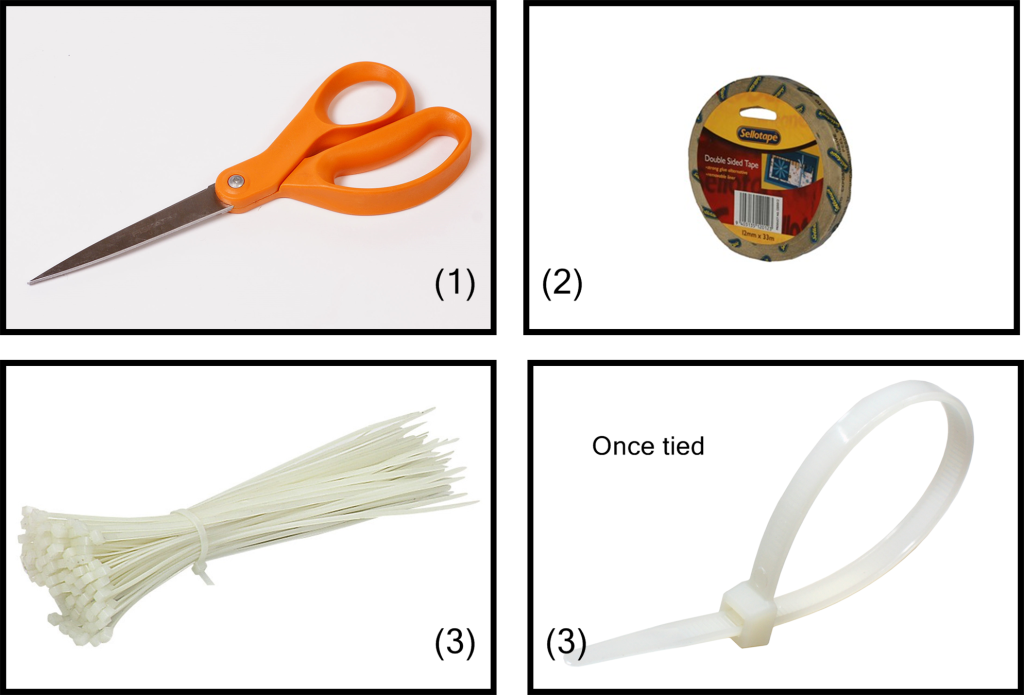
First 3 Toolbox Items

1.  Scissors

This may seem a little obvious, but they are absolutely essential, and there are a few things you should consider.  Firstly if you have a sizeable group of volunteers helping with set up it will be worthwhile having 2- 3 pairs.  Event set ups are usually done under time constraints and the last thing you want to be doing is wasting time looking for a pair of scissors.  Secondly, you need to consider what you are going to cut and whether or not the scissors you have will actually do the job.  Some scissors just can’t handle cutting fabrics, so it pays to check.  Also, while they aren’t strictly scissors I have a pair of wire cutters in my toolbox too.  I find they are useful for when scissors just aren’t strong enough for the job.

2. Double Sided Tape

This is another essential. It is my firm belief that in most decorating circumstances tape should not be seen – therefore double sided tape is perfect.  It can be used just about anywhere and for anything.  Just be aware that not all double sided tapes are created equal.  Some of the cheaper varieties turn into clumpy messes when you try and remove them, which is why I choose to use the Sellotape brand which you can buy in most supermarkets and stationery stores.  The other brand I also like it Impact, which is available from Warehouse Stationery.  The backing paper on this brand seems to be thicker than others, which makes it easier to peel off.

3. Cable Ties

If your decorating involves a lot of tying or hanging, then cable ties can be a quick and easy alternative to fumbling with knots.  I’ve found that a lot of the $2 variety type stores sell the smaller sizes rather cheaply.  Mitre 10 and The Warehouse have the bigger sizes if you need them, but be prepared to pay more.

Well that’s my first 3 Toolbox favourites.  Over the coming months I plan to reveal a few more.  If you need help figuring out how to assemble your event décor then feel free to email us with your questions.