1950s/Greased Lightning Theme Party

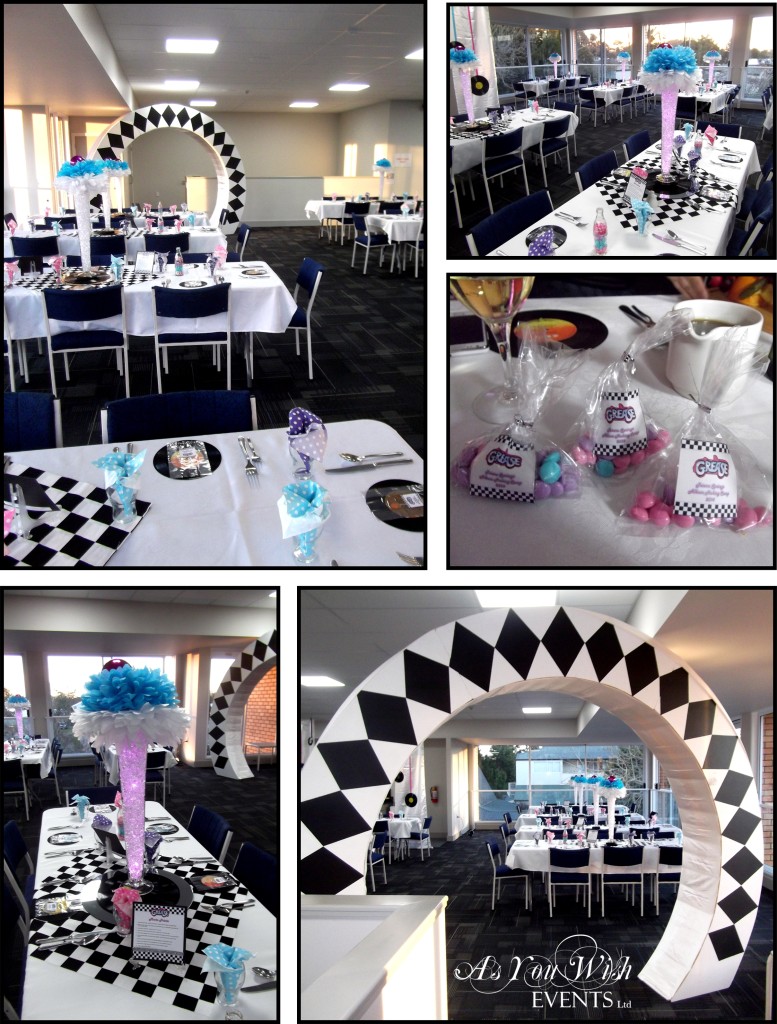
For the last 4 years I have had the privilege of arranging the theming for an annual scrapbooking camp held at Totara Springs just out of Matamata.  This year the theme was ‘Greased Lightning’.  For most of the weekend the theming stretched only as far a name tags, room labels and work table decorations, but on the Saturday night for dinner we went all out.   While the campers donned their full circle skirts, cats eye glasses, tight black leather pants and pink wigs I set to giving the dinning room an overhaul.

1950s / Greased Lightning Image 1

1950s/Grease Lightning Image 2
Party Décor Favourites:
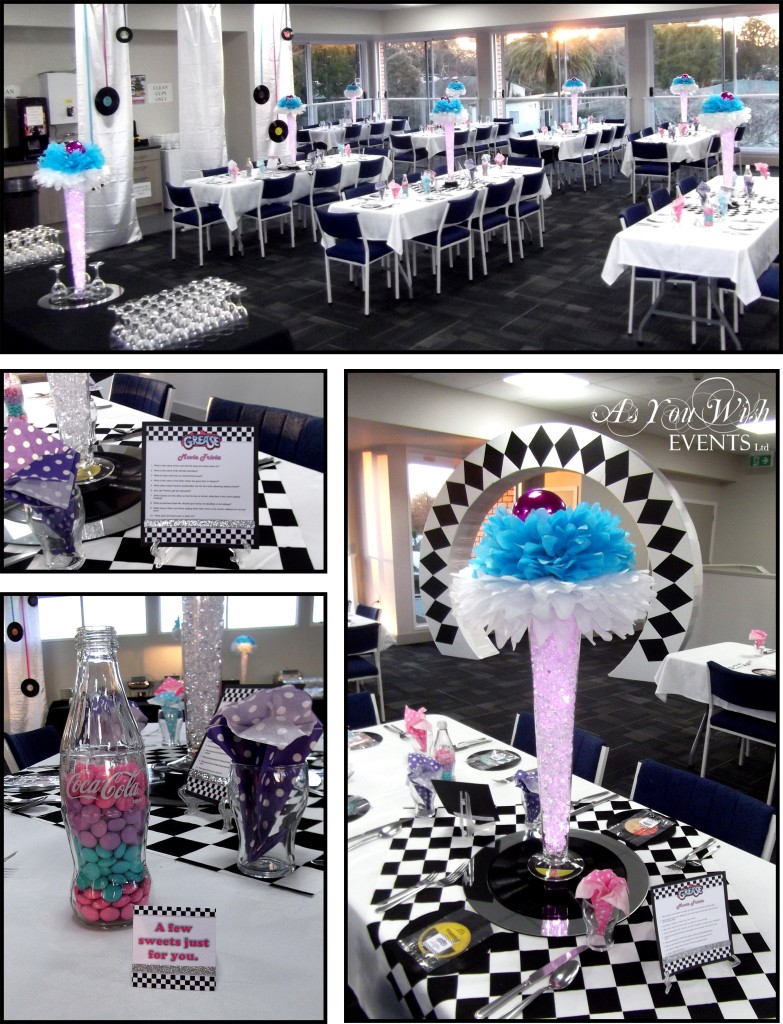
  • I loved working with the Pink, Turquoise and Purple colour scheme.  They added the necessary pop of colour among all the black and white checks.
  • The ice cream soda centrepieces were another favourite.  I wanted to incorporate the neon lights we tend associate with 1950s so I filled the tall cone vases with acrylic ice and ran a strand of battery operated lights through them.
  • Lastly, the final touches of the theme coloured chocolate gems (similar to Smarties and M&Ms) as a self serve favour bag and the ‘Grease’ movie trivia card really finished it all off perfectly.

If you have any questions or comments regarding how we put this theme together or if you would like us to create a party for you then please contact us either via email or through the comments section below.


A Little Time Out

A Pamper Party

In amongst the hectic lives we live it is important to take a little time out every now and then to relax and pamper ourselves.  After a fairly stressful start to the year I decided that for my birthday that was exactly what I was going to do.

I wanted to be able share the experience with a few of my good friends.  I also wanted the experience to be similar to that of going to an actual day spa, but without having to leave the comfort of my own home.  I didn’t think this would work if we had to do the treatments ourselves, which meant finding a company that would do these for us.    So I went looking, and found Beauty Patrol.  Their staff are fully trained and the ladies that came to us had a lot of experience and did great work.  Beauty Patrol offer a great selection of pamper party treatment menus and at a very reasonable price, I might add.  All that was left to organise was a relaxing environment and some tasty food.

Pamper Party Image 1

Pamper Party Food & Favours

The Menu:

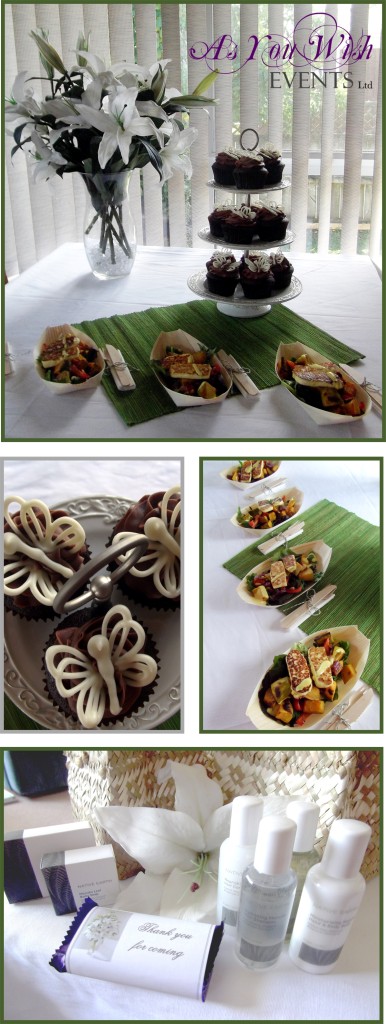
For the food I decided that a couple of fresh and healthy options would be ideal.  So we served a roast vegetable salad with Haloumi Cheese and Honey Mustard Dressing, as well as some fresh summer fruits.  And of course no pampering is complete without a little indulgence so I included some triple chocolate cupcakes.

The Favours:

I love party favours, they are a simple way of saying how much you love and appreciate your guests.  I also think for an occasion such as this it adds just that little extra to the atmosphere of luxury.  So in keeping with the natural and neutral theme, I purchased some flax ketes from the $ value store and some beauty sets off Trade Me to go in them.  I also added a chocolate bar that I wrapped with my thank you note, that matched the rest of my stationery.

Pamper Party 2

The Environment

 The Environment:

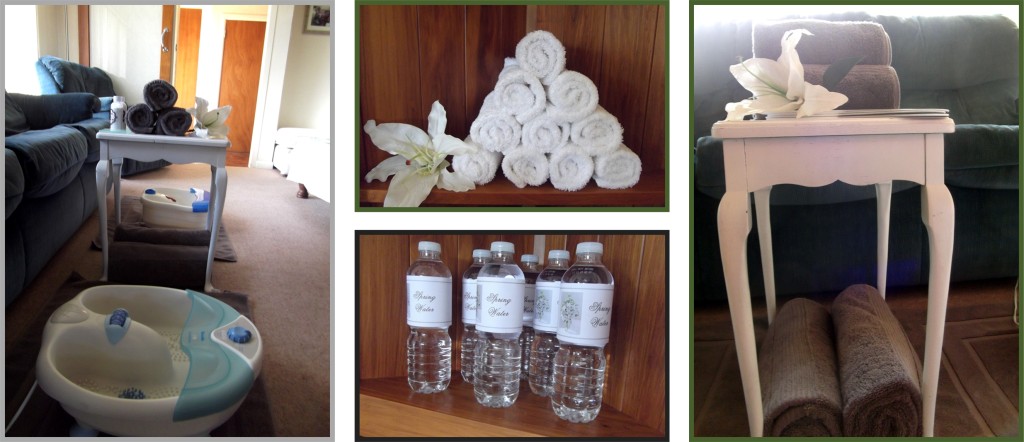
Usually when I write about parties I talk about the decorations, because they play a large role in setting the atmosphere.  However in this case setting the atmosphere was more about clearing things away, rather than setting things up.  I moved out all the unnecessary items that usually clutter our living room.  This instantly made the room more relaxing.  Then apart from a few flowers and a scented candle, everything else I put out was there to be used by my guests.  I made sure we had plenty of towels, water bottles, magazines, a couple of foot spas, and a few additional pamper products like lotions and face masks.

Summing Up:

Overall, it was everything I had hoped and planned for.   One pampered afternoon with friends.

If you have any questions or comments please feel free to share them with us in the space below.  If you’d like us to organise a pamper party for you then please contact us via email for more information.

Vendor Credits:
  • Party Printables: As You Wish Events Ltd
  • Décor & Styling: As You Wish Events Ltd
  • Catering: As You Wish Events Ltd
  • Beauty Therapists: Beauty Patrol


Table Setting – What you need to know.

It has surprised me the number of times I’ve come across people working in the food service industry that don’t know how to properly set a table.  However I guess that it shouldn’t be that surprising with more of us eating in front of the TV or in cafés and restaurants that roll their cutlery in a paper serviette – not that there is anything wrong with that.  But when you’re faced with a more formal or special occasion, you may like to brush up on your table setting skills as it is a simple and low cost way to add style to your event.

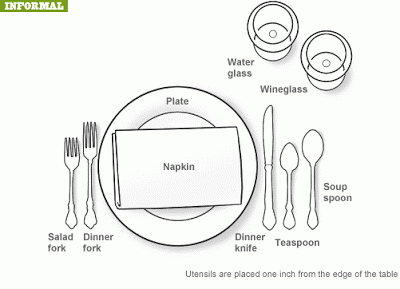
To look at a fully set table it can be rather daunting.  You are most definitely not alone if you find yourself thinking “Really, how many glasses and forks do I need?”  The important things to remember are that a well set table shouldn’t have any unnecessary items, and that all you have to do is work your way from the outside in.


casual-table-place-setting

If it is your job to set the table a few things you need to remember are that the forks all go on the left of the dinner plate and the knives and spoons go on the right, with the glasses above them.  The bottom edge of the cutlery and the lower rim of the plate should all line up so that they are approximately 3 cm in from the edge of the table. This way guests should be able to sit down without knocking them.

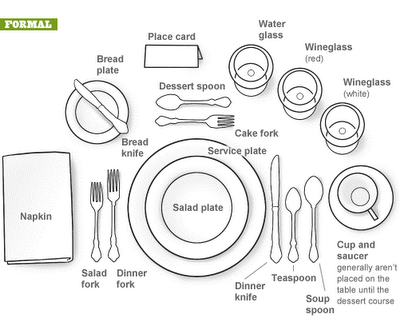
formal-place-setting

For the more formal of occasions, usually when the menu is pre-plated, a bread plate and knife is added above the forks, and the dessert spoon and cake fork are placed above the dinner plate so that they can be moved into place either side of the plate space once the other courses are completed.  Napkins can be either placed to the left or on the plate.  The only other item to mention is the service plate, sometimes called a Charger.  No food is served directly on this plate, instead it serves as an under plate for the plate holding the first course.  The service plate will then be cleared either with those from the first course or will be exchanged for the plate holding the second course.

Lastly, while there are the traditionally accepted ways of setting a table it is also quite common to tweak these to suit the specific needs of your occasion.

If you want to learn more about table settings then I recommend the following articles:


Christmas Foyer Decor

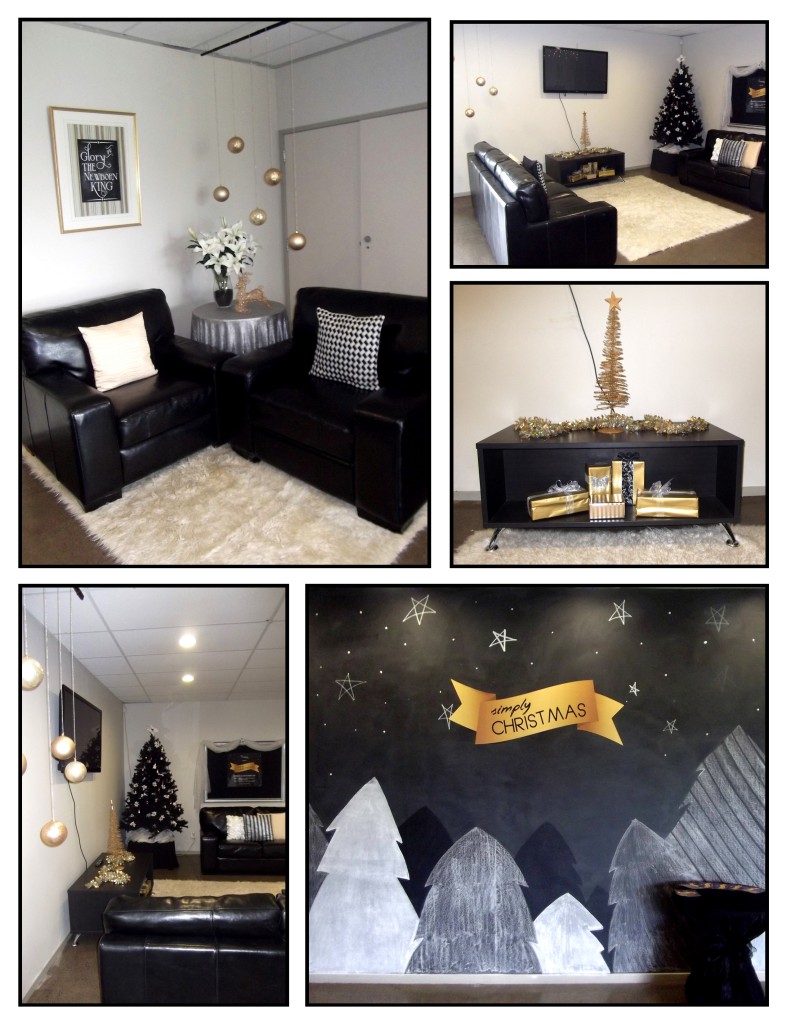
This year I was asked to decorate our church’s foyer for the Christmas season.  The flyer for the Christmas Production served as my inspiration which lead to a colour scheme of gold, black, and white with a touch of silver and yellow.  Although the church had a collection of decorations such as the trees and a few ornaments, some shopping was still needed to create a look that was new.  My favourite shopping finds were from The Clearance Shed where I found the extra large gold baubles and stylish cushion covers.

One of the permanent features in the foyer is a large blackboard wall.  On this wall my assistant and I drew up the same scene at was pictured on the Christmas Production flyer.  The mural was done completely in chalk, apart from the gold banner which was printed onto paper, cut out and stuck on.

Christmas Foyer Decor 1

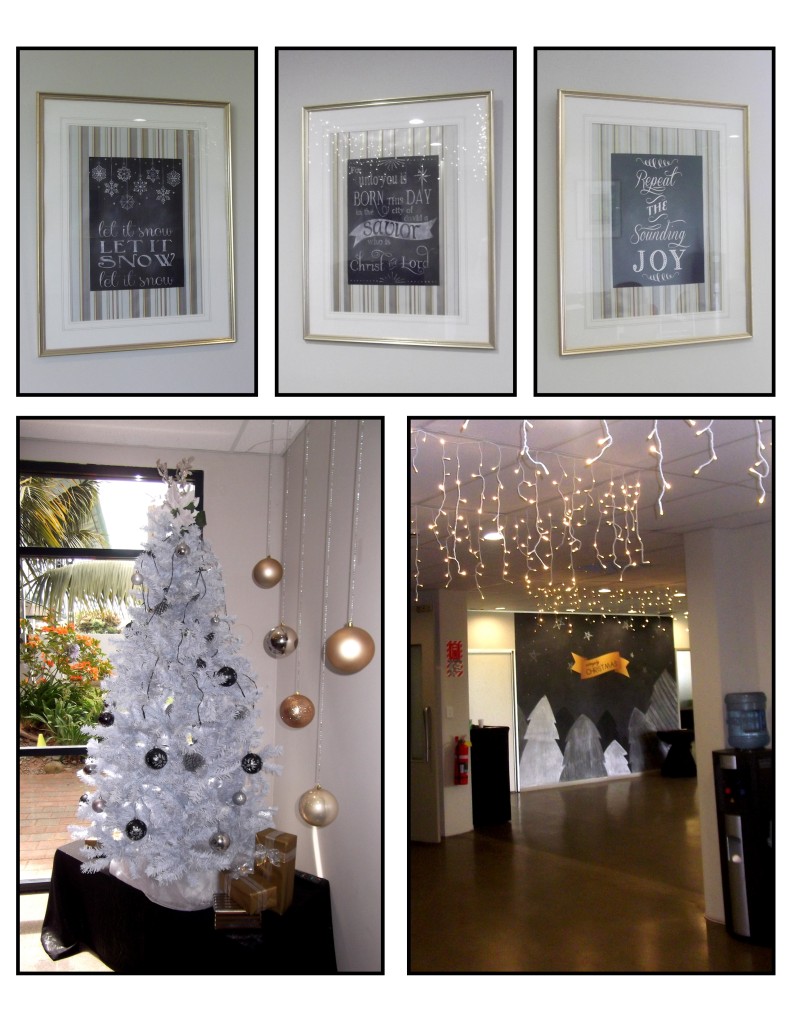
The lowest cost item with the biggest impact had to be the wall hangings.  The frames had been sitting around for a while having been recused from the recycling pile.  I pulled these apart and using some stripy wrapping paper and some beautiful chalkboard printables I found online at Nest of Poises and Love, Pomegranate House I put them together again to create some stunning wall hangings – all for the cost of the wrapping paper.

Christmas Foyer Decor 2

The look was finished off with a few clusters of faux presents and some icicle fairy lights.  Overall a reasonably low cost project that looked fabulous.

The Cookie Swap Party

12 Days of Christmas Ideas – Day 10

Home baking is a lovely treat to offer family and friends when they pop in for a visit over the Christmas period.  It is also a great and inexpensive gift idea.  Having a variety available for both instances can be a lot of work which is why (as promised on Day 2 – Planning Tips for Christmas) I would like to share with you the second of the two party ideas that will help you prepare for Christmas. It’s the Cookie Swap Party.

The Cookie Swap Party is somewhat of a new concept to us here in New Zealand, but I think it is a fantastic idea for getting friends together to achieve a common goal.  Here’s how it works.

1. The Planning

Invite a few of your friends to participate.  I think 5 – 8 people is a nice number.  Each person bakes one dozen of cookies per person attending, plus 1 extra dozen for tasting during the party.  So if you have 5 people coming, each person would need to bake 6 dozen cookies.  That may seem a little scary at first but if you choose a recipe that yields a large quantity to start with and has a short baking time then all you need to do is double the recipe once and within an hour or so you should have all the cookies you need.  Another planning tip is when your guests confirm their participation, ask them what type of cookie they plan to bring.  This way you can be sure to have a good variety on the day.

2. The Cookies

A couple of points to consider when choosing your cookie recipe:

  • Make sure that they are a cookie that will handle being transported – you don’t want the cookies crumbling to pieces before they reach their intended recipients.
  • If the recipe calls for the cookie to be kept in the fridge then it is not a good recipe to choose – you don’t want them to spoil before they reach their intended recipients.
  • You might also like to find out if any of your friends would like a gluten and dairy free option in which case I found the most amazing recipe for Coconut Flour Snickerdoodles. Yum, Yum!
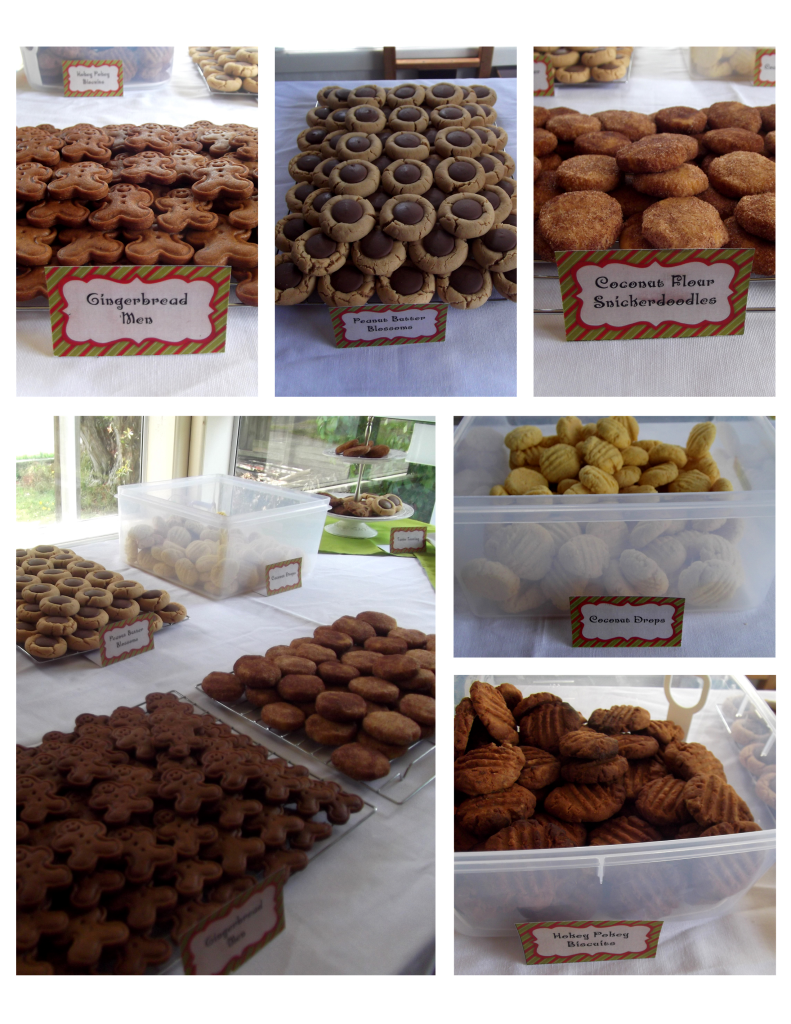
The Cookies - gingerbread

When everyone arrives for the party layout the cookies for swapping on the table.  Label the cookies so everyone knows what they are getting.  If there are gluten and dairy free options make sure everyone knows which ones these are.  Before the swapping begins remind everyone that they can take one dozen of each type of cookie, including one dozen of their own.  If people are gift wrapping their cookies then they probably won’t want to take all their cookies at once, so offer paper and pens for people to keep track of what they take.


3. The Tasting

Set up the cookies for tasting in a space separate from the swapping cookies.  Be the polite hostess and offer your guests a beverage when the arrive, but also set up a little refill station so they can help themselves later if they would like another one – this way you can concentrate on wrapping your cookies and enjoying their company.
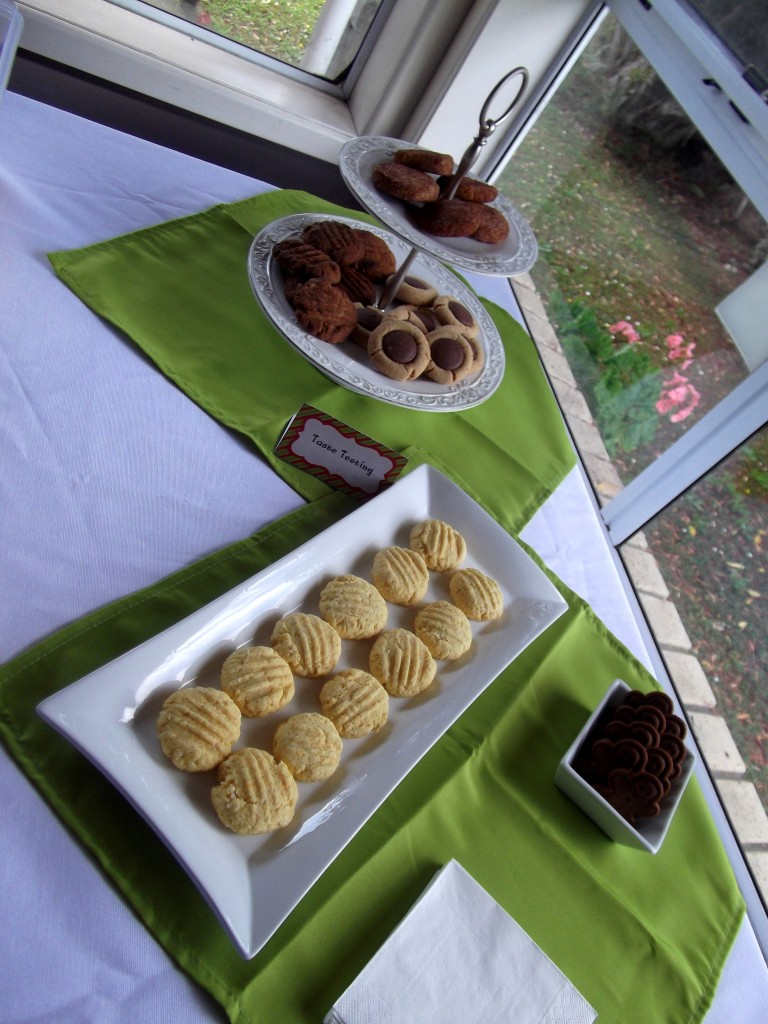
The Tasting

Tasting the cookies is my favourite part.  It’s great that the refreshments for the party are provided without any extra effort, but I think it is even better that everyone then knows exactly what it is they are wrapping as gifts or taking home.  It’s also a great opportunity to swap recipes if something really takes your fancy.


4. The Wrapping

The last thing you’ll need to set up is a wrapping station.  Gather together a range of wrapping supplies.  You can choose whether you supply these yourself or if you ask your friends to contribute.  Things you could include are ribbons; favour boxes; disposable plates; recycled cans, boxes and jars that could be decorated and Christmas paper for making boxes or gifts bags.  Cellophane and lunch wrap paper are also handy to have. One idea a friend of mine suggested was to buy little glass dishes from the second hand shop and wrap the cookies up in these.  You’ll also need things like scissors, glue stick, rulers, sticky tape etc. along with anything else you might want in order to achieve your desired results.The Wrapping
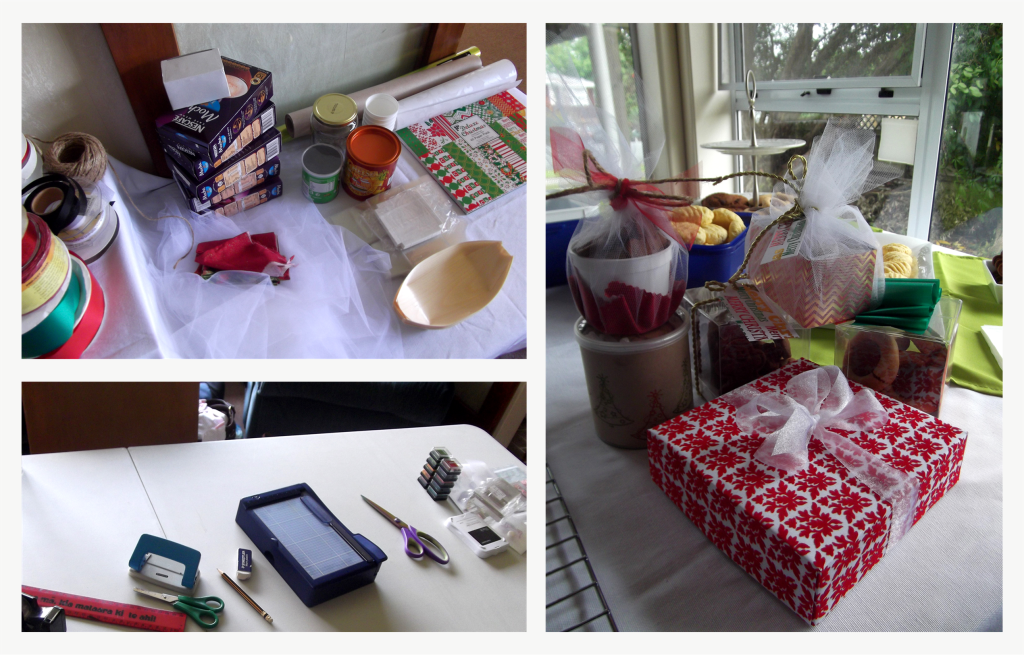
Once everything is set all that is left to do is start swapping, wrapping, eating and chatting.

The photos in this post were taken at a Cookie Swap Party I had with my friends over the weekend.  It was a lot of fun, catching up, eating cookies and being creative.  I wish you just as much fun, should you try this idea with your friends.
A Naturally Kiwi Christmas

12 Days of Christmas Ideas – Day 5

A Naturally Kiwi Christmas 1

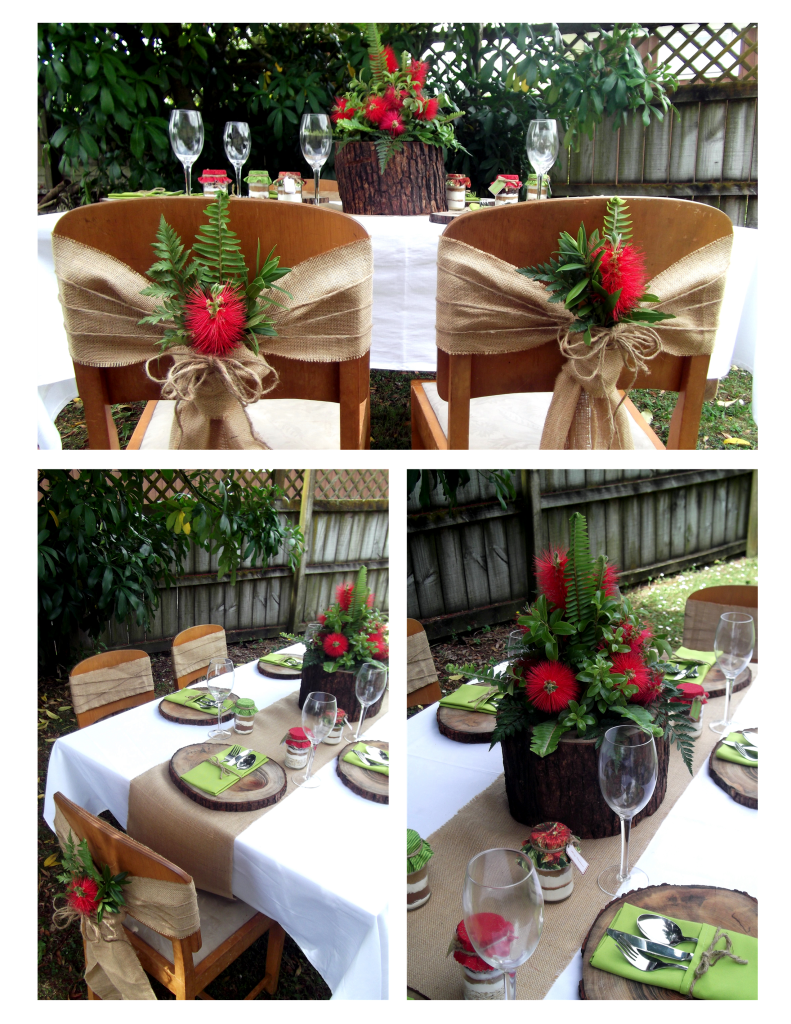
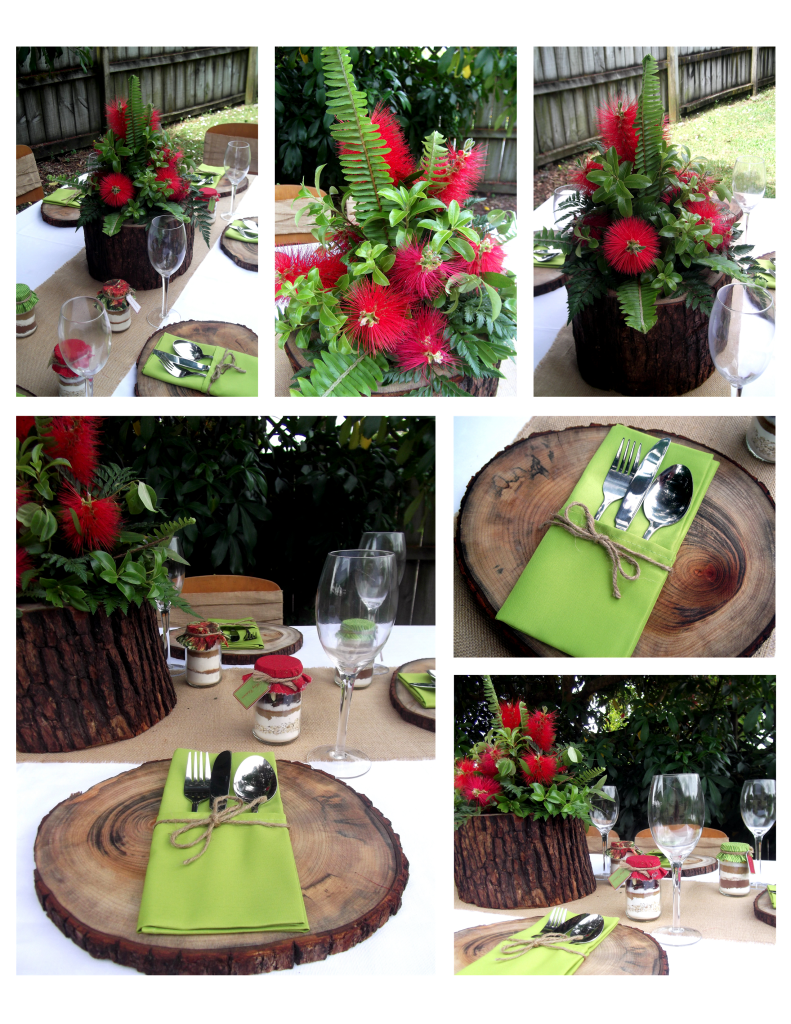
I recently had the opportunity to design and demonstrate a table setting for Christmas dinner.  I was inspired to design something that was decidedly Kiwi.  I wanted to stay true our summer time Christmas and emphasise elements of nature which I felt was consistent with our country’s clean, green image.

I started with a fresh white tablecloth and hessian table runner.  I then added the wooden placemats and centrepiece.  My father is quite the handyman so I asked him to cut cross-sections from an old log.  He then sanded these down and I oiled them with cooking oil to stop them from drying out and cracking. It was an added bonus that the oil brought out the grain in the wood.  The log we used for the centrepiece had a hole cut out of the centre.  This was big enough to fit a 2 litre milk bottle with it’s top cut off, which is what we used to arrange the flowers in. I used a variety of ferns, leafy greenery and red Bottle Brush flowers.  My intention is to use Pohutukawa flowers when I re-create the arrangement for Christmas.

A Naturally Kiwi Christmas 2

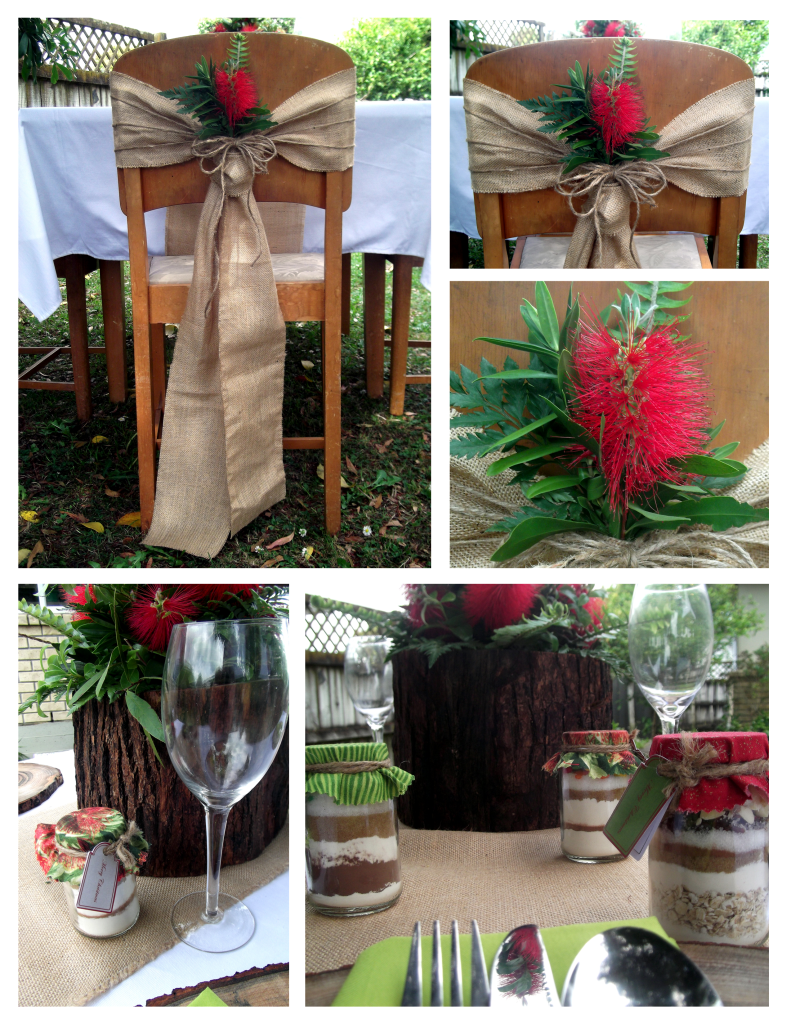
The cutlery and glassware was next placed on the table, along with sage green fabric napkins folded into a simple cutlery pouch.  Each napkin was tied with a piece of twine to finish off the look.   I wanted to make my overall design just that little more special, so I decided to decorate the chairs as well.   Any kind of chair can look great with a few decorations, even these old ones.  I cut chair sashes from the hessian and tied them around the chairs in the same way you would tie a neck tie.  I used the twine to create extra detail by wrapping it around the chair and making a bow.  I then made little arrangements with the leftover flowers and greenery from the centrepiece, and tucked them into the knot in the chair sash.

A Naturally Kiwi Christmas 3

Lastly I added my personal favourite, the favours.  I think it is always nice to add a small gift as I feel it is an extra way to show the appreciation I have for each of my guests.  The favour I used in this case was my own creation of a Mug Cookie in a Jar.  The ultimate combination of the two great ideas of Cookies in a Mug and Cookies in a Jar.  All the details on how to make these favours will feature in tomorrow’s blog.


Shopping Notes:
  • Spotlight: White Tablecloth $34.99 & Hessian $5.59 per metre
  • Dreamlands: Sage Green Napkins $14.64 for a packet of 5
  • $1, $2, $3 Store: Twine $2