1950s/Greased Lightning Theme Party

For the last 4 years I have had the privilege of arranging the theming for an annual scrapbooking camp held at Totara Springs just out of Matamata.  This year the theme was ‘Greased Lightning’.  For most of the weekend the theming stretched only as far a name tags, room labels and work table decorations, but on the Saturday night for dinner we went all out.   While the campers donned their full circle skirts, cats eye glasses, tight black leather pants and pink wigs I set to giving the dinning room an overhaul.

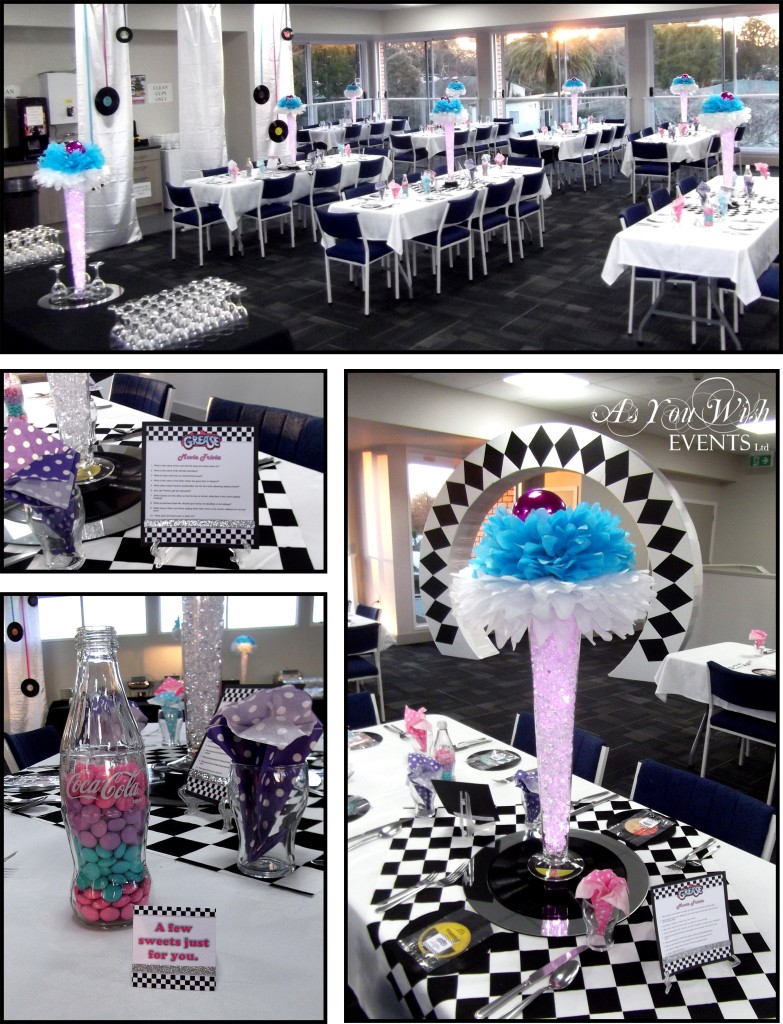
1950s / Greased Lightning Image 1

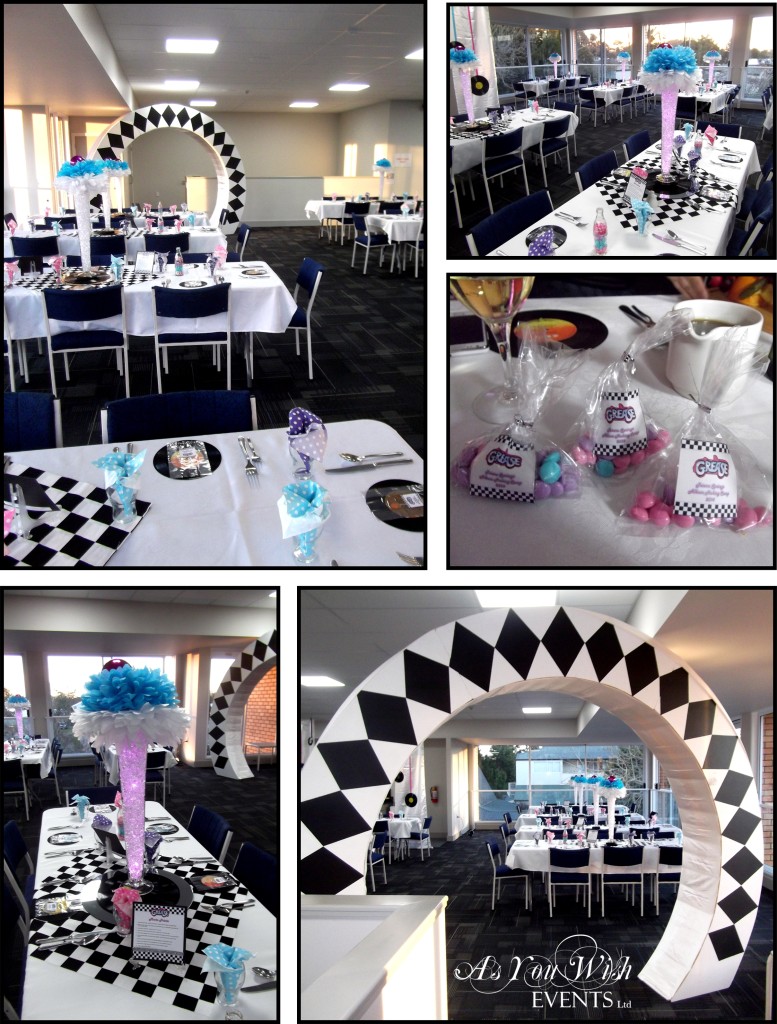
1950s/Grease Lightning Image 2
Party Décor Favourites:
  • I loved working with the Pink, Turquoise and Purple colour scheme.  They added the necessary pop of colour among all the black and white checks.
  • The ice cream soda centrepieces were another favourite.  I wanted to incorporate the neon lights we tend associate with 1950s so I filled the tall cone vases with acrylic ice and ran a strand of battery operated lights through them.
  • Lastly, the final touches of the theme coloured chocolate gems (similar to Smarties and M&Ms) as a self serve favour bag and the ‘Grease’ movie trivia card really finished it all off perfectly.

If you have any questions or comments regarding how we put this theme together or if you would like us to create a party for you then please contact us either via email or through the comments section below.


A Little Time Out

A Pamper Party

In amongst the hectic lives we live it is important to take a little time out every now and then to relax and pamper ourselves.  After a fairly stressful start to the year I decided that for my birthday that was exactly what I was going to do.

I wanted to be able share the experience with a few of my good friends.  I also wanted the experience to be similar to that of going to an actual day spa, but without having to leave the comfort of my own home.  I didn’t think this would work if we had to do the treatments ourselves, which meant finding a company that would do these for us.    So I went looking, and found Beauty Patrol.  Their staff are fully trained and the ladies that came to us had a lot of experience and did great work.  Beauty Patrol offer a great selection of pamper party treatment menus and at a very reasonable price, I might add.  All that was left to organise was a relaxing environment and some tasty food.

Pamper Party Image 1

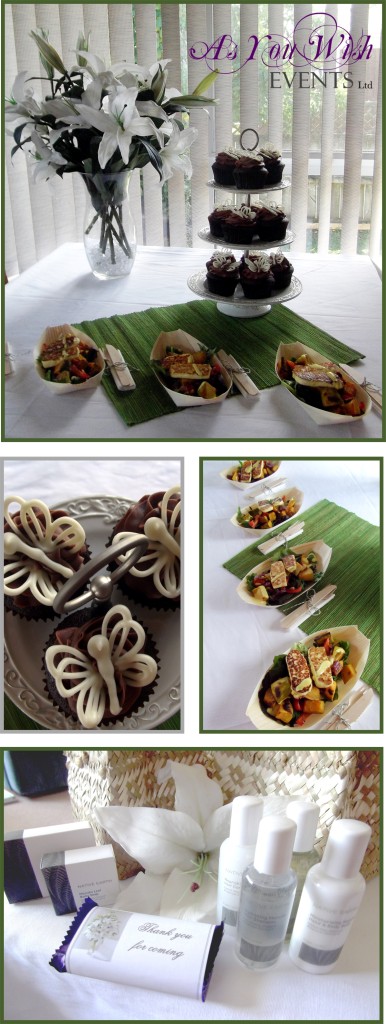
Pamper Party Food & Favours

The Menu:

For the food I decided that a couple of fresh and healthy options would be ideal.  So we served a roast vegetable salad with Haloumi Cheese and Honey Mustard Dressing, as well as some fresh summer fruits.  And of course no pampering is complete without a little indulgence so I included some triple chocolate cupcakes.

The Favours:

I love party favours, they are a simple way of saying how much you love and appreciate your guests.  I also think for an occasion such as this it adds just that little extra to the atmosphere of luxury.  So in keeping with the natural and neutral theme, I purchased some flax ketes from the $ value store and some beauty sets off Trade Me to go in them.  I also added a chocolate bar that I wrapped with my thank you note, that matched the rest of my stationery.

Pamper Party 2

The Environment

 The Environment:

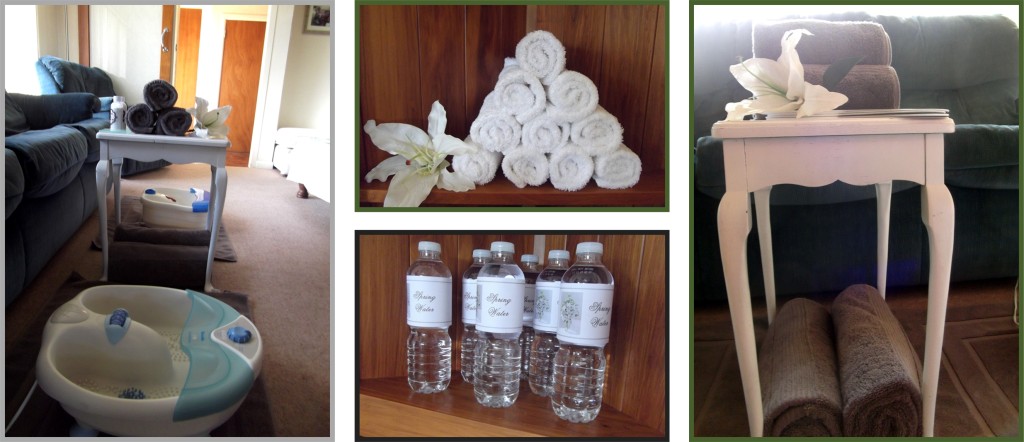
Usually when I write about parties I talk about the decorations, because they play a large role in setting the atmosphere.  However in this case setting the atmosphere was more about clearing things away, rather than setting things up.  I moved out all the unnecessary items that usually clutter our living room.  This instantly made the room more relaxing.  Then apart from a few flowers and a scented candle, everything else I put out was there to be used by my guests.  I made sure we had plenty of towels, water bottles, magazines, a couple of foot spas, and a few additional pamper products like lotions and face masks.

Summing Up:

Overall, it was everything I had hoped and planned for.   One pampered afternoon with friends.

If you have any questions or comments please feel free to share them with us in the space below.  If you’d like us to organise a pamper party for you then please contact us via email for more information.

Vendor Credits:
  • Party Printables: As You Wish Events Ltd
  • Décor & Styling: As You Wish Events Ltd
  • Catering: As You Wish Events Ltd
  • Beauty Therapists: Beauty Patrol


The Last of the Toolbox Favourites

At the end of last year I began a series of articles about my favourite and most often used toolbox items.  I figured it’s about time I wrap this series up, so today I am going to share with you the last few items I just wouldn’t want to be without when decorating.

Toolbox 3

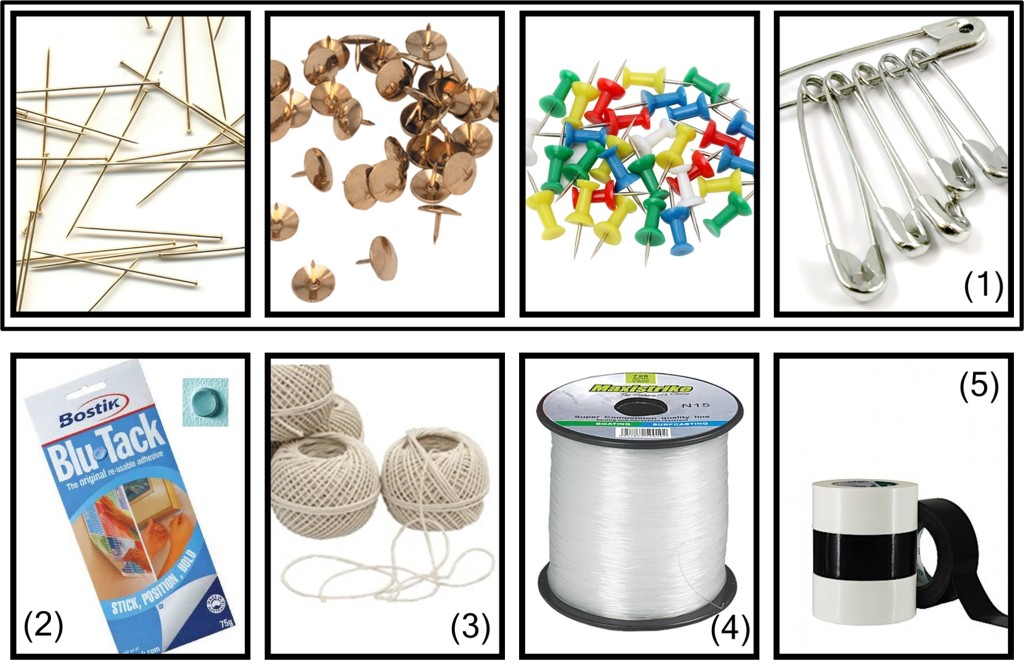
1. Pins, Pins and More Pins

As seen in the picture above, there are a few different kinds of pins that can be useful when decorating.  There are the dressmaker pins, thumb tacks, drawing pins (also know as push pins) and safety pins.  In each situation gage which type of pin is best for the task at hand.  If you plan to pin things to the walls or ceiling, be sure to check with your venue’s management that it is okay to do so.  Try not to use more pins than you have to and where possible position the decorations to hide them as it gives a neater finish.  Lastly (and while this may seem obvious), if you are using the dressmakers pins just be careful that the sharp end isn’t sticking out somewhere that will stick into one of your guests.

2. Blu Tack

An all time favourite for most people, Blu Tack is ideal for hanging up posters or pictures that are part of your décor.  Don’t be fooled by the cheaper knock offs that are out there as they may not do a good job of holding your pictures up properly and they may mark the surface you are working with.

3. String

Another useful item for hanging items or tying items together.  I prefer the natural coloured, cotton varieties as they look clean and tidy, however if are going for a more rustic look in your décor then the chunkier twines can look fantastic.  If the string is going to be seen make sure your knots or bows look neat and that you trim the ends appropriately.

4. Fishing Nylon

Much like string, fishing nylon is also good for hanging items or tying items together. The difference with fishing nylon is that it is pretty much see through, so it is like using invisible string.

5.  Cloth Tape

Also known as gaffer or duct tape, cloth tape can come in handy for just about anything.  If you are wanting to secure poles, framing, or curtain rails in place then cloth tape is good for this, as long as it is hidden out of sight once you’re finished.  Cloth tape is also ideal for taping down any extension leads or carpet runners you might be running across your venue – by securing these you are reducing the risk of your guests tripping on them.

So there you have it, 11 of my favourite toolbox items.  But as I said last time unless you are decorating events on a regular basis, save yourself some money by taking a good look at your venue and determining beforehand what items you will need on the day of your event.  As always having the right tools for the task at hand will make your event less stressful and therefore more enjoyable.

Happy Decorating!


Some Super Ideas for Celebrating Easter

Easter is sneaking up fast on us again.  This is another of my most favourite holidays, so I’ve been out looking for some exciting ideas for our family’s celebrations.

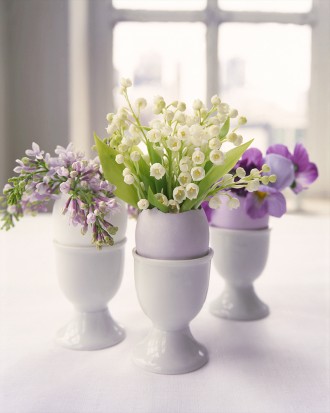
Flower Arrangments in Eggshells

Such a simple yet sweet idea to bring a touch of Easter into your home.

As Seen On: Martha Stewart.com


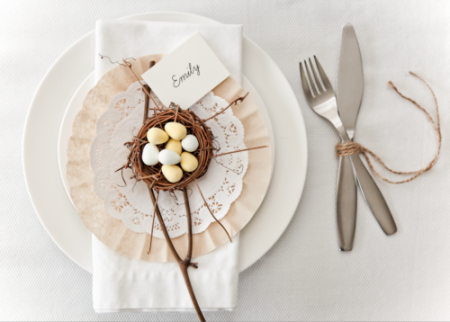
Easter Table Setting

I love this table setting by Boxwood Clippings. It has a rustic elegance about it with the little nest, paper doily and coffee filters. Brilliant!

As Seen On: Boxwood Clippings


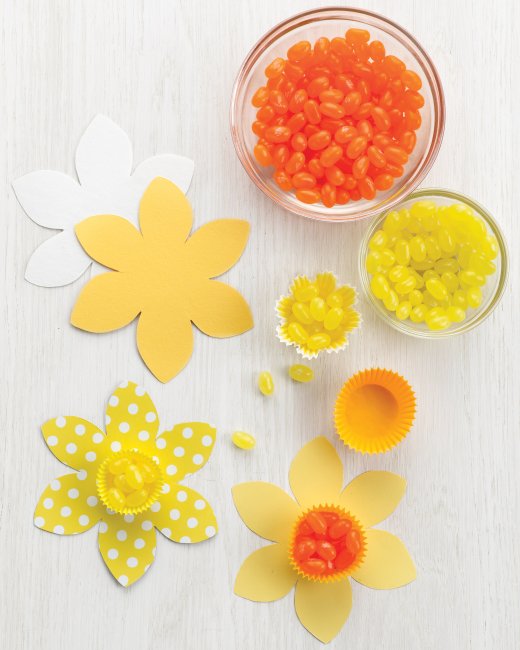
Daffodil Candy Cups

Not only is this a great craft idea to do with the family, its also a great option for those who have allergies that stop them from eating chocolate.

As Seen On:  Martha Stewart.com

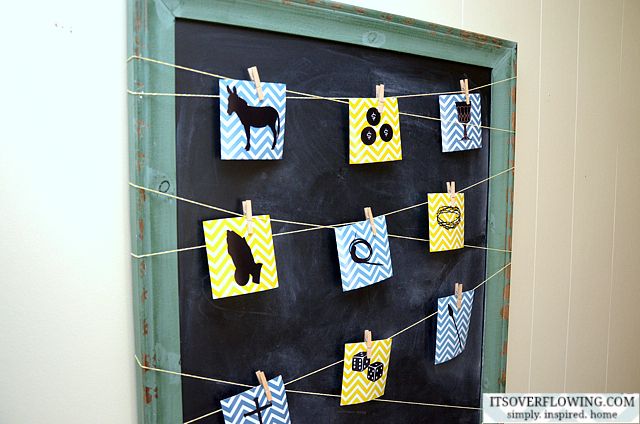
The Easter Story

What a beautiful way to keep the true story of Easter central to the holiday. Aimee from ‘It’s Overflowing’, offers the template for this as a free printable on her website. I absolutely love it!

As Seen On: It’s Overflowing


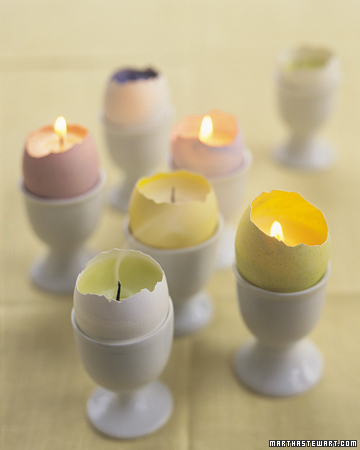
Egg Votive

Another fantastic idea from Martha Stewart.com

As Seen On: Martha Stewart.com

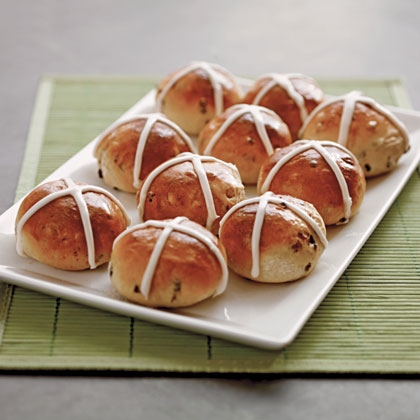
Hot Cross Buns

I just can’t imagine having Easter without Hot Cross Buns. Why not try making your own, maybe hunt out the old family recipe or give this one a try.

As Seen On: Spoonful

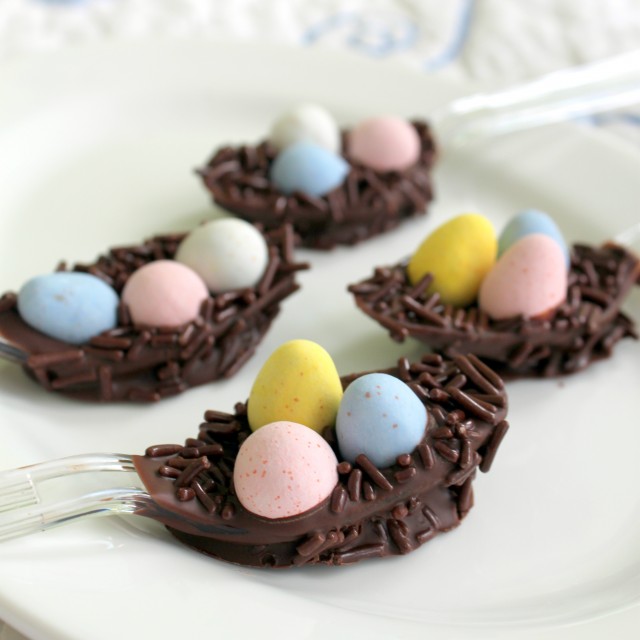
Chocolate Easter Egg Nests

A fun gift idea or maybe an activity for the family.
Mmmm, I would like to try stirring one into a nice mug of hot chocolate.

As Seen On: Life and Kitchen

If you have any Easter craft ideas, favourite Easter recipes or Easter decorations that you’d like to share, we’d love to hear from you.  Just share your ideas in the comments below or send us an email.  Happy Easter everyone!

Table Setting – What you need to know.

It has surprised me the number of times I’ve come across people working in the food service industry that don’t know how to properly set a table.  However I guess that it shouldn’t be that surprising with more of us eating in front of the TV or in cafés and restaurants that roll their cutlery in a paper serviette – not that there is anything wrong with that.  But when you’re faced with a more formal or special occasion, you may like to brush up on your table setting skills as it is a simple and low cost way to add style to your event.

To look at a fully set table it can be rather daunting.  You are most definitely not alone if you find yourself thinking “Really, how many glasses and forks do I need?”  The important things to remember are that a well set table shouldn’t have any unnecessary items, and that all you have to do is work your way from the outside in.


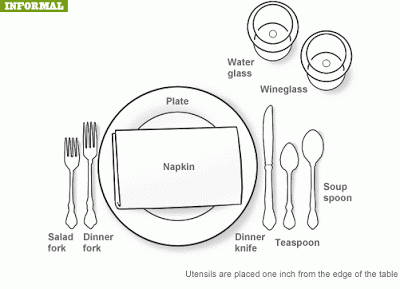
casual-table-place-setting

If it is your job to set the table a few things you need to remember are that the forks all go on the left of the dinner plate and the knives and spoons go on the right, with the glasses above them.  The bottom edge of the cutlery and the lower rim of the plate should all line up so that they are approximately 3 cm in from the edge of the table. This way guests should be able to sit down without knocking them.

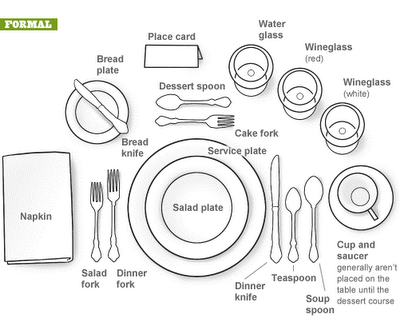
formal-place-setting

For the more formal of occasions, usually when the menu is pre-plated, a bread plate and knife is added above the forks, and the dessert spoon and cake fork are placed above the dinner plate so that they can be moved into place either side of the plate space once the other courses are completed.  Napkins can be either placed to the left or on the plate.  The only other item to mention is the service plate, sometimes called a Charger.  No food is served directly on this plate, instead it serves as an under plate for the plate holding the first course.  The service plate will then be cleared either with those from the first course or will be exchanged for the plate holding the second course.

Lastly, while there are the traditionally accepted ways of setting a table it is also quite common to tweak these to suit the specific needs of your occasion.

If you want to learn more about table settings then I recommend the following articles:


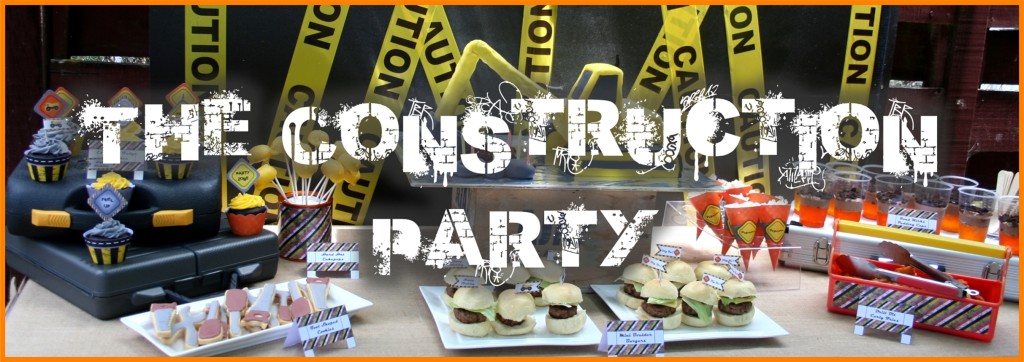
The Construction Party


The Construction Party Header

Back in February I had the privilege of designing a Construction themed birthday party for a young man who was turning six years old.  This was such a great theme to do as there was no shortage of ideas.

Party Highlights:
  • Once again I was really pleased with how the printables turned out.  Out of these the Toolbox Favour box and the little flags have to be my favourites.
  • I loved planning and making the food to match the theme.
  • I was so pleased to find yellow plastic construction party hats at a $ value store and the tool shaped erasers at Manna Christian Store in Henderson – they fitted the theme perfectly.
  • The ‘Build your own Gingerbread House’ activity was a hit, entertaining guests both young and old.
  • And probably the best part for me was the Birthday Boy’s unmistakable excitement and awe for how it all came together.

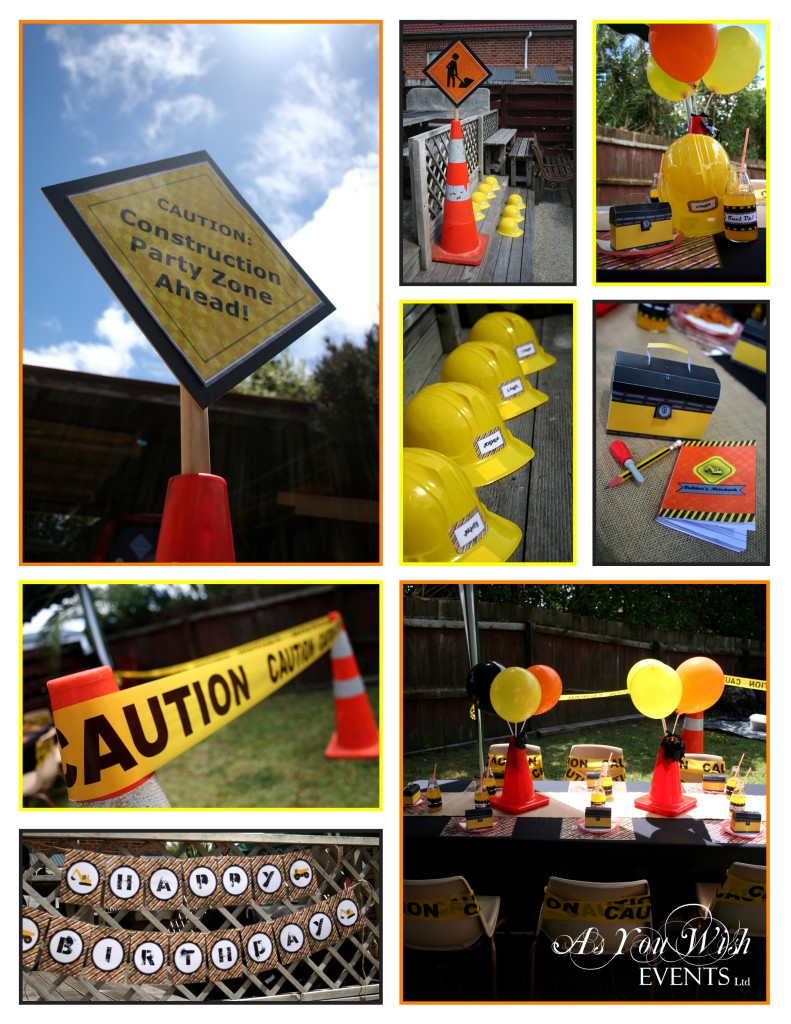
 Construction Party Blog - The Decor

Party Décor:

The weather was brilliant for this outdoor party.  As the guests arrived they were directed to the backyard by signs made especially for the occasion.  One of the first things they would have seen on reaching the backyard was the big birthday banner, from the Construction party printable collection.  We created the dining space by using the gazebo and a couple of giant road cones paired with ‘Caution’ tape.  We also used the ‘Caution’ tape to wrap around the backs of the chairs and the backdrop for the food table.  The guest table had two small road cone centrepieces and a hessian table runner, along with place settings consisting of a placemat, plate, serviette, themed drink bottle and favour box.

Party Favours:

Each guest received a construction party hat along with a Toolbox, favour box.  These were a little tricky to put together but looked great in the end.  Each favour box contained a tool shaped eraser, pencil and a ‘Builder’s Notebook’.  The covers for the notebooks were from the printable collection which we wrapped around some little notebooks we found at a $ value store.

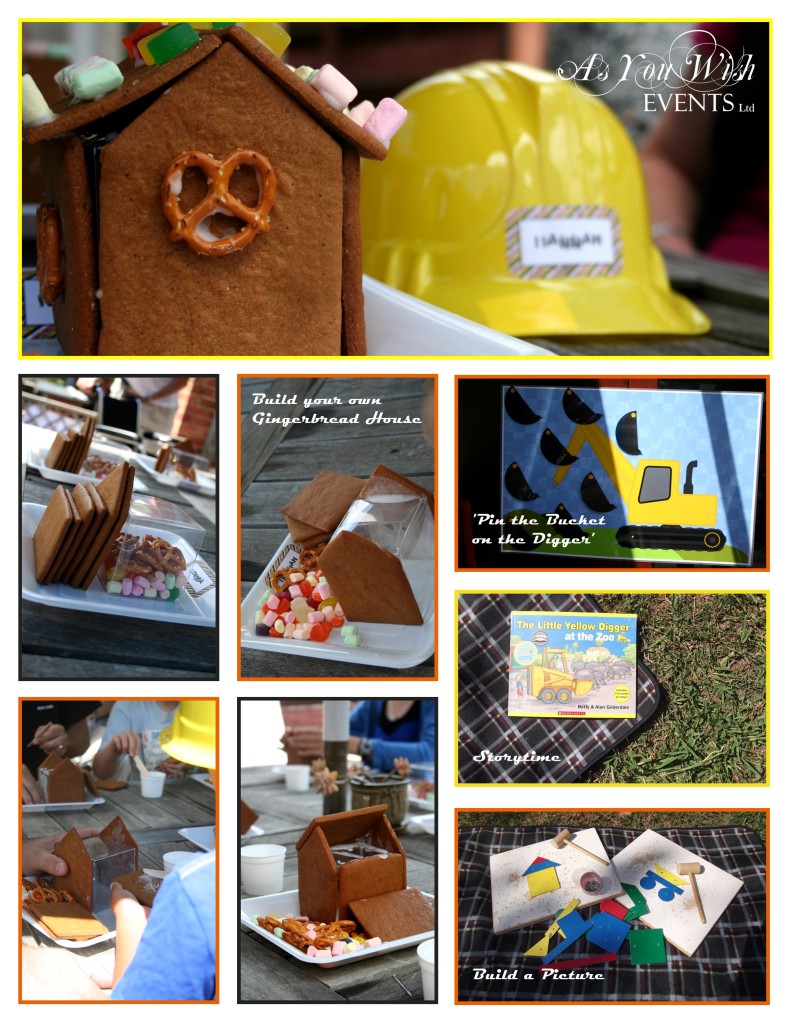
Construction Party Blog - The Entertainment

The Entertainment:

There was no shortage of things to do at this party.  The main activity was to ‘Build your own Gingerbread House’.  Each guest was given their own ‘kit set’ containing everything they would need for building their house.  After giving a quick demonstration and appointing a couple of the dads as the foremen for the job site, we left them to it.  As the party progressed the guests played ‘Pin the Bucket on the Digger’ – simply a theme appropriate version of ‘Pin the tail on the Donkey’; played with the build a picture set and listened to our storyteller read one of the popular ‘Little Yellow Digger’ books.

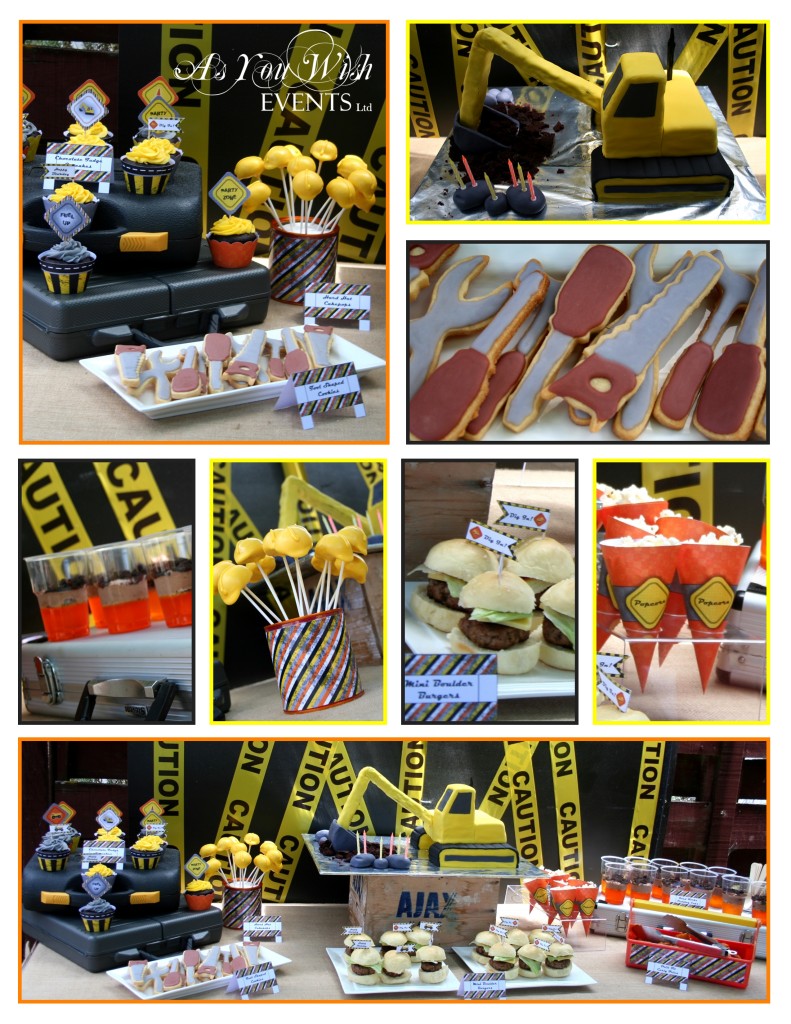
Construction Party Blog - The Food

The Party Food:

This was an exciting menu to put together.  We had:

  • Chocolate Fudge cupcakes – displayed with wrappers and toppers from the Construction Party printable collection.
  • Hard hat cake pops
  • Tool-shaped cookies
  • Mini Boulder Burgers – displayed with little flags from the Construction Party printable collection.
  • Popcorn served in cones from the Construction Party printable collection.
  • Drill bit curly fries
  • Road Works Pudding Cups.

The buffet table was set up using a variety of toolboxes and an old nail box along with a few other pieces we had handy.  We used labels from the Construction Party printable collection to tie everything together.  At the centre of the buffet table was the amazing ‘Digger’ birthday cake made by a family friend.

Summing Up:

Overall this was a fabulous party to put together.  The most challenging part was dealing with the heat from the sun – but once we had everything properly positioned under the gazebo and umbrella we were good to go.  Everyone seemed to enjoy themselves, especially the Birthday Boy.

If you have any questions or comments regarding how we put this theme together or if you would like us to create a party for you then please contact us either via email or through the comments section below.

 Vendor Credits:
  • Party Printables: As You Wish Events Ltd
  • Décor & Styling: As You Wish Events Ltd
  • Catering: As You Wish Events Ltd
  • Photography: Christine Kehinde
  • Cones hired from Hirepool
  • Caution tape purchased at Super Cheap Auto


The Evolution of the Cardboard Wedding Camera

I have a great passion for photos.  For me they breathe life back into the memories I have of days gone past and allow me to relive the emotions and remember the people with whom I shared those moments with. You could say there is magic in them.  I believe that this is one reason why photos should always play an important role in your wedding day.  Now I think it goes without saying that you should always have an official photographer – one who knows what they are doing and has a style that suits yours – but what I really want to talk about today is capturing those candid moments that happen when the official photographer is busy elsewhere.

In the late 90s the disposable cardboard wedding camera set out on its rise to popularity as the preferred way for guests to capture these very moments.  But with the advances we’ve seen in technology in recent years is this still our best choice?


The Disposable Cardboard Camera
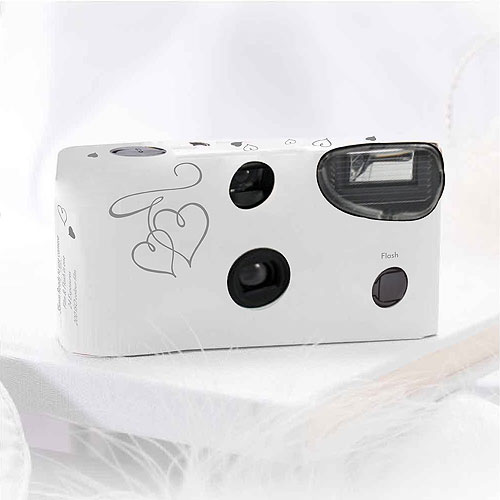
Disposable Wedding Camera

For us here in New Zealand the trend of placing disposable cameras on the guest tables began it’s rise to popularity around the mid 2000s.  Around that time I had two weddings that chose to use them.  We found a 10 pack of cameras at an affordable price that had a design that worked with their theme.  Away their guests went, clicking photos to their hearts content.  Then it came time to develop them.  Being that they were film cameras we had no choice but to develop the whole film which generally cost somewhere between $20 – $30, only to find that most of the photos were blurry, and those that weren’t had the top of someone’s head cut off.  I think that one of those brides, after developing a couple of films, gave up on the rest and threw them out.  Overall a rather costly and disappointing experience.

From that point on I looked for alternative options to offer my clients.  I found that a few companies overseas were offering a similar solution to the disposable cameras, but rather with digital cameras that you could hire. Unfortunately no one in NZ had picked up on that idea in time for the next wedding so we had to come up with something else.


CDs for Guest’s Photos
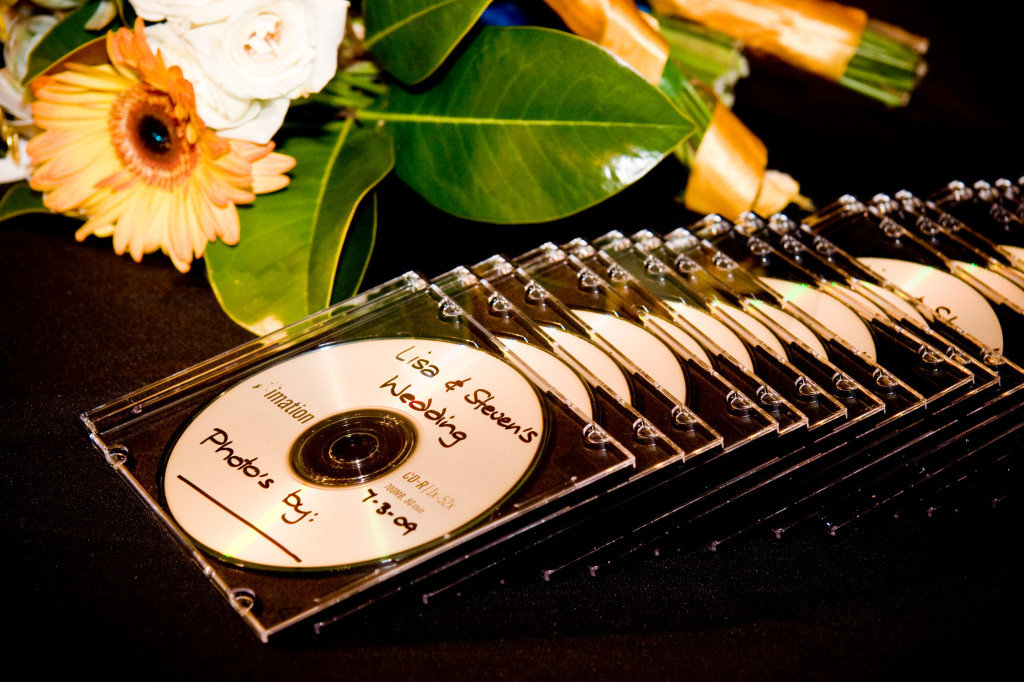
Photo CDs

By this time digital cameras had become increasingly popular.  This Bride and Groom were confident that many of their guests had digital cameras and that they would bring them along.  So this time we gave out CDs, labelled with the Bride and Grooms details, for the guests to take home, download their photos onto and then post to the Bride and Groom.  This idea had better success because the guests could check their photos as they took them, meaning they were of a higher quality and the Bride and Groom could be more selective about the ones they chose to develop.  Sadly there were still a few downsides.  The first being that it is very hard to predict how many guests will take a CD, so we ended up with CDs and envelopes leftover.  Secondly, not everyone remembered to send their photos to the Bride and Groom, meaning they had to chase people for the photos.  Overall for the cost of around $30 – $50 it wasn’t a bad idea.


Photo Sharing Apps
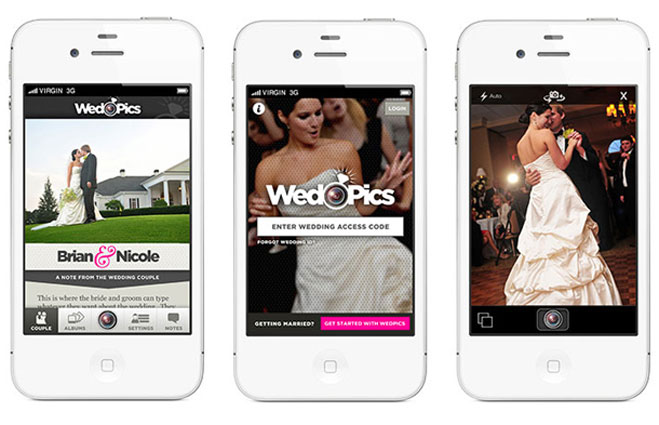
WedPics

Now with smart phones and mobile access to the internet there are a number of apps that can be downloaded onto your phone through which you can take photos and share them to a personalised online album. My favourite of these apps is WedPics.

WedPics wedding app is a free, fun, and an easy way for your guests to share their photos & videos of your special day.  It is available for both iPhone and Android, and if your cell phone isn’t smart enough then you still have the option of uploading photos from you digital camera.  The pros of this modern solution to the disposable cardboard camera are that it costs nothing to set up and because it is instant you are less likely to have to chase people to send you their photos.


 Conclusion

Ultimately all these options are still viable for any event, you just have to consider your event, your guests, your budget and the look and feel that you are aiming for. For me the strength of the app option and ability to immediately upload photos from your phone or later from your digital camera is very attractive especially at no cost.

There are plenty of other options out there like Facebook, Instagram or shared file services like Dropbox. It would be great to hear from you on what you have seen or done, and whether they worked well or not.
Counting Down to Valentines Day – Part 2

What to do, what to do?  Dinner and a Movie?  Sometimes we can easily get stuck in a rut when it comes to date ideas, so here are  5 Valentine’s Date ideas, to spark your dating creativity.

1. ‘A Great Pick Up’ – Sometimes what could be a rather unimaginative date idea can be made memorable by arriving to pick up your date in an unexpected mode of transportation.  Yes there is the cliché limousine, but why not try something different like a scooter, horse, tandem bicycle, golf cart or roller blades.

2. ‘On a Mission’  – Just like the old party game ‘Treasure Hunt’, set up a series of clues for your date to follow in order to find you.  When they do find you, you are waiting with a fun activity to do together or a romantic dinner.

3. In the Park – If you happen to be in the Auckland region over the summer months there are a great selection of free outdoor movies and concerts that you can take your date too.  Take along a picnic and enjoy the outdoor entertainment together.  For more details on when and where these events are taking place click here.

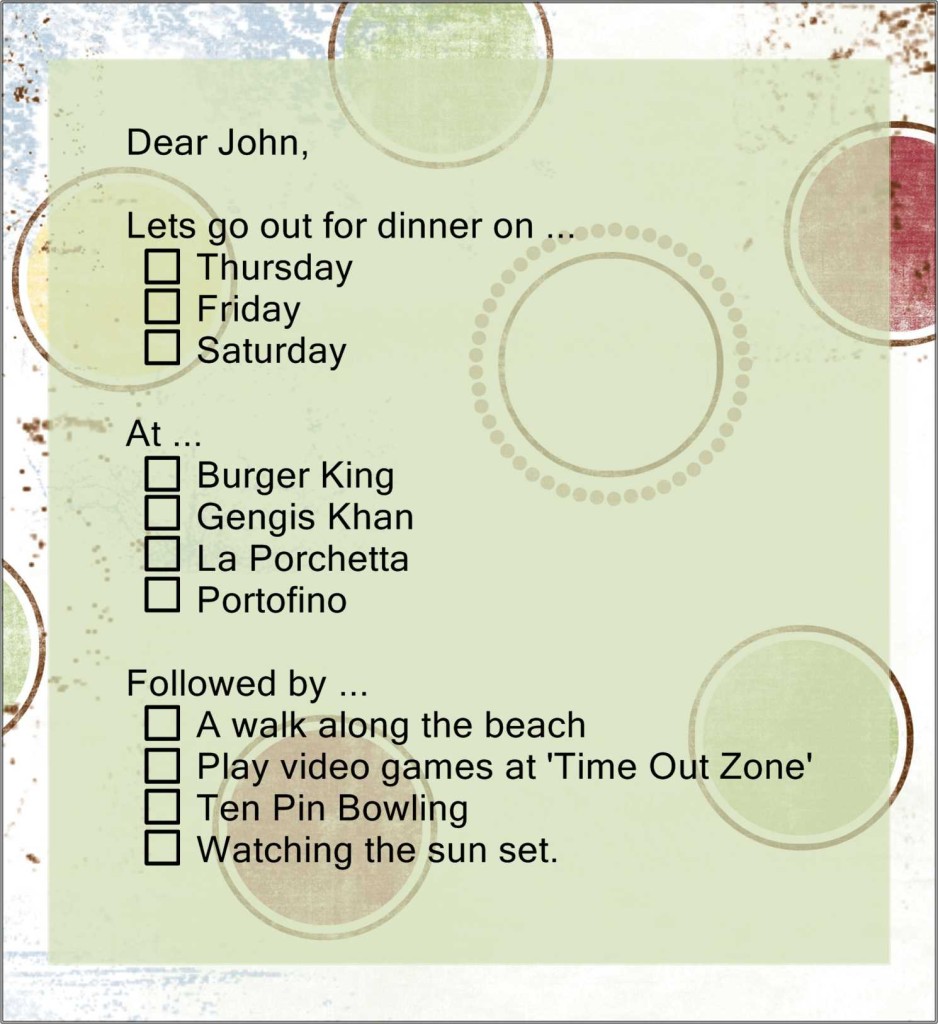
4. ‘Decisions, Decisions’ – If you are tired of being the one who always makes the date plans then here is a great idea for you.  Send your loved one an invitation for a date. However, create multi-choice options for the when, where and what so they have to make the decision for once. Here is an example …

Invitation Example

5. ‘A Rotic Evening’ – While Valentine’s Day is considered to be more for couples, why should the singles miss out on celebrating love.  Rotic is simply ‘romantic’ without the ‘man’.  So arrange a girls night with a group of single friends.  Why not have a candle light dinner and watch a good chick flick.

For more ideas and resources try The Romantic.com, alternatively if you have some creative ideas for dates please share them in the comments section below.  But more than anything we hope you enjoy your Valentine’s Day.

More Toolbox Favourites

Today it is all about Hooks.  Last month I posted an article about 3 of my favourite toolbox items and today I plan to continue with this theme by showing you 3 types of hooks that I find to be very useful.

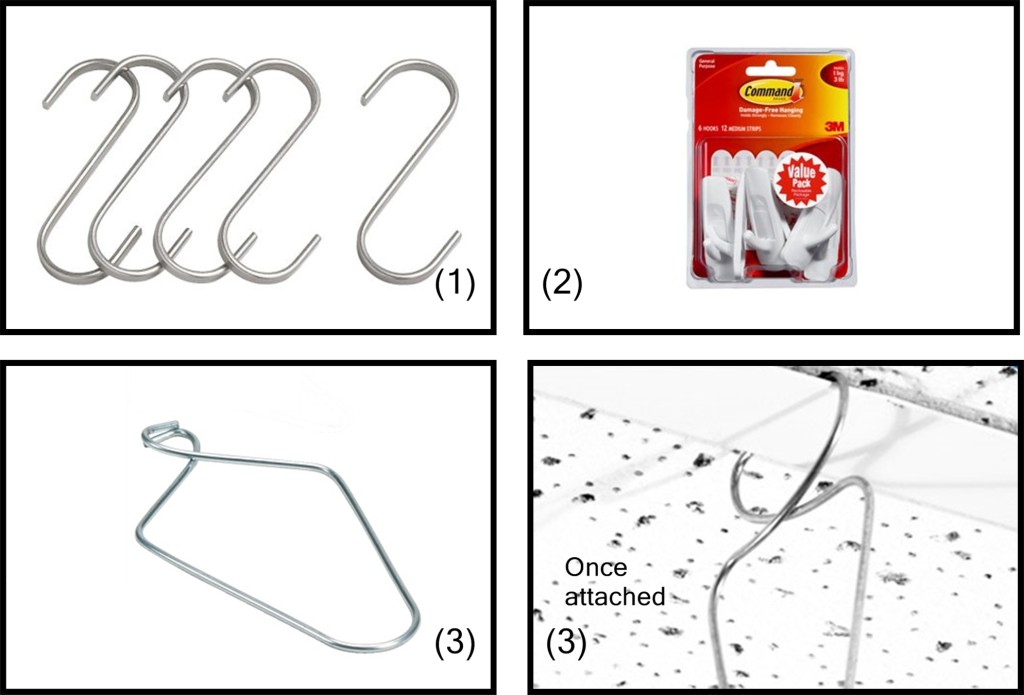
Toolbox Pt21. ‘S’ Hooks

The ‘S’ hook is a quick and simple way of hanging a decoration that would usually require string.  They can also turn pre-existing railings, rods, nails or bolts into hooks.  For example, I have used them to hang oversized curtains onto the rods of those old winding windows you find up high in classrooms or community halls; chandelier crystals from tree branches; and paper lanterns from a client’s back porch.  These are available at most hardware stores and variety discounter stores such as the ‘$1, $2, $3 Shops’.  I tend to buy mine at the later as they are usually cheaper.

2. 3M Command Hooks

Most venues these days will have restrictions on what you can use to hang decorations up with – which I think is absolutely fair since their walls may start to resemble Swiss cheese if they didn’t.  The problem comes when these venues don’t offer any existing options for hanging decorations, which is when the range of 3M Command Hooks can really come in handy.  They come in a variety of shapes and sizes.  You should choose which hooks to use based on the weight of the objects you wish to hang.  Some people can have difficulty removing the hooks cleanly, but if you follow the instructions on the back of the pack you should have success.  If you still don’t feel confident with the removal of these hooks then I suggest you have a few practice runs at home before the day of your big event.  3M Command Hooks are available from most supermarkets, hardware stores and The Warehouse.

3. Suspended Ceiling Display Clips

Okay, so technically it is more of a clip than a hook, but you can still use it to hook decorations on to a suspended ceiling.  This type of ceiling is often found in converted warehouses or office spaces, which is why you’ll find a lot of modern churches will have them.  These ceilings are made up of a system of rails and ceiling tiles.  The clips simply clip onto the rails (as shown in the picture above) and from there you can add anything you like – as long at it isn’t too heavy.  These are a little harder to come by being that they are more of a shop merchandising item but the folk at the Celebrations Group – Party Mad do sell them and I have always found them to be very helpful.

All of these hooks have been useful to me at various times but unless you are decorating for events on a regular basis, save yourself some money by taking a good look at your venue and determining beforehand what hooks you will need on the day of your event.  Having the right tools for the task at hand will make your event less stressful and therefore more enjoyable.

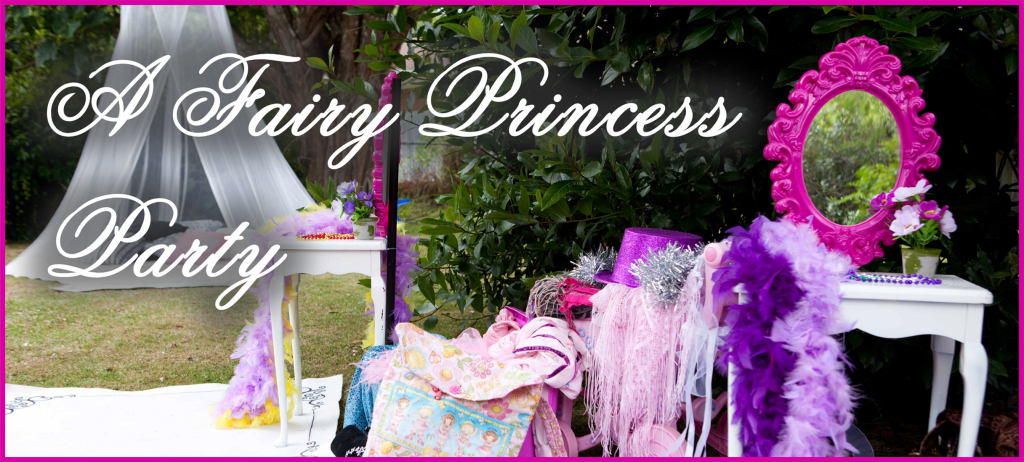
Fairy Princess Party


Fairy Princess Party

One of my earlier printable designs recently underwent a fairy-makeover for my niece’s 5th birthday party.  The weather was just perfect for the outdoor party which took place in their back yard last weekend.

Party Highlights:
  • The pretty pink and white ‘Fairy Princess’ party printables.
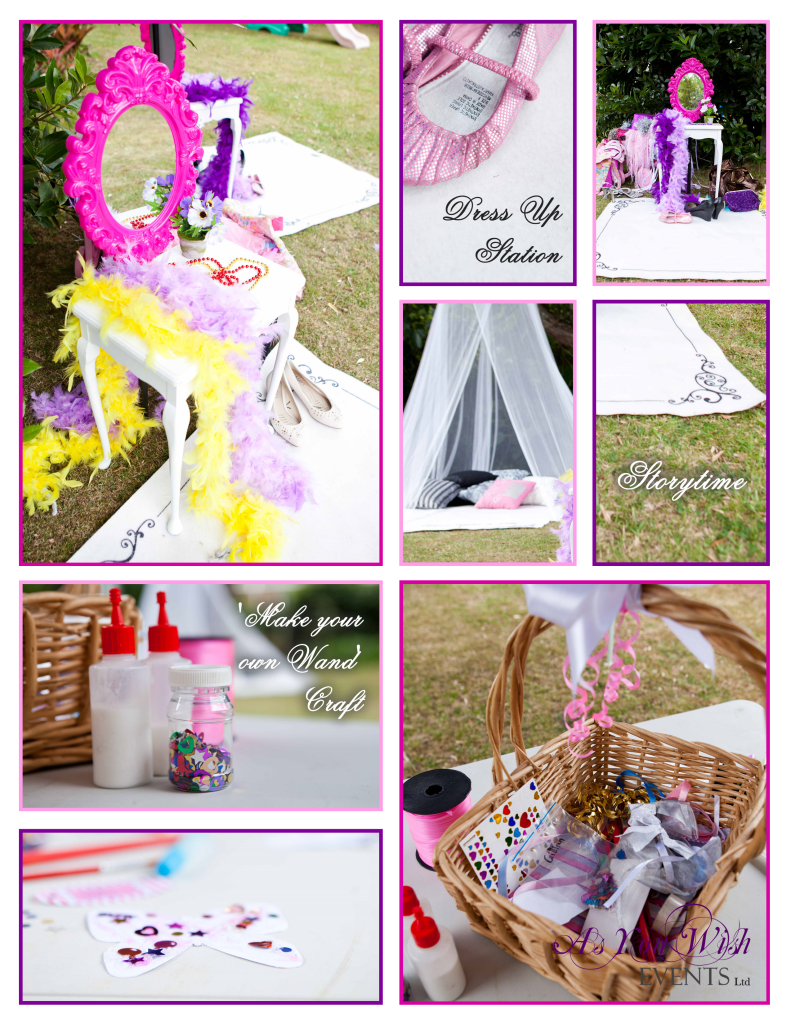
  • The Dress Up stations with ornate pink mirrors.
  • Gran dressing up as the ‘Fairy Grandmother’ who read the guests a beautiful book in the ‘Storytime Tent’.
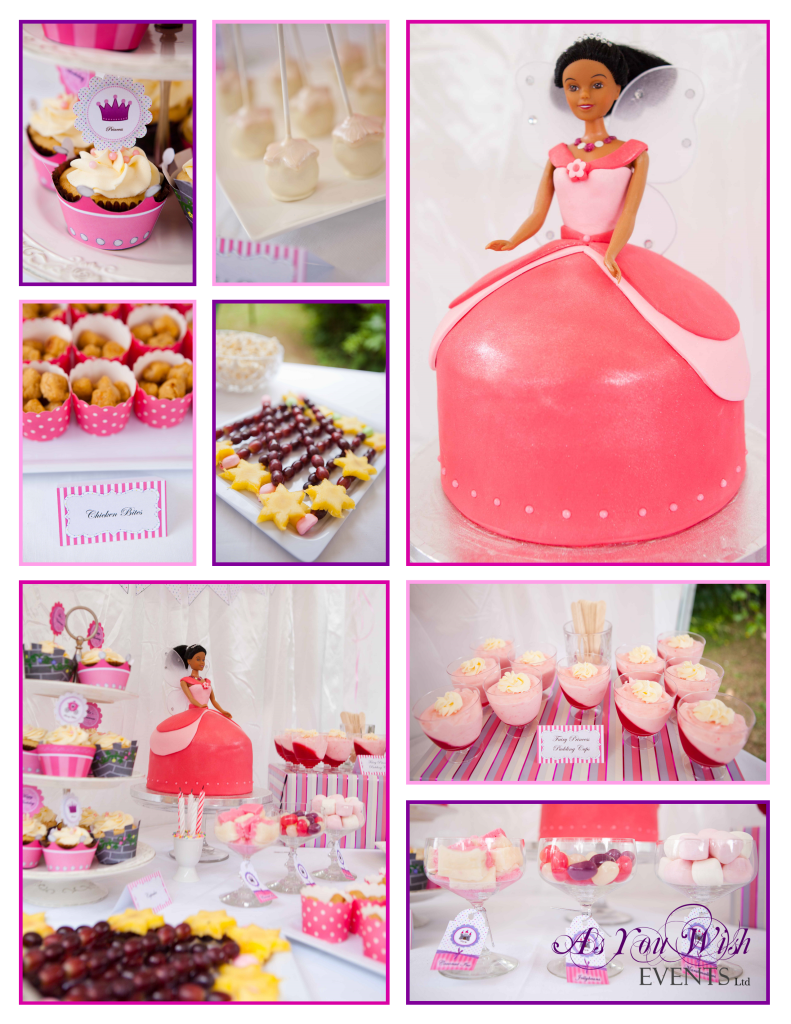
  • The Fairy Princess Pudding cups and Fruit Wands.
  • And when I asked my niece her favourite thing she said “the presents”.

Fairy Princess Party Pt1

Party Décor:

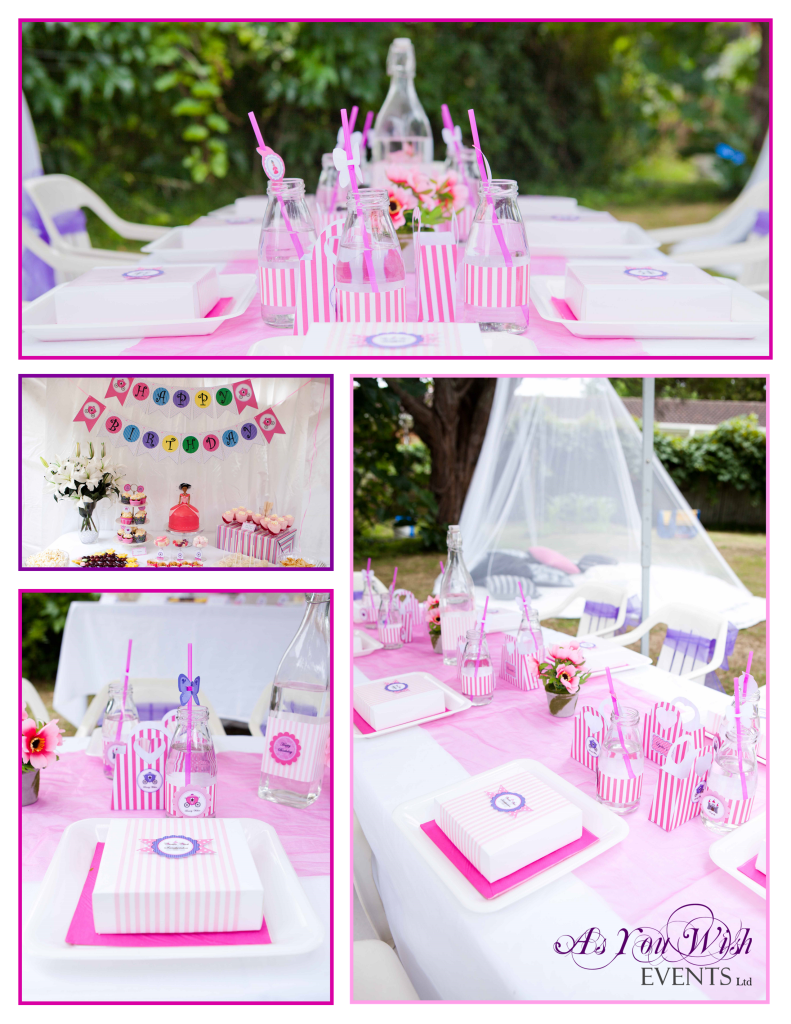
This time around we started out with our party printables which gave us the colour scheme of pink and white and a splash of purple. Much of the décor was determined by the activities we had planned.  I had some old white carpet runners sitting in my storeroom waiting to be thrown out, but instead I decided to cut them down to mat sizes and draw designs on them.  I then used these to define the areas for eating, dress up and story time.  I wanted to keep the eating area looking clean and bright – which was achieved through the use of white tablecloths and a white satin backdrop. This also created a background on which the party printables could really stand out.  A few other items I had in my storeroom were the two little white tables that I was able to pair with ornate pink mirrors from The Warehouse to create child-sized dressing tables for the Dress Up station.  The ‘Storytime Tent’ was made from a Mosquito Net that I got on special at Briscoes along with all the cushions I could find.

 Party Favours:

As part of the party printable set, we designed a lovely little handbag box.  In each box was a mini chocolate bar, a pink balloon, a sparkly hairclip and a lip gloss.

Fairy Princess Party Pt2The Entertainment:

Instead of games we opted for three activities.  We had the ‘Make Your Own Wand’ craft; the Dress Up Station and Story time.  As the guests arrived they were able to join in with making their own wand and once they were done they were free to play with the dress ups or wherever else there imagination took them.  Towards the end of lunch we sung happy birthday and the beautiful cake was cut.  At the same time Gran came out dressed up as the ‘Fairy-Grandmother’ to read all the guests the story of ‘The Rose Princess and the Special Gift’.  This was then followed by the opening of the presents.

Fairy Princess Party Pt3

The Food:

On the menu we had:

  • Castle Club Sandwiches – these were served in little lunch boxes placed at each guest’s place setting.
  • Crinkle Cut Fries
  • Popcorn
  • Chicken Bites – served in little cupcake cases purchased at Countdown.
  • White Chocolate Cake Pops
  • Vanilla Cupcakes – displayed with wrappers and toppers from the Fairy Princess printable collection
  • Fairy Princess Pudding Cups
  • Fruit Wands
  • And a mini candy buffet with 3 types of theme coloured lollies.

The buffet was set up using a collection of glassware, white platters and a box that I covered in stripy paper.  The fabulous centrepiece on the buffet was the amazing doll cake made by Sweet Bites Cakes – a decadent chocolate mudcake – yummy!

Summing Up:

It was really fun to transform my sister’s backyard into a fairy princess’ garden.  Everyone seemed to enjoy themselves having plenty of activities do and yummy treats to eat.

If you have any questions or comments regarding how we put this theme together or if you would like us to create a party for you then please contact us either via email or through the comments section below.

Vendor Credits:
  • Party Printables: As You Wish Events Ltd
  • Décor & Styling: As You Wish Events Ltd
  • Catering: As You Wish Events Ltd
  • Photography: Adam Ferris
  • Cake: Sweet Bites Cakes